
Shamrock Sun Catchers (St. Patrick’s Craft)
A shamrock suncatcher is a translucent window decoration made by layering colorful tissue paper inside a shamrock-shaped cardstock frame, creating a glowing display when hung in a sunny window.
Last updated: July 2026
Quick Answer: What Is a Shamrock Suncatcher?
A shamrock suncatcher is one of those crafts that looks like it took serious effort but comes together in about 20 to 30 minutes with supplies most families already have at home. You sandwich tissue paper between two sheets of clear contact paper, frame it with a black cardstock shamrock outline, and hang it in a sunny window. The light does all the magic. Kids ages 3 and up can make one, and honestly, the hardest part is keeping yourself from making five of them.
St. Patrick’s Day has a way of sneaking up fast, and if you’re looking for a festive activity that doesn’t require a craft store run or a full afternoon, this is it. It’s low-mess, budget-friendly (under $5 even if you’re starting from scratch), and the finished product looks beautiful in a window. You can also find more ideas for the season in our spring crafts roundup for kids. If you want to turn this into a full afternoon, pair it with a treat from our green snacks for St. Patrick’s Day roundup.
Quick Craft Stats
- Age Range: 3 years and up (adults handle scissors for ages 3 to 5)
- Craft Time: 20 to 30 minutes (add 10 to 15 minutes dry time for the Mod Podge method)
- Difficulty: Easy
- Mess Level: Low
- Cost: Under $5 if buying supplies; free if you already have contact paper and tissue paper on hand
What You’ll Need
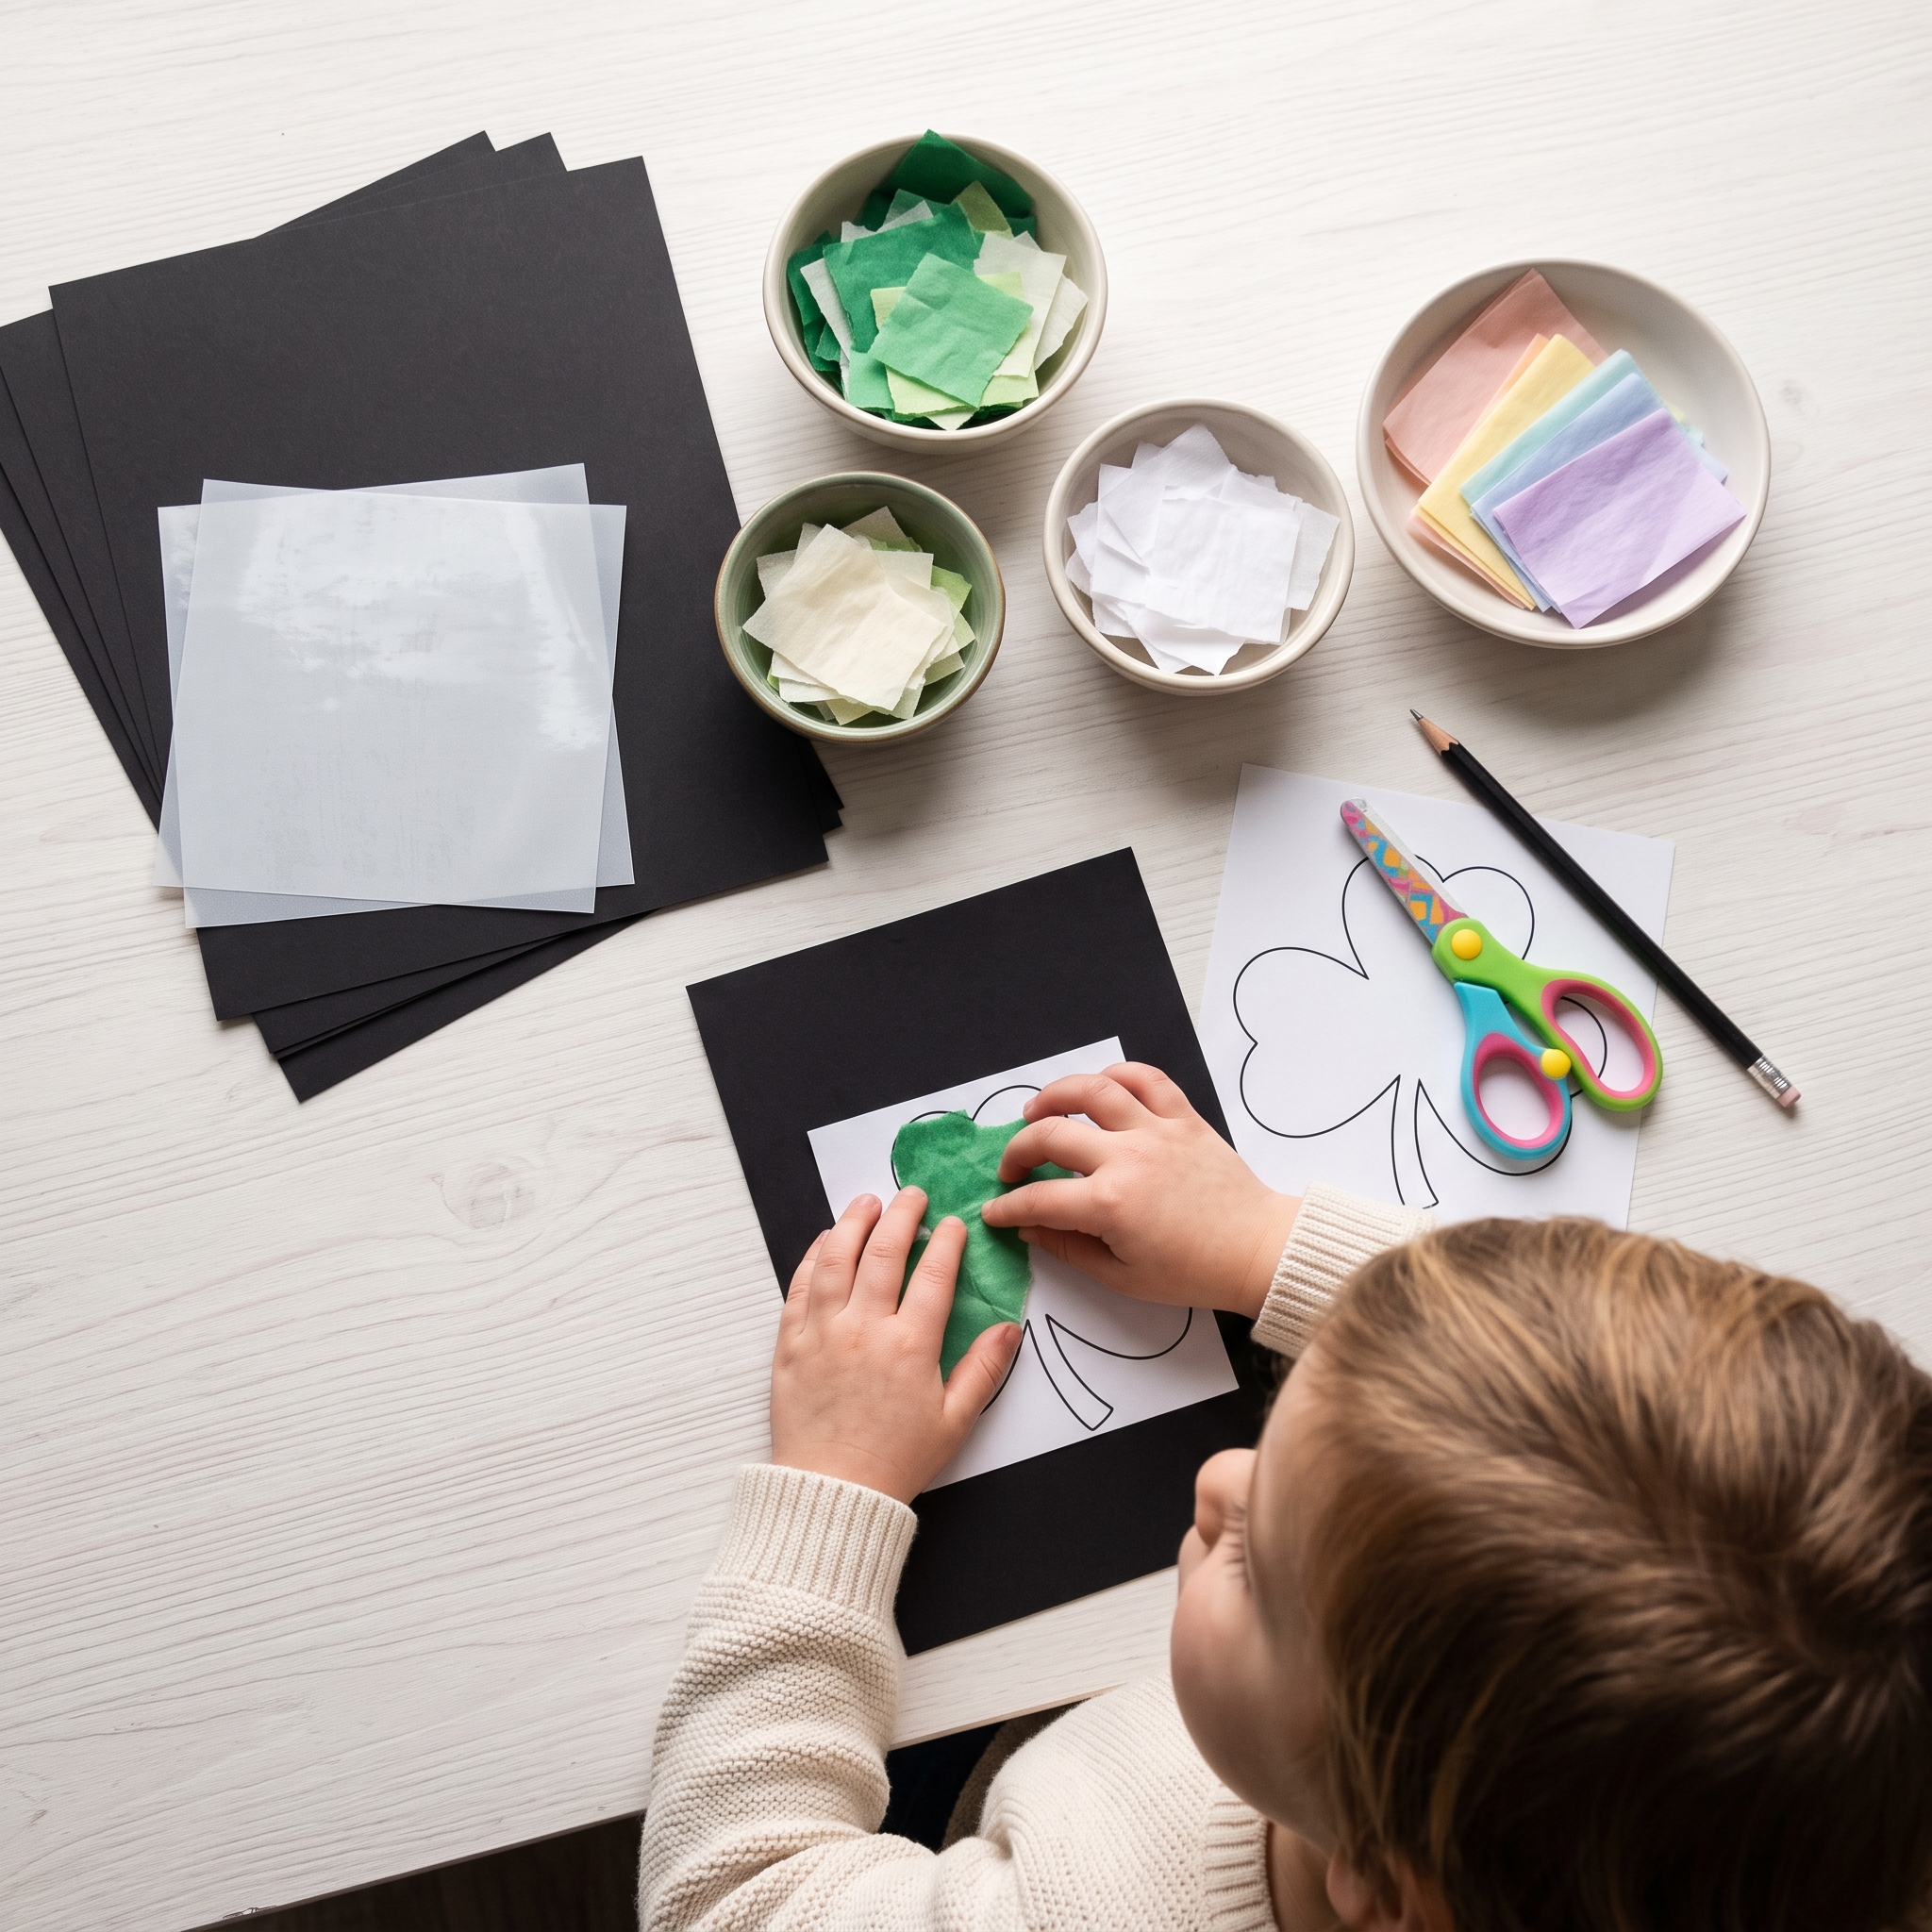
- Black cardstock: 65 lb. weight is ideal for a clean, crisp frame; regular black construction paper works in a pinch but may tear when cutting the inner section
- Clear adhesive contact paper: Look for fully transparent (not frosted) self-adhesive contact paper or laminating sheets, ideally 9″x12″ sheets; Con-Tact brand is easy to find in the office supply aisle at Walmart or Target
- Tissue paper: Green, white, and/or rainbow colors torn or cut into roughly 1-inch squares
- Scissors: Safety scissors work fine for kids 4 and up
- Pencil or marker: For tracing the template onto cardstock
- Shamrock template: Print a free template (linked below) onto regular paper, or draw your own
- Tape or a suction cup hook: For hanging in the window
- Optional: Hole punch and ribbon for a loop hanger
- Optional (Mod Podge method): Wax paper, Mod Podge matte finish, and a paintbrush
How to Make a Shamrock Suncatcher
- Print and cut out your shamrock template. An 8.5″x11″ sheet gives you a suncatcher that’s roughly 6 to 7 inches wide, which is a great size for window display. If you’d rather freehand it, draw three overlapping hearts arranged in a triangle and add a short stem at the bottom.
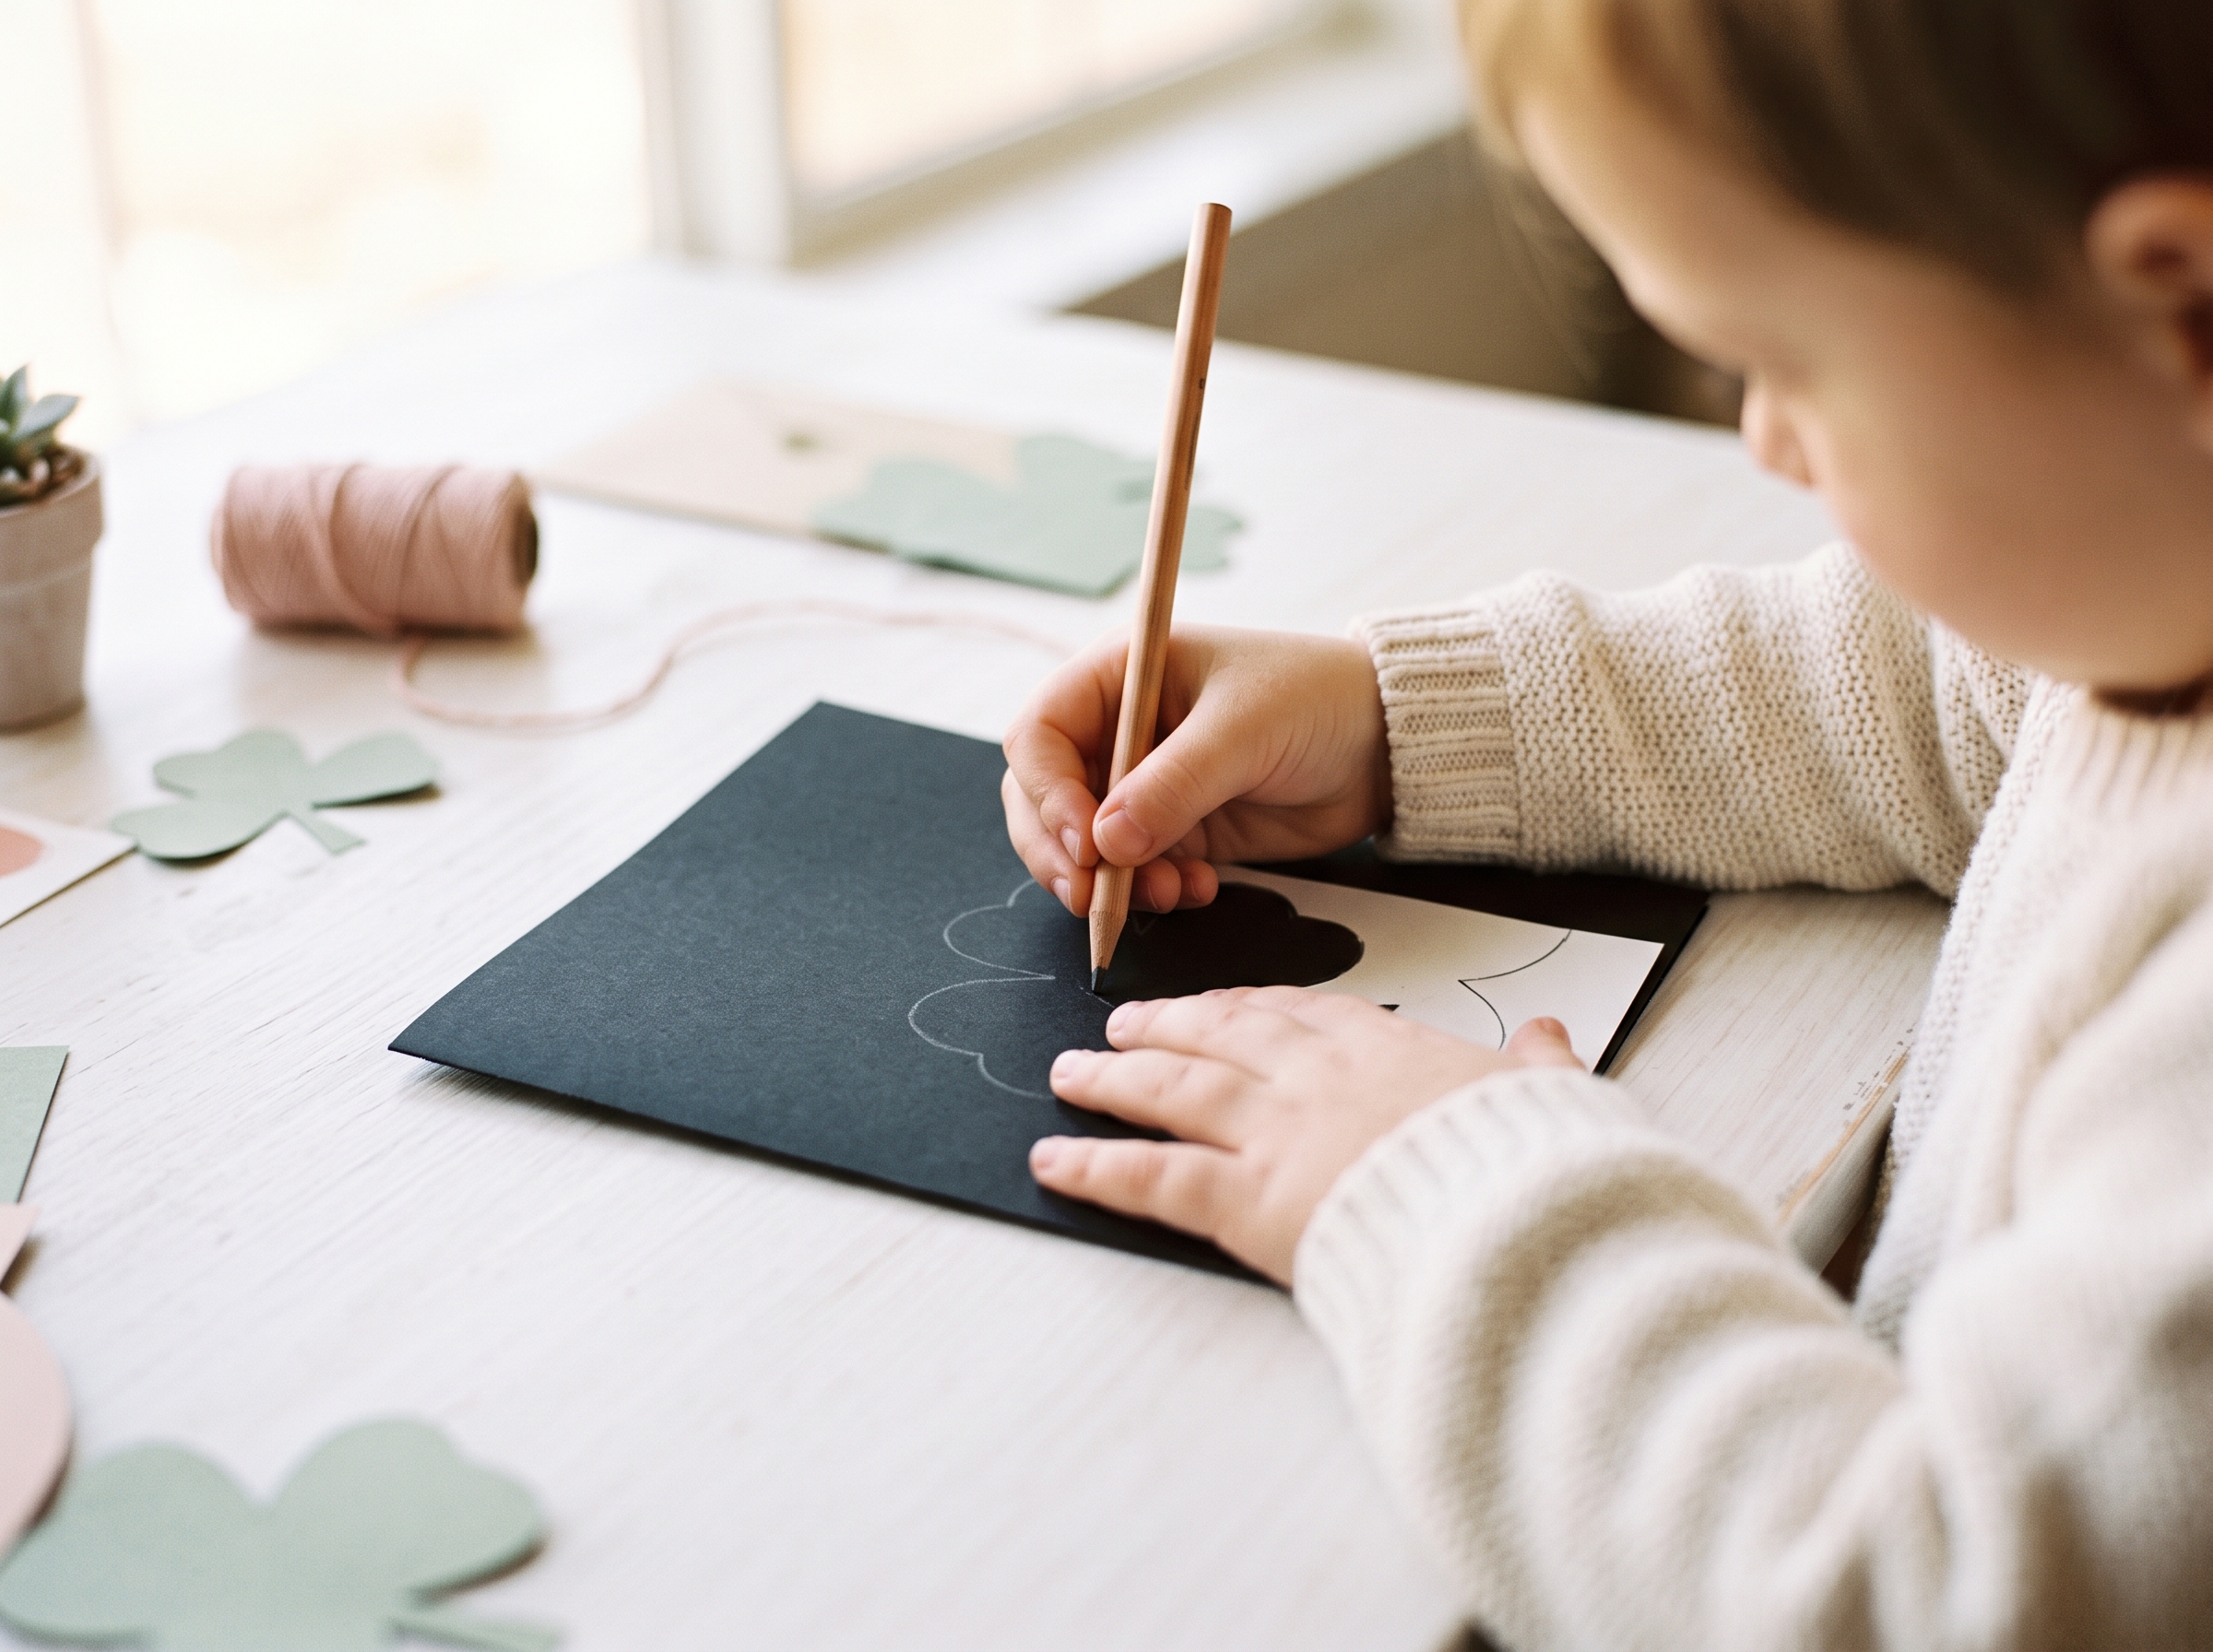
- Trace the shamrock onto black cardstock. Use a pencil so the lines are easy to cover later. Trace both the outer edge and the inner shamrock opening.
- Cut out the shamrock frame. Cut the outer edge first, then fold the cardstock slightly to snip a small slit in the center so your scissors can get into the inner cutout area. Adults should handle this step for kids under 5.
- Peel the backing off one sheet of contact paper and lay it sticky-side up. Tape the corners to your work surface so it doesn’t curl or shift while little hands are working on it.
- Press the black shamrock frame onto the sticky contact paper. Center it so you have at least 1 inch of sticky border on all sides for trimming later.
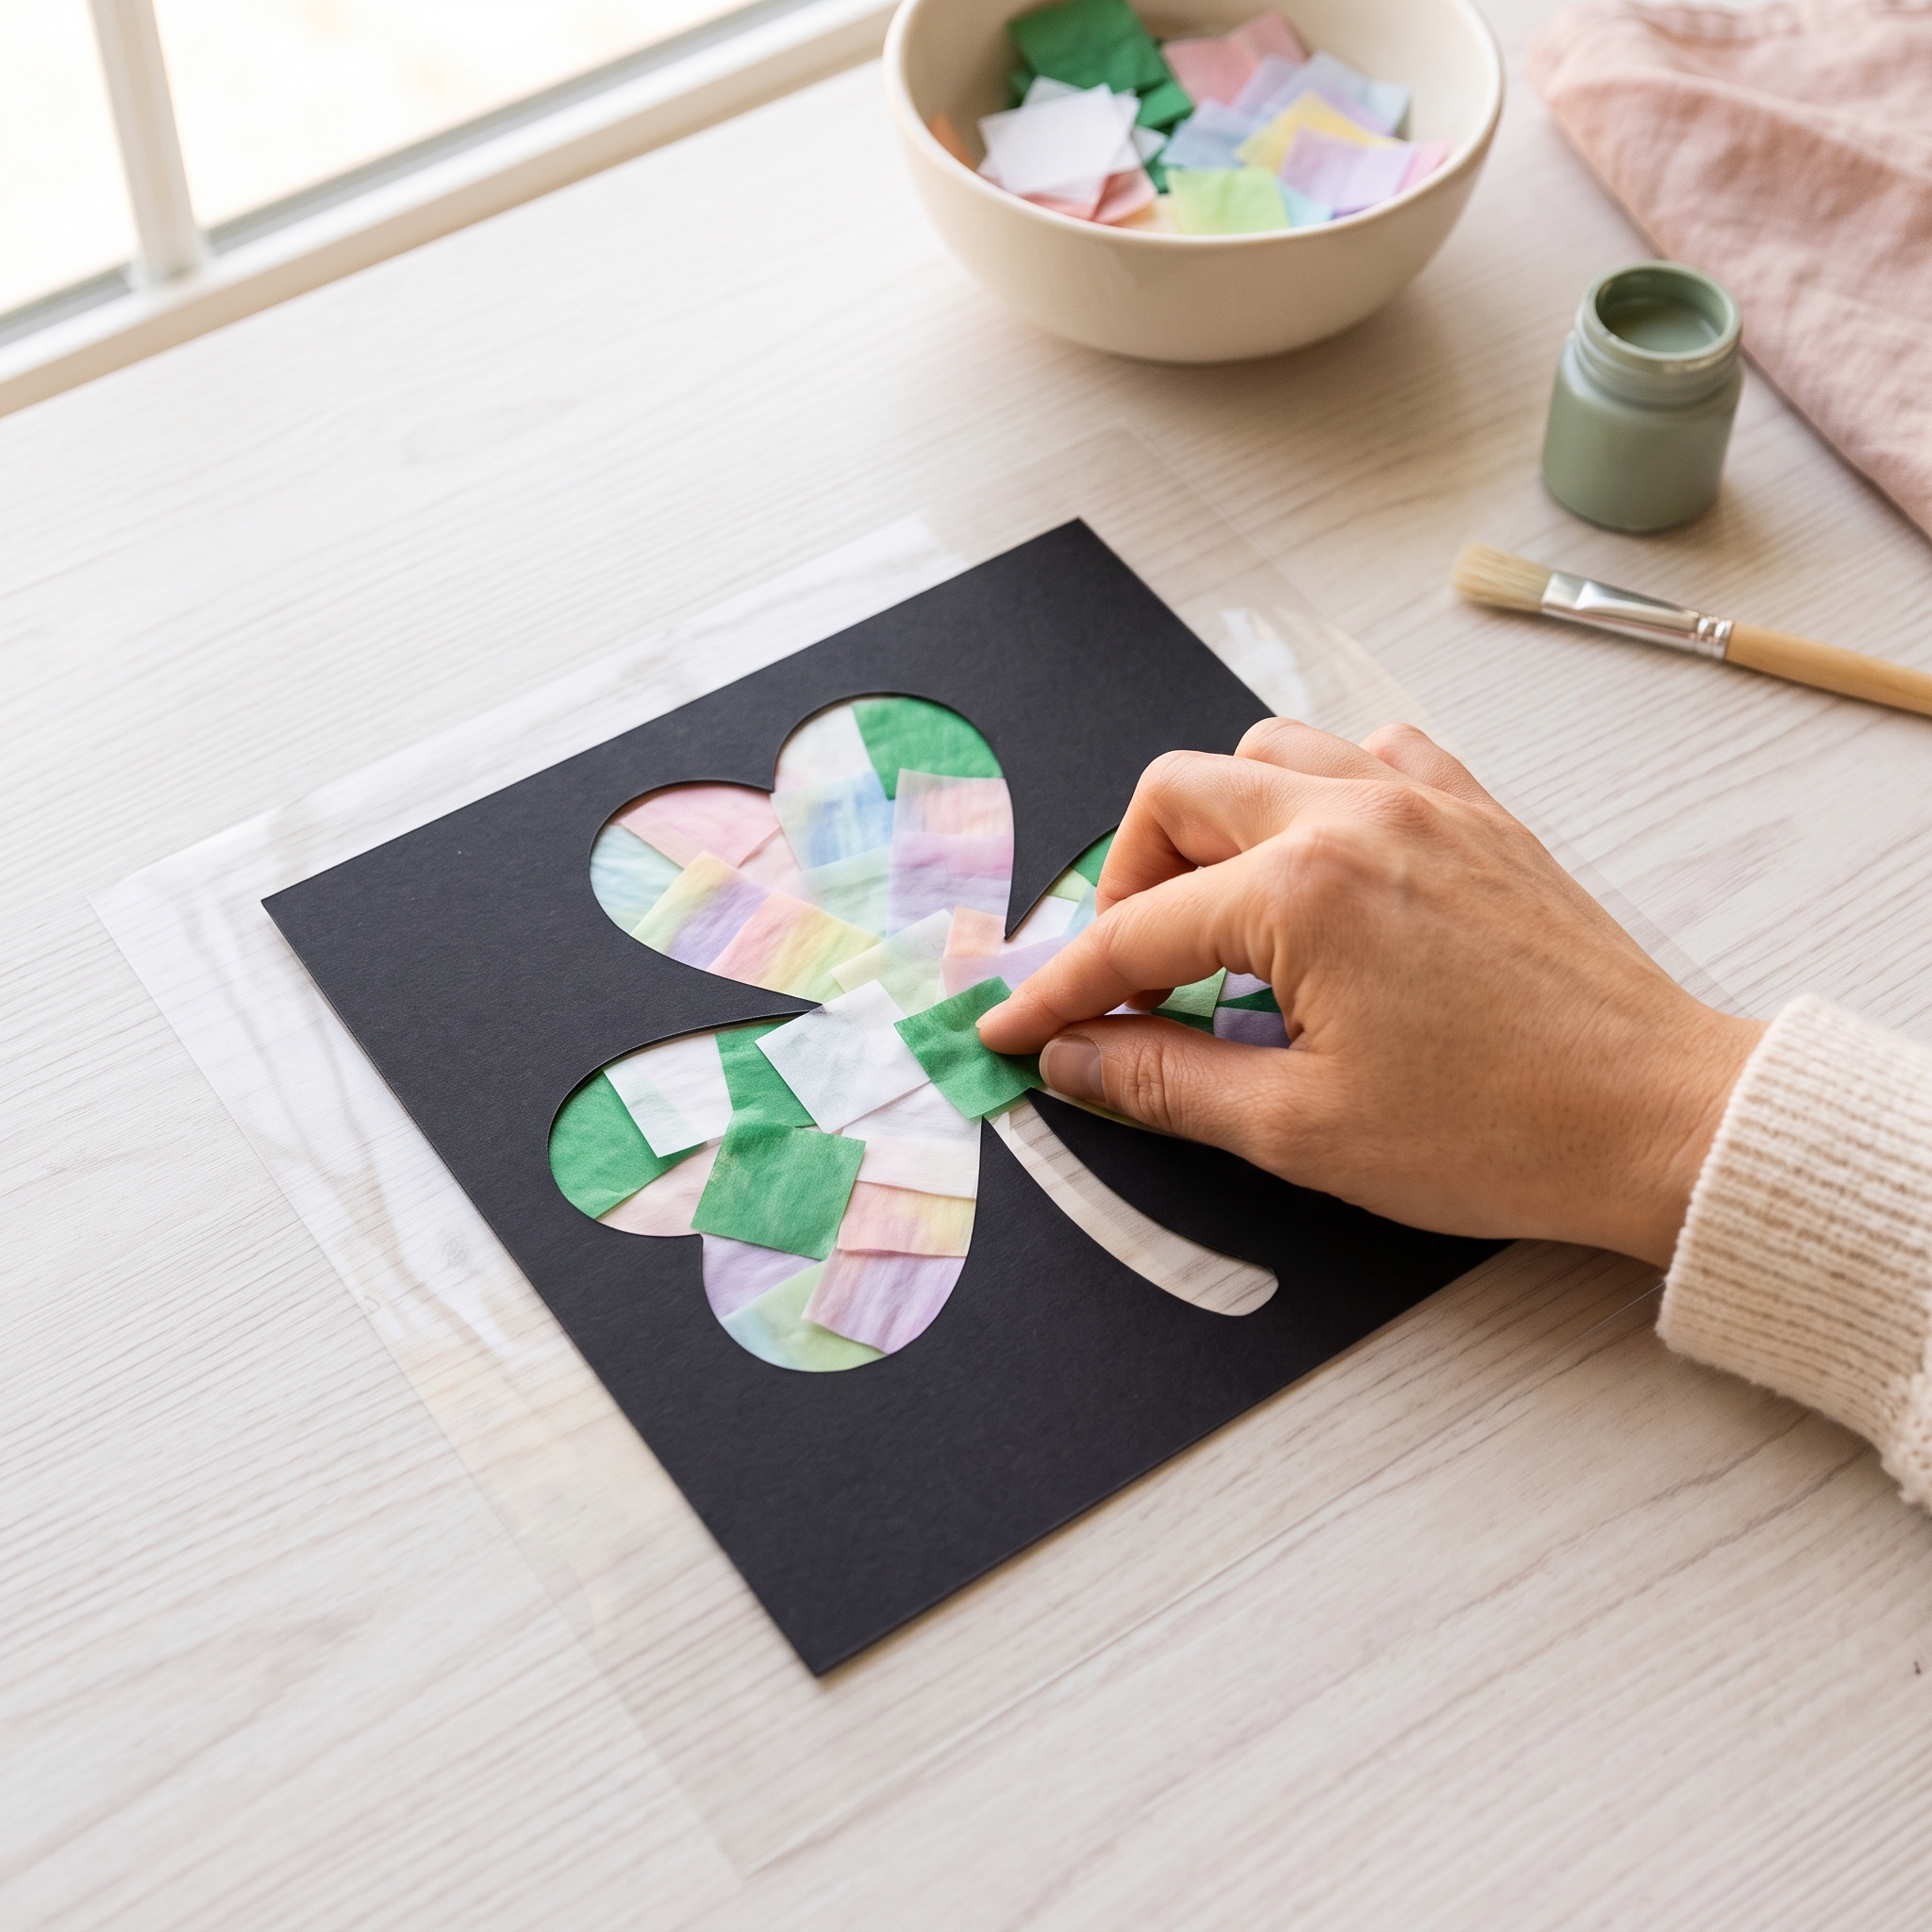
- Fill the shamrock opening with tissue paper squares. This is the kids’ step. Overlap pieces slightly so every sticky inch is covered; any gaps will look dull once light shines through. Don’t worry about going outside the lines.
- Lay the second sheet of contact paper on top, sticky-side down. Start from one edge and smooth toward the other, the way you’d apply a screen protector, to push out air bubbles. Press firmly with a flat hand across the whole surface.
- Trim away the excess contact paper around the shamrock outline. Leave a thin sliver (about 1/8 inch) of clear contact paper around the black edge so the layers don’t peel apart over time.
- Hang in a sunny window. Use tape, a suction cup hook, or punch a hole at the top of the stem and thread ribbon through for a residue-free option.
Troubleshooting Tips
Even simple crafts have their moments. Here’s what to do when things don’t go quite right.
- Air bubbles: Smooth from the center outward using a credit card edge or your knuckle. Most small bubbles flatten on their own within a day.
- Tissue paper bleeding color: This only happens with the Mod Podge method, not with contact paper. If you’re using Mod Podge on wax paper, let each layer dry for about 10 minutes before adding the next one.
- Cardstock frame tearing when cutting the inner section: 65 lb. cardstock handles this well. If you’re working with thinner construction paper, fold first, snip a small starting slit, then ease the scissors in slowly rather than forcing a straight cut.
- Contact paper won’t stick to the window: Add a small piece of regular tape to the back edge of the suncatcher. Most modern windows are fine with tape, and it peels off cleanly after a few weeks.
Shamrock Suncatcher Variations
Rainbow Shamrock Suncatcher
Arrange tissue paper squares inside the shamrock frame in rainbow order (red, orange, yellow, green, blue, violet) instead of all-green. Morning light turns the whole window into a prism. This is the version that tends to get photographed and shared at school pickup.
Coffee Filter Shamrock Suncatcher
Flatten two coffee filters and color them with washable markers or watercolor paint. Lightly spritz with water and watch the colors bleed together in soft, organic patterns. Let them dry completely, then sandwich between contact paper sheets cut to a shamrock shape. The translucent texture is different from tissue paper and has a stained-glass quality kids love.
Watercolor Shamrock Suncatcher
Paint a shamrock shape directly onto white tissue paper using diluted watercolors. Let it dry for about 20 minutes (important: rushing this step causes the paper to tear when you press it). Once dry, press it between contact paper sheets. This watercolor shamrock craft is a good one for older kids who want more artistic control over the outcome.
No-Template Freehand Version
For kids 7 and up, skip the printable altogether. Have them draw a shamrock directly onto black cardstock: three overlapping hearts clustered together with a short straight stem at the bottom. It’s a confidence-building step, and no two turn out the same.
Four-Leaf Clover Version
Use the exact same method with a four-leaf clover template instead. It’s a small tweak that adds a “lucky” angle to the craft. (Not sure what the difference is between a shamrock and a four-leaf clover? The FAQ below covers it.) For another low-mess St. Patrick’s Day project, our shamrock marshmallow painting activity comes together just as quickly and uses giant marshmallows as stamps instead of paintbrushes.
Tips for Different Ages
Toddlers (Ages 2 to 3)
Skip cutting entirely. Pre-tear tissue paper into pieces before you sit down, and let your toddler do the sticking. Pressing small pieces onto a sticky surface is great fine motor practice all on its own, and toddlers feel the same pride in the finished product as older kids do. An adult handles all the contact paper and cardstock steps. If your toddler loves hands-on activities like this, the toddler sensory activities guide has a lot of similar setups that work at this age.
Preschoolers (Ages 4 to 5)
Preschoolers can practice cutting tissue paper into rough squares, which is great scissor work. An adult traces the template and cuts the cardstock frame, but kids can do the peeling, sticking, and tissue paper filling with minimal help. According to the CDC’s developmental milestones, most 4- and 5-year-olds are building fine motor skills like a proper pencil grip and buttoning, the same hand strength and coordination that crafts like this reinforce naturally.
Elementary Age (Ages 6 to 10)
Kids in this range can handle nearly every step on their own with just a quick walkthrough. Challenge them to draw their own shamrock template freehand, try the coffee filter variation, or experiment with color patterns inside the frame. The watercolor version is especially satisfying for kids who want a craft that feels a little more like real art.
Ways to Display Your Shamrock Suncatcher
- Sunny window tape: The classic. Morning light gives the most dramatic glow effect, especially with rainbow tissue paper.
- Ribbon loop: Punch a hole at the top of the stem, thread 12 inches of green ribbon through, and hang from a curtain rod for a more polished look.
- Garland: Make five or six suncatchers in different sizes and hang them horizontally across a window with twine. It takes about an hour total and looks like something you’d find at a boutique.
- Classroom display: String them vertically from the ceiling with clear fishing line. Pre-cut frames and tissue paper squares in advance so a group of 20 to 25 kids can each finish one in under 30 minutes.
- Mini card version: Make a 3-inch version and tape it to the front of a St. Patrick’s Day card. The tissue paper catches the light even in an envelope window.
Frequently Asked Questions
Is it a shamrock or a four-leaf clover for St. Patrick’s Day?
The shamrock (three leaves) is the traditional St. Patrick’s Day symbol. According to Tourism Ireland, legend holds that St. Patrick used the three-leafed shamrock to illustrate the Holy Trinity when bringing Christianity to Ireland. A four-leaf clover is a rare natural variation of the same plant and represents good luck, but it’s not the official symbol of the holiday. So for this craft, three lobes is correct.
What kind of contact paper works best for suncatchers?
Clear, fully transparent self-adhesive contact paper is what you want. Frosted or textured versions will mute the color payoff. Con-Tact brand clear sheets and self-adhesive laminating sheets (the kind used for book covers) both work well. Check the office supply section at Walmart or Target before heading to a specialty craft store.
Can I make a shamrock suncatcher without contact paper?
Yes. The Mod Podge and wax paper method works great. Paint a layer of Mod Podge onto wax paper, press tissue paper squares onto it, add another layer of Mod Podge on top, and let each coat dry before adding the next. Once dry, trim to fit inside your cardstock frame and attach with a thin ring of glue. The finish is slightly more matte than the contact paper version but still glows nicely in the window.
How long does a shamrock suncatcher last in a window?
With contact paper, you can expect two to four weeks before the tissue paper starts to fade in direct sun. The Mod Podge version tends to hold color a bit longer. If you want to save them, store flat between sheets of parchment paper and bring them out again next year. Most of the wear comes from UV exposure, so a north-facing window will extend the life considerably.
Is this craft manageable for a classroom or large group?
It handles group settings well. The key is prep: cut all cardstock frames and tissue paper squares ahead of time so kids sit down ready to fill and seal. Each child needs two roughly 8″x10″ pieces of contact paper and one pre-cut frame. With one adult per five or six kids handling the contact paper sandwiching step, a group of 20 to 25 kids can finish in under 30 minutes. It’s one of the easier St. Patrick’s Day group crafts to manage because the mess is almost zero.


