
Easy Science Experiments for Kids
Easy science experiments for kids are simple, hands-on activities using everyday household materials to demonstrate basic scientific concepts, typically completable in under 30 minutes with minimal prep.
Last updated: June 2026
Quick Answer: Easy Science Experiments for Kids
You don’t need a lab coat or a specialty supply order to pull off a cool experiment at home. Most of the best science experiments for kids use baking soda, food coloring, dish soap, and whatever’s already in your kitchen cupboard. The ones in this guide are organized by age, mess level, and school curriculum, so you can pick the right one for right now, not just the first one on a list.
Grab a towel (or don’t, some of these are delightfully clean), and let’s get to it.
Why These Experiments Actually Stick With Kids
There’s a reason kids remember making a volcano at age 5 but can’t recall a single worksheet from that same year. Hands-on, self-directed learning creates a different kind of memory. When a child predicts what will happen, runs the experiment, and then sees something unexpected, that “wait, what?!” moment is the learning. It’s not just a fun afternoon activity; it’s how early scientific thinking actually forms.
According to ZERO TO THREE, hands-on science activities for young children can span physical sciences (like exploring ice melting), life sciences (like planting seeds), and earth and space science, all of which help develop early STEM skills in ways that feel completely natural to a curious child.
The other good news: you don’t need a science background to run these. If your kids are anything like most, they’ll figure out more than you expect on their own. Your job is to set it up and step back.
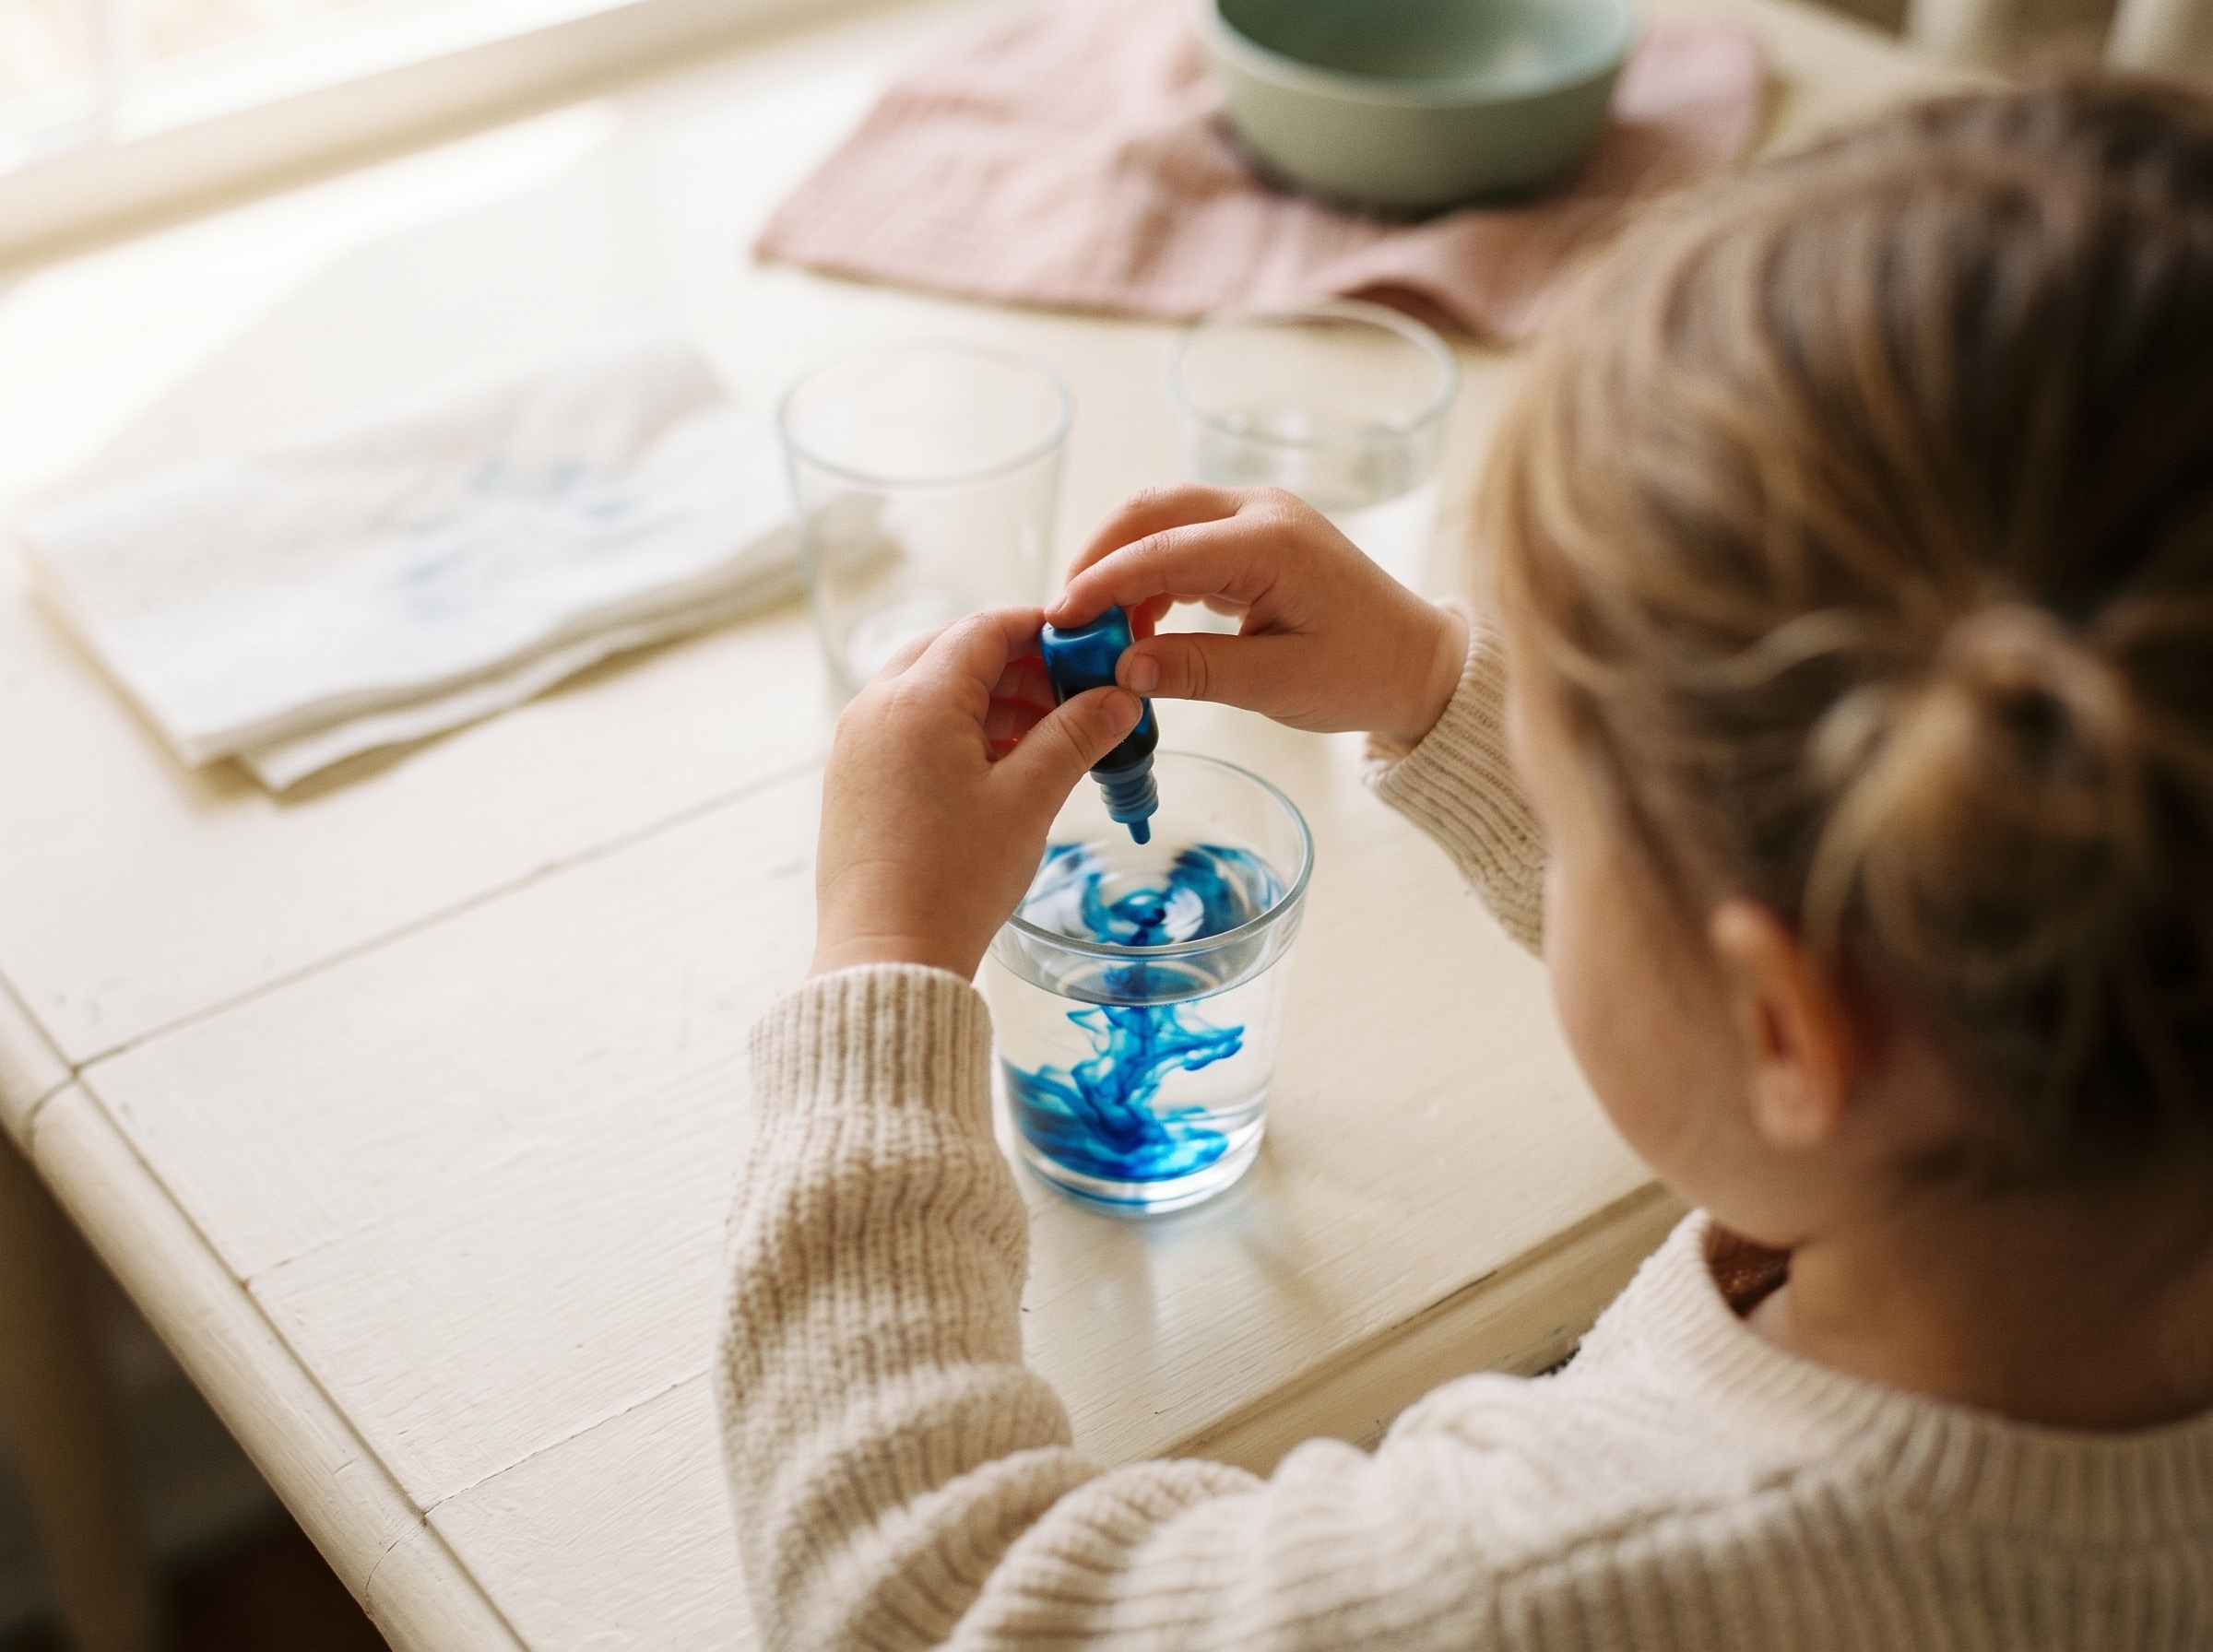
Featured Experiment: Walking Water Rainbow
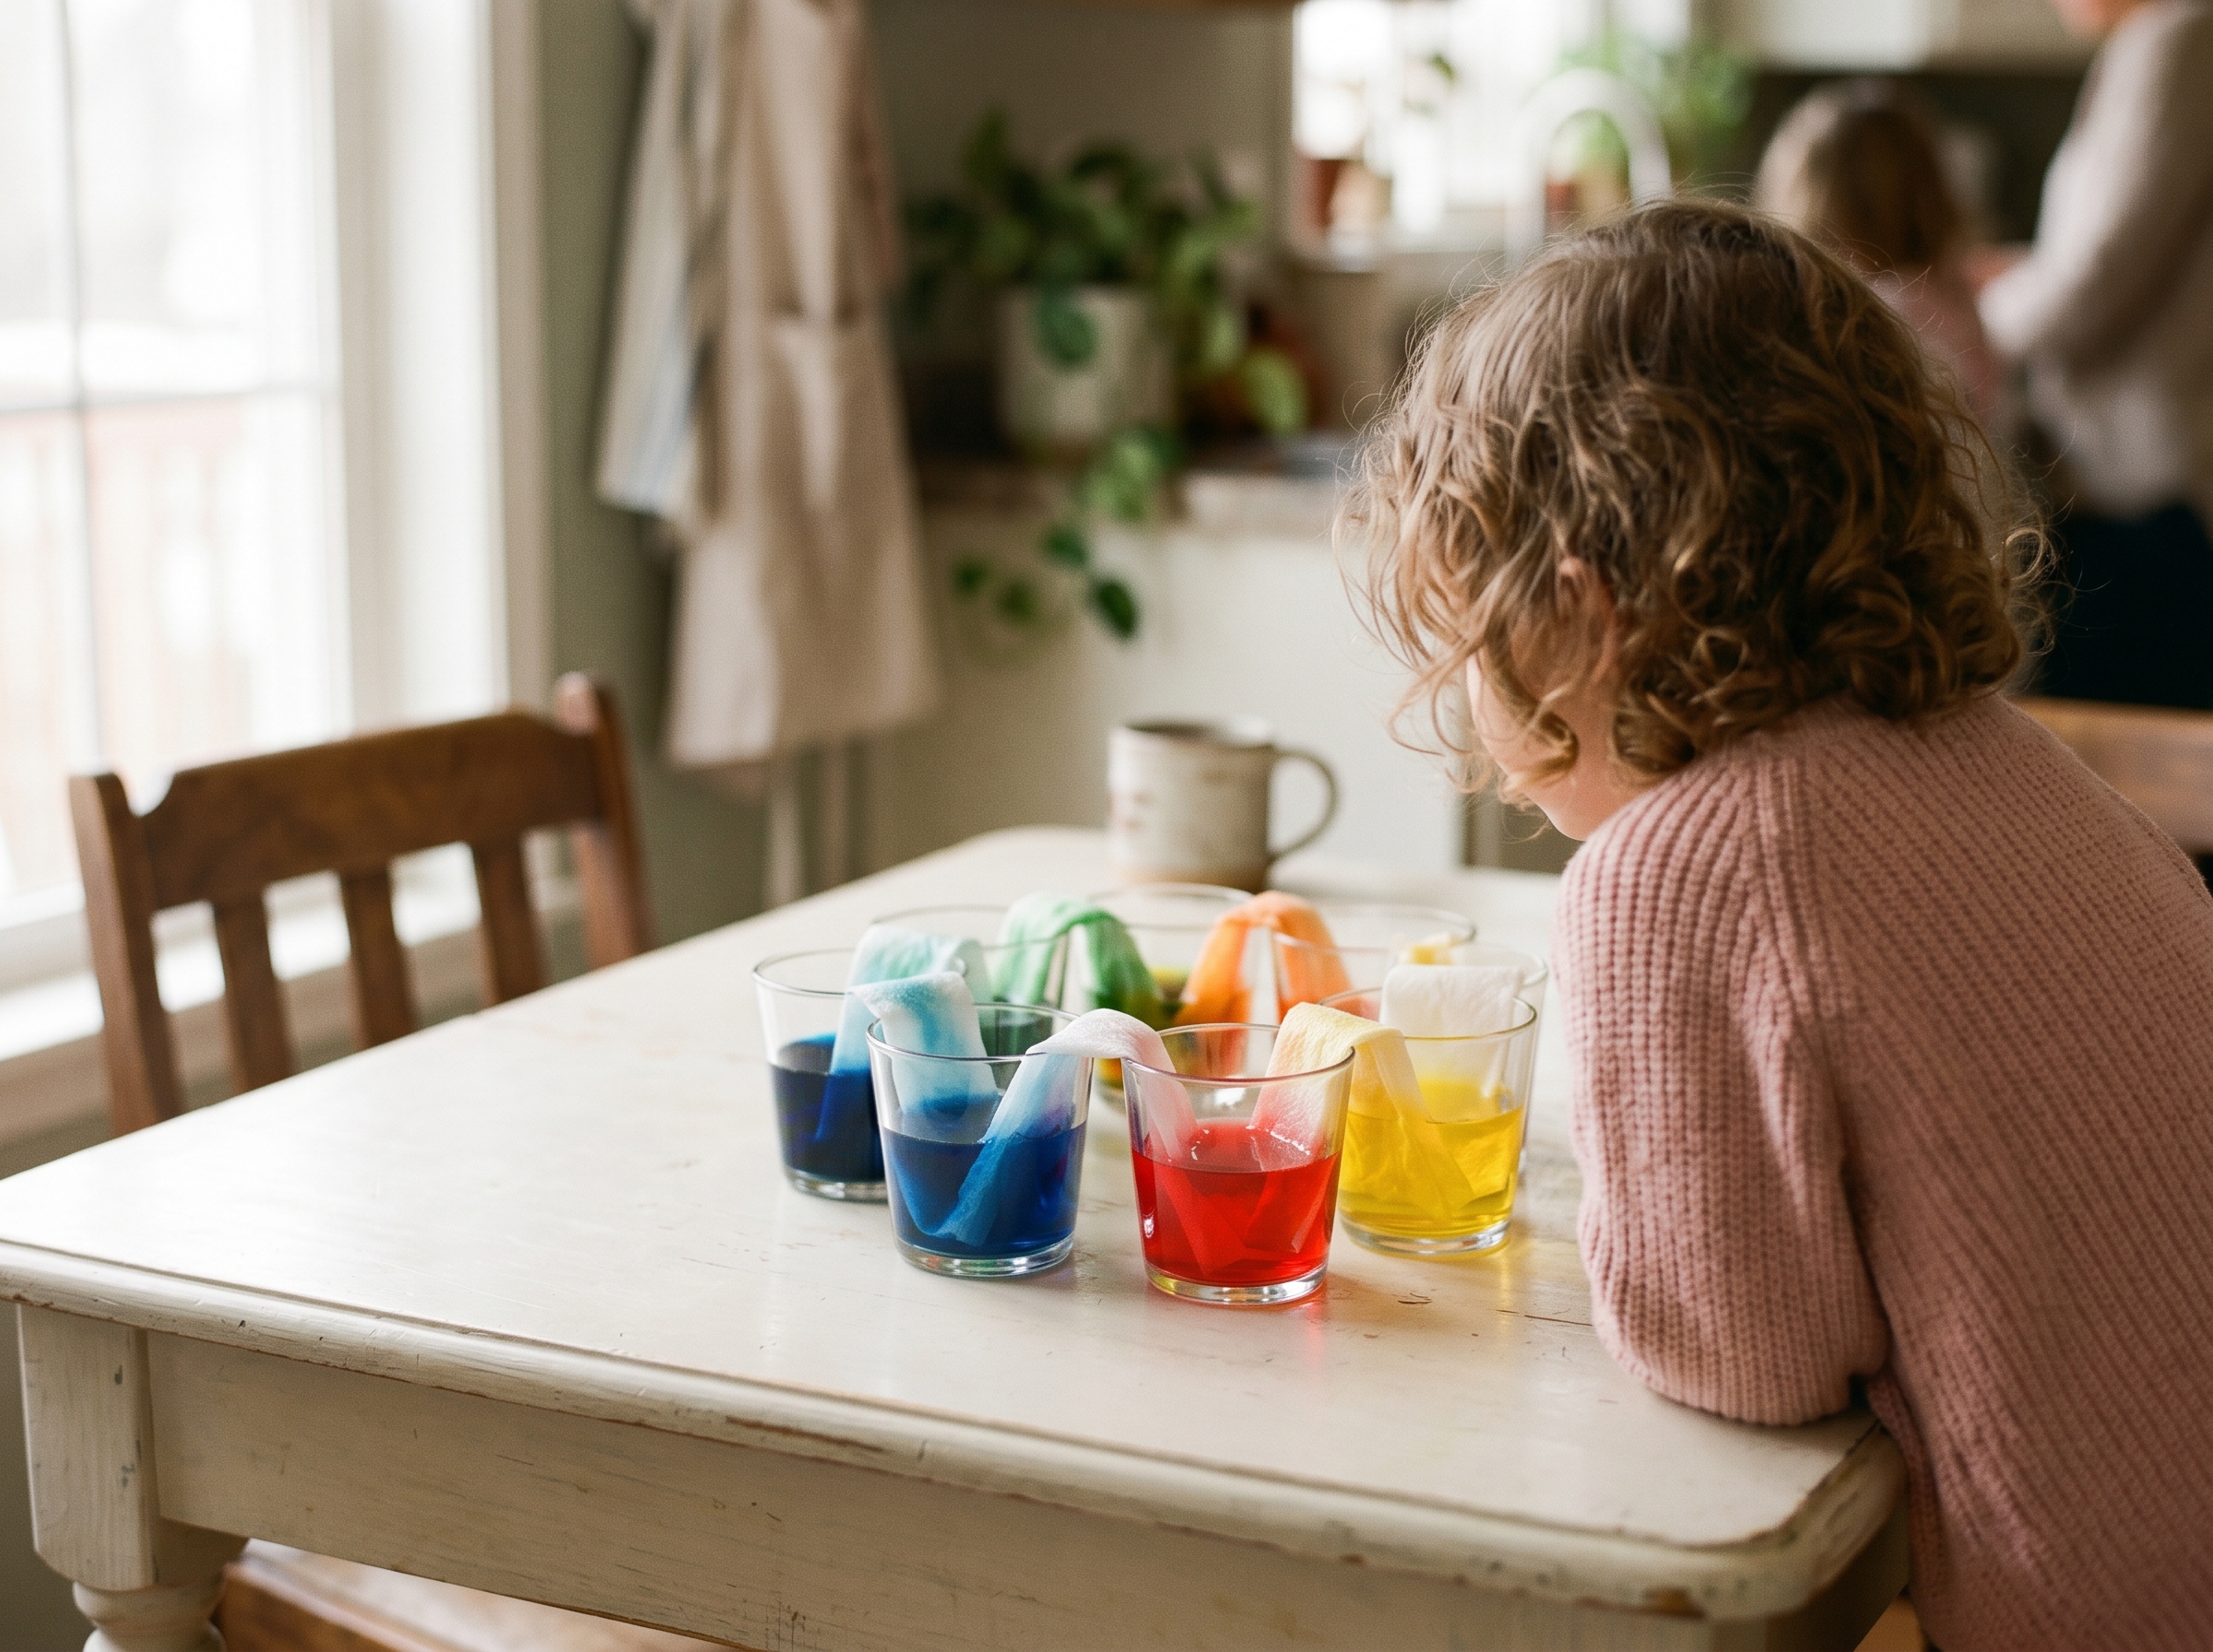
If you’re looking for a perfect first at home science experiment for kids, walking water is it. All you need is food coloring, water, paper towels, and six cups. The setup takes about five minutes, and then the experiment does its thing over the next one to two hours, which makes it ideal for short attention spans. Kids can check back in every 20 minutes and watch the magic grow.
It works for ages 3 and up with an adult nearby, and kids 5 and up can handle most of the setup independently. The payoff is big: secondary colors appear like orange, green, and purple in the previously empty cups, and kids have no idea how it happened until you explain it.
What You’ll Need
- 6 clear glasses or plastic cups
- Water
- Red, yellow, and blue food coloring
- 5 to 6 strips of white paper towel, folded lengthwise
- A flat surface or tray
- About 2 hours of passive wait time
Everything on this list costs under $5 total if you’re buying from scratch, and most families already have all of it. If you love no-mess activities for kids, this one is going to be a favorite, there’s no splatter, no staining, and cleanup is just tossing the paper towels.
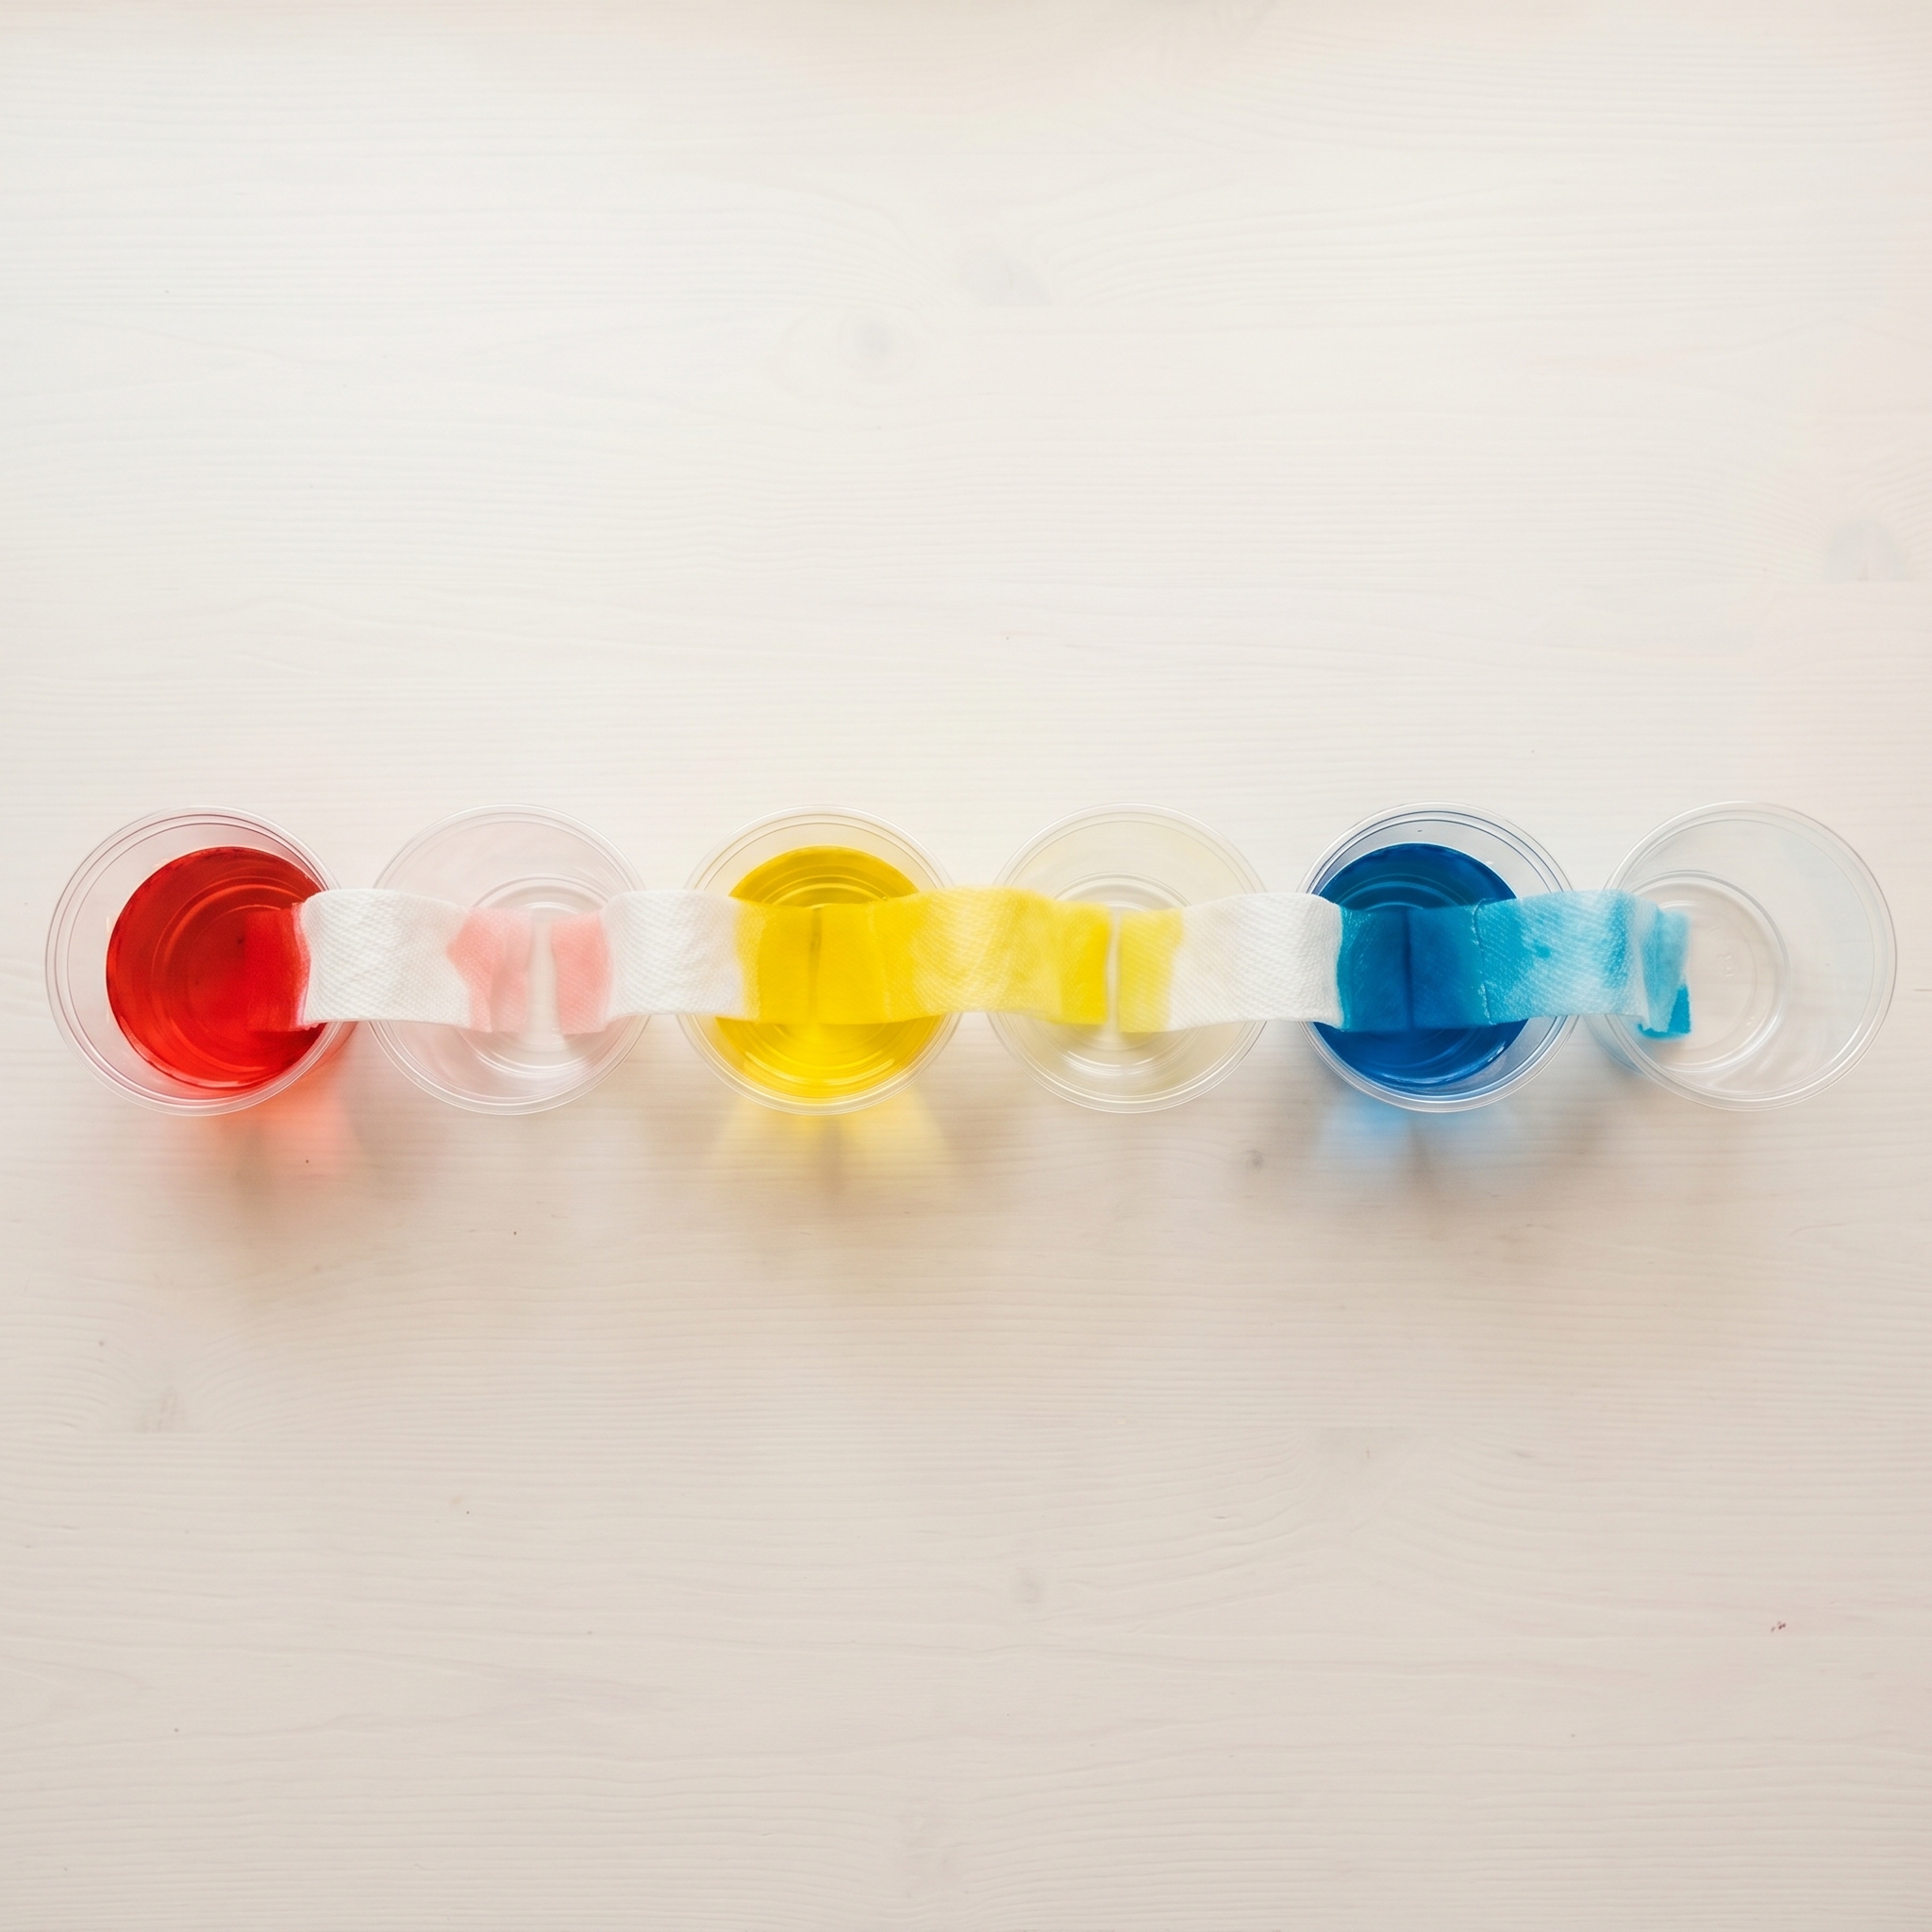
How to Set It Up
- Line up 6 cups in a row and fill cups 1, 3, and 5 with about 1 inch of water.
- Add 10 to 15 drops of red food coloring to cup 1, yellow to cup 3, and blue to cup 5.
- Leave cups 2, 4, and 6 empty. These are where the secondary colors will appear.
- Fold each paper towel strip lengthwise 2 to 3 times to form a narrow bridge.
- Drape one strip between each pair of cups so one end sits in a colored cup and the other hangs into an empty cup.
- Wait 30 to 60 minutes (up to 2 hours for the full effect) and check back to watch the colors travel.
Set this up before lunch and check back after, because kids love the suspense of coming back to find the empty cups filling with color.
What Kids Learn (Why This Works)
The science behind walking water is called capillary action: water molecules cling to the paper towel fibers and travel upward and across, moving against gravity. It’s the same process that helps plants pull water up through their roots.
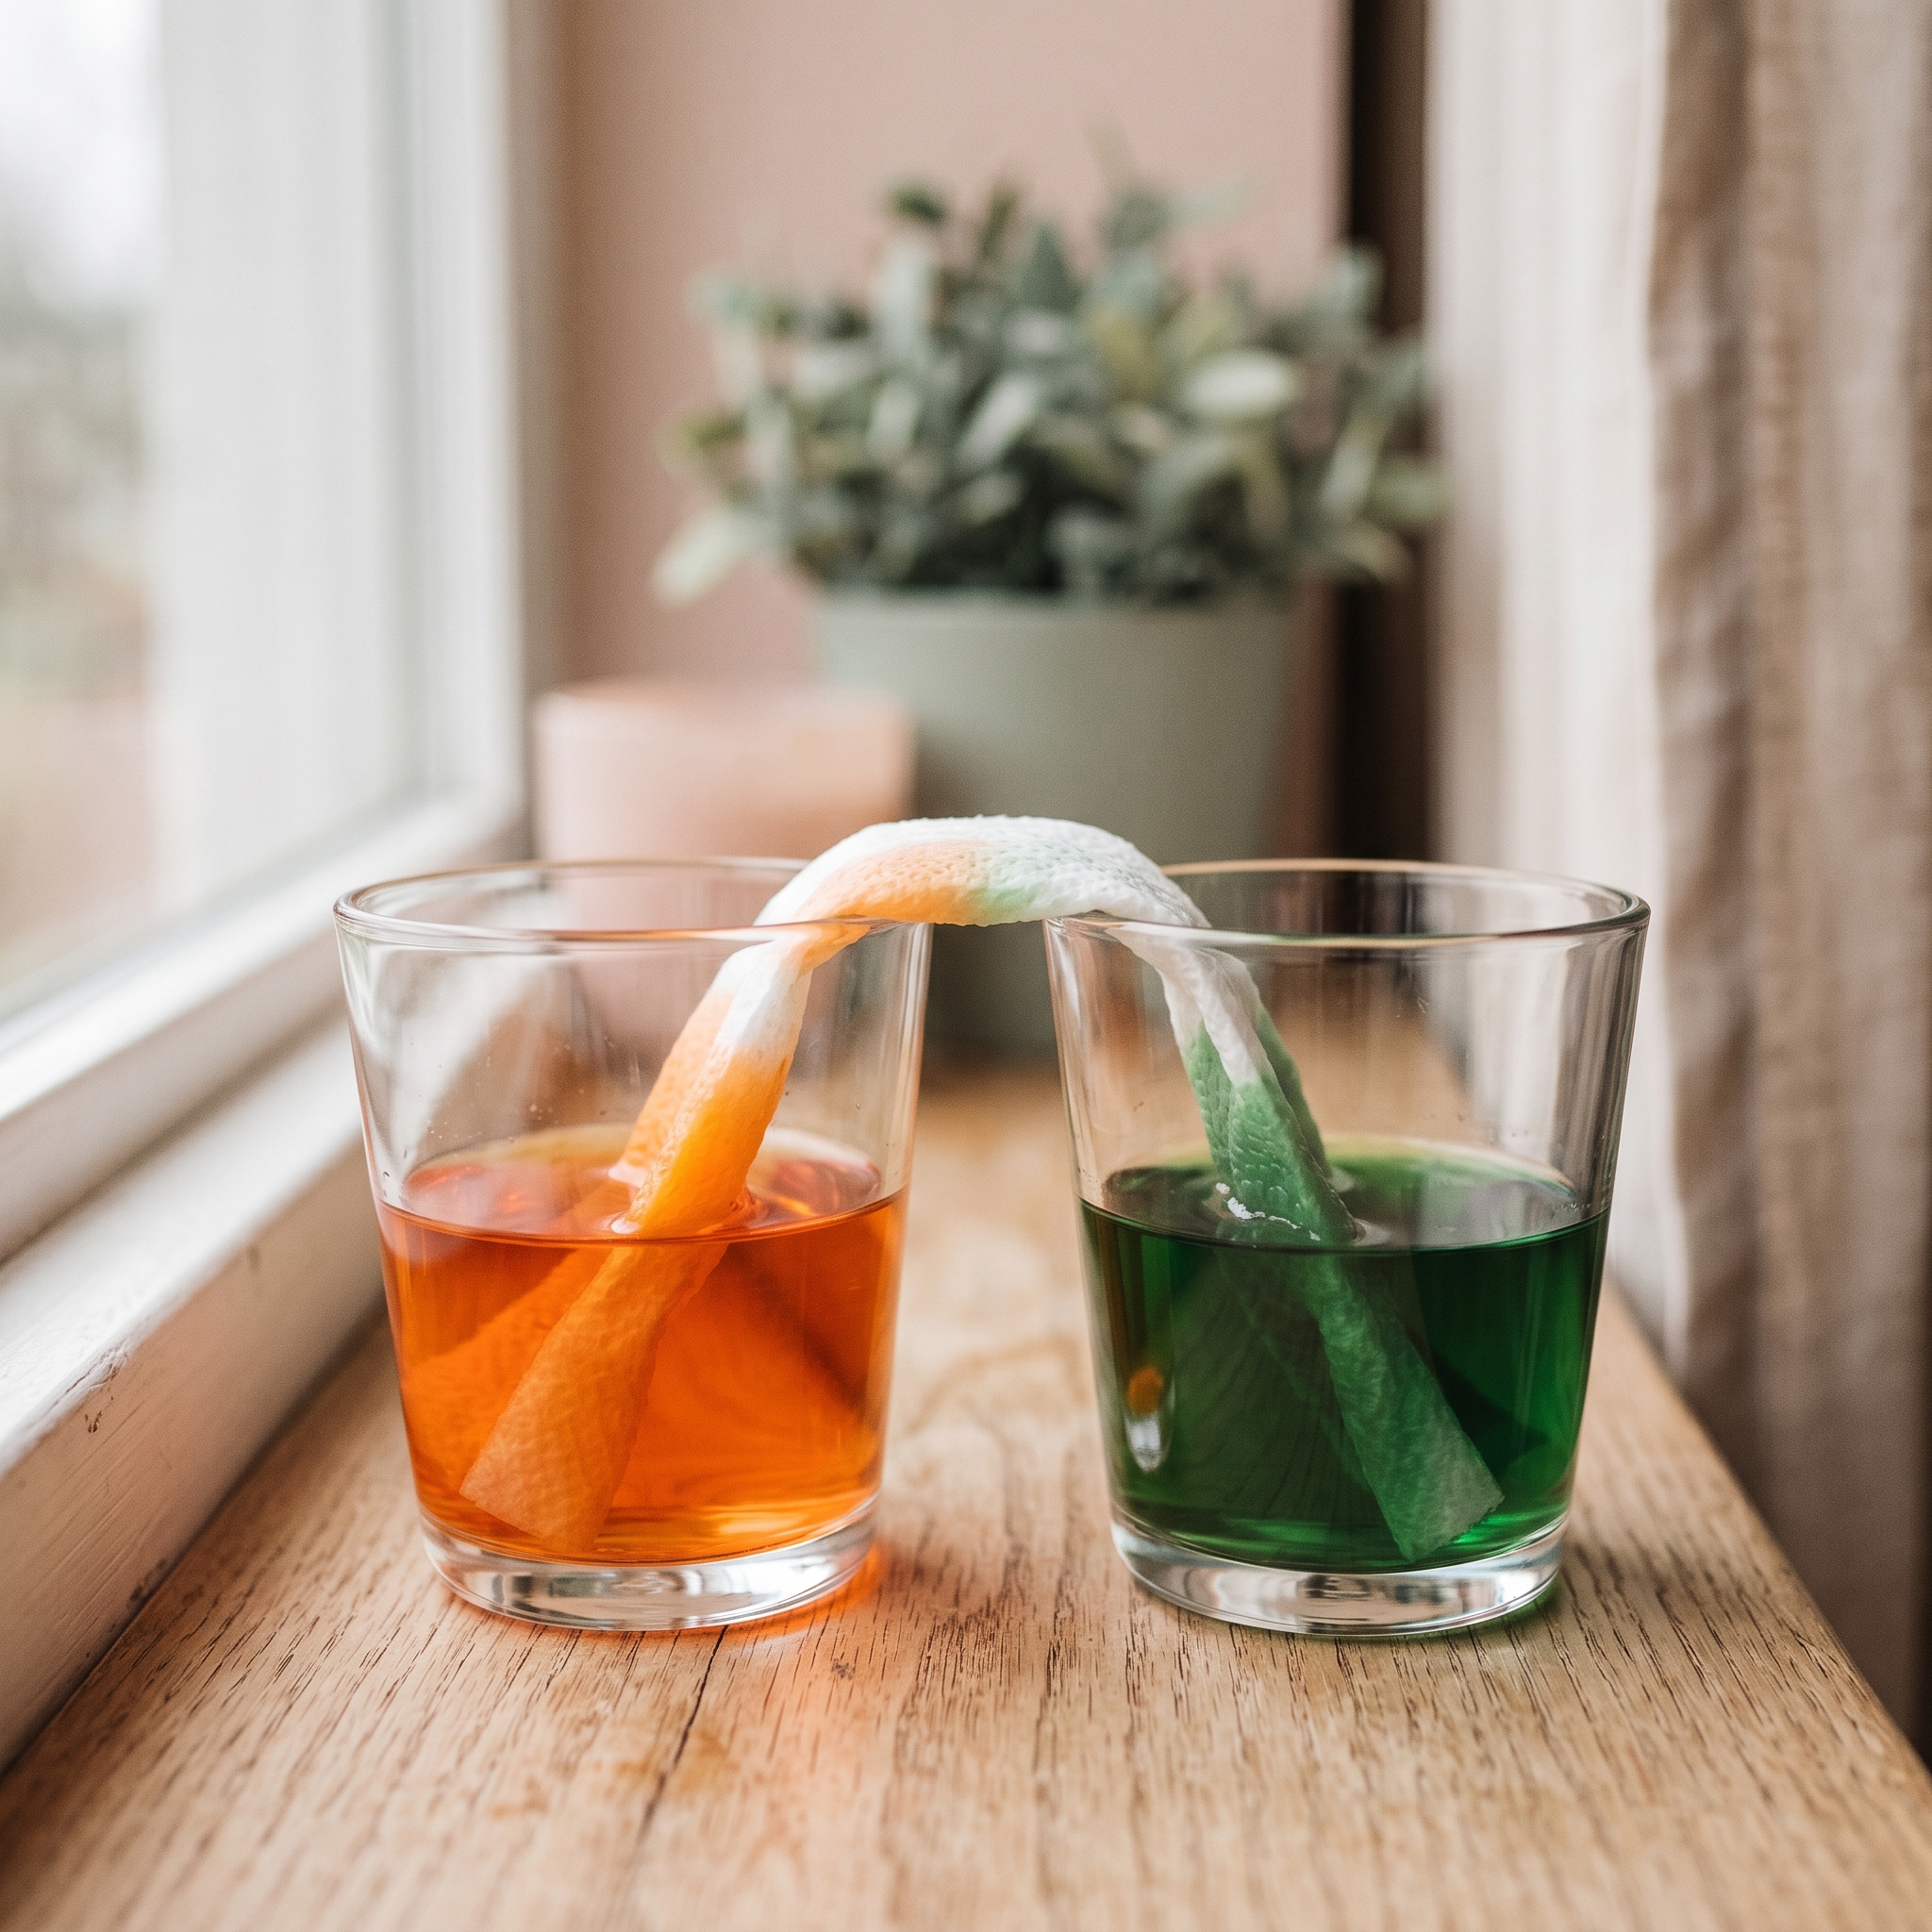
As the colored water travels, kids are observing absorption, color mixing, and basic chemistry, all at once. Orange appears between red and yellow. Green shows up between yellow and blue. Purple emerges between blue and red. That’s three secondary colors created with no mixing by hand.
This experiment aligns with K through 2 science standards on properties of materials and observable changes, so if your child’s class has touched on this, you’re reinforcing it in the most memorable way possible. Have kids 5 and up draw their predictions before you start and their observations after. That single step mirrors what scientists actually do.
10 More At-Home Science Experiments
Once you’ve tried the walking water rainbow, these are the ones we keep coming back to. Each one takes under 30 minutes and uses stuff already in the house.
1. Baking Soda Volcano
Ages: 4+ | Time: 10 min | Mess: Medium
Combine baking soda, white vinegar, and a squirt of dish soap in a container and watch it foam over. The science is an acid-base reaction that produces carbon dioxide gas. I always add red food coloring for maximum dramatic effect. If you want to go deeper on this one, there’s a whole baking soda and vinegar experiment guide that walks through the reaction in kid-friendly terms.
2. Magic Milk
Ages: 3+ | Setup: 5 min | Mess: Low
Pour whole milk onto a shallow plate, add drops of 3 to 4 food colors around the edge, then touch one drop of dish soap to the center. The colors explode outward in swirling patterns. The soap breaks the surface tension, causing the fat molecules in the milk to scatter. One note competitors often miss: whole milk is essential. Skim milk won’t give you the same result because the fat content drives the reaction.
3. Oobleck (Non-Newtonian Fluid)
Ages: 4+ | Time: 10 min | Mess: High
Mix 2 cups of cornstarch with 1 cup of water. That’s the ratio. The result acts like a solid when you squeeze it and a liquid when you relax your hand. Kids can punch it, poke it, and roll it into a ball, and then watch it melt back into a puddle. Do this one outside or on a vinyl tablecloth. Not a Tuesday-before-dinner experiment.
4. Sink or Float Tub
Ages: 2+ | Time: 15 min | Mess: Low
Fill a plastic tub or the kitchen sink and gather about 10 household objects. Have kids predict whether each one will sink or float before they test it. This one introduces density and buoyancy, and the prediction step turns it from splashing into actual scientific thinking. Write the results on a piece of paper for an extra layer of engagement.
5. Tornado in a Jar
Ages: 5+ | Setup: 5 min | Mess: Low
Fill a mason jar with water, add a teaspoon of white vinegar and a drop of dish soap, then swirl it quickly in a circular motion and set it down. A mini vortex forms in the center. The science is centripetal force creating a funnel shape as the liquid moves. Optional glitter makes it look like a snow globe tornado.
6. Skittles Rainbow
Ages: 4+ | Time: 5 min | Mess: Low
Arrange Skittles in a circle on a white plate and carefully pour warm water into the center. The colors migrate outward in straight lines and meet in the middle without mixing. The science is diffusion: sugar and dye dissolve and spread evenly through the water. One important note: it has to be warm water. Cold water slows the effect significantly and the pattern won’t form cleanly.
7. Elephant Toothpaste (Mini Version)
Ages: 6+ (adult supervision required) | Time: 10 min | Mess: High
Mix roughly 3% hydrogen peroxide (the standard drugstore variety) with a dissolved packet of yeast, a squirt of dish soap, and warm water in a tall container. The result is a rapid foam that erupts upward like a giant tube of toothpaste. The science is a decomposition reaction that releases oxygen gas quickly. That roughly 3% concentration is safe for home use; you don’t need lab-grade peroxide for a great result.
8. Cloud in a Jar
Ages: 5+ | Time: 10 min | Mess: Low
Pour a small amount of hot water into a mason jar, spray a quick burst of hairspray inside, then place a bag of ice cubes on top. In a few minutes, a visible cloud forms inside the jar. Kids are watching condensation and the water cycle in action. This one pairs beautifully with any water cycle unit at school.
9. Leakproof Bag
Ages: 6+ | Setup: 5 min | Mess: Low
Fill a zip-top plastic bag with water, hold it over a sink, and push a sharpened pencil all the way through both sides. The bag doesn’t leak. The science is polymer chemistry: the plastic is made of long chains of molecules that seal tightly around the pencil. The wow factor here is sky-high, and it’s easy enough to do as a school show-and-tell.
10. Dancing Raisins
Ages: 3+ | Time: 5 min | Mess: Low
Drop a handful of raisins into a glass of clear soda (club soda or Sprite work great). The raisins sink, then rise, then sink again, over and over. Carbon dioxide bubbles attach to the rough surface of the raisins, giving them enough lift to float up. When the bubbles pop at the surface, the raisins drop back down and the cycle starts again. This one is endlessly watchable.
Matching the Experiment to the Right Age
Not every experiment is the right fit for every kid, and that’s fine. Here’s how I’d break it down by developmental stage.
For ages 2 to 4, stick with sink or float, magic milk, and dancing raisins. These require no measuring, no waiting, and no reading. They’re all about sensory observation, and that’s exactly where toddlers and preschoolers thrive. If you’re looking for more ideas in this range, the toddler learning activities guide has a lot of overlap with what these little scientists are ready for.
For ages 5 to 7, the walking water rainbow, skittles experiment, and cloud in a jar are perfect. At this stage, kids can handle simple instructions and are starting to form predictions. Ask “what do you think will happen?” before every experiment and let them own the answer.
For ages 8 to 10, oobleck, tornado in a jar, and leakproof bag are satisfying because kids this age want to understand the why, not just see the what. They can read simple instructions independently and start to journal their observations.
For ages 11 to 12, elephant toothpaste and baking soda-based rockets are the experiments to reach for. Kids at this stage can measure precisely, record data, and connect what they’re seeing to chemistry concepts they’re likely covering in school.
The beautiful thing about all of these is that you can scale the explanation up or down. A 3-year-old loves the magic of dancing raisins. A 10-year-old wants to know why the bubbles attach to a rough surface and not a smooth one. Same experiment, different conversations.
The Mess Meter: Picking the Right Experiment for Right Now
This is the part no one else tells you. The best experiment isn’t the one with the highest wow factor; it’s the one that matches your current energy level and kitchen situation. Here’s a quick breakdown.
Low mess (5-minute cleanup): Magic milk, skittles rainbow, dancing raisins, walking water rainbow, sink or float, leakproof bag, cloud in a jar. These are all table-friendly and involve nothing that stains.
Medium mess (wipe-down required): Baking soda volcano, tornado in a jar. Plan for a paper towel or two and maybe a tray underneath.
High mess (plan ahead, go outside, or use a drop cloth): Oobleck and elephant toothpaste. Both are worth it, but on your terms. Oobleck on a Tuesday afternoon before dinner? Hard pass. Oobleck on a Saturday when we can hose off the patio? Absolutely.
On a rainy day when everyone’s stir-crazy, low-mess experiments are the move. For more ideas that work indoors without requiring a cleanup crew, the indoor toddler activities roundup has a lot of overlap for the younger crowd.
Connecting These Experiments to What They’re Learning in School
One of the easiest ways to help kids feel confident at school is to connect what they’re doing at home to what they’re covering in class. Most of these experiments map directly onto Next Generation Science Standards for elementary grades.
| Experiment | Science Concept | Typical Grade Covered |
|---|---|---|
| Sink or Float | Density and buoyancy | K to 2 |
| Walking Water Rainbow | Capillary action | 1 to 3 |
| Magic Milk | Surface tension | 2 to 4 |
| Baking Soda Volcano | Acid-base reactions | 3 to 5 |
| Oobleck | States of matter | 3 to 5 |
| Cloud in a Jar | Water cycle | 2 to 4 |
| Elephant Toothpaste | Chemical reactions | 5 to 6 |
After any experiment, have kids draw what happened and write one sentence about what surprised them. That’s science journaling in its simplest form, and it mirrors what most US elementary classrooms already ask students to do. It also gives you an easy way to revisit the experiment later and see how their thinking has grown.
Frequently Asked Questions About Science Experiments for Kids
What is the easiest science experiment for a 4-year-old?
Magic milk and sink or float are the easiest starting points for a 4-year-old. Both require no measuring, take under 5 minutes, and are visually exciting. Magic milk works best with whole milk specifically; skim milk won’t show the same dramatic color movement because the reaction depends on fat content in the milk.
What science experiments can kids do at home in under 10 minutes?
At least 7 of the experiments in this list can be fully set up and started in under 10 minutes: dancing raisins, skittles rainbow, magic milk, leakproof bag, tornado in a jar, walking water setup, and sink or float. All of them use materials most families already have in the kitchen or bathroom cabinet.
Are these experiments safe for kids to do without adult supervision?
Most experiments here are low-risk, but adult supervision is recommended for anything involving hot water (cloud in a jar), hydrogen peroxide or vinegar (elephant toothpaste, baking soda volcano), or sharpened pencils (leakproof bag). Experiments like magic milk, dancing raisins, and the skittles rainbow are appropriate for older kids (8 and up) to run on their own. For anything involving heat or reactive ingredients, I always make sure I’m right there with younger kids.
Do I need to buy special supplies for these science experiments?
No. All 11 experiments in this list use standard household materials. If your kitchen has baking soda, vinegar, dish soap, food coloring, and cornstarch, you can run at least 8 of them today without a single trip to the store. The most specialized item on the whole list is a packet of active dry yeast for elephant toothpaste, which costs under $1 at any grocery store.
How do I make a science experiment more educational without it feeling like school?
Ask your child one question before you start: “What do you think will happen when we add the soap?” That single step activates critical thinking and makes the reveal feel earned rather than just entertaining. You can also let them lead the setup instead of doing it for them. The learning happens in the doing, and kids who run the experiment themselves tend to ask a lot more questions than kids who watch.


