
Spring Crafts for Kids
Spring crafts for kids are hands-on art projects themed around flowers, butterflies, and garden scenes, made with simple low-cost supplies suited to children ages 1–10.
Last updated: June 2026
Quick Answer: What Are Spring Crafts for Kids?
Spring crafts for kids are seasonal art and craft activities built around the hallmarks of the season: blooming flowers, buzzing bugs, rainy skies, and garden life. They span a wide range of skill levels, from simple sensory smashing for babies to structured paper-folding and nature projects for older kids. Most spring arts and crafts call for supplies you can grab at any dollar or craft store for just a few dollars.
Here’s the thing about the first warm weekend of spring: the kids are buzzing, the backyard is calling, and screen time feels like a waste of all that seasonal energy. Muddy boots, longer afternoon light, and the sudden urge to make something beautiful? That’s exactly where easy spring crafts for kids come in. This post walks you through one featured step-by-step craft you’ll want to do every year, plus a full lineup of ideas organized by age so you can pick and go.
Featured Spring Craft: Handprint Flower Bouquet
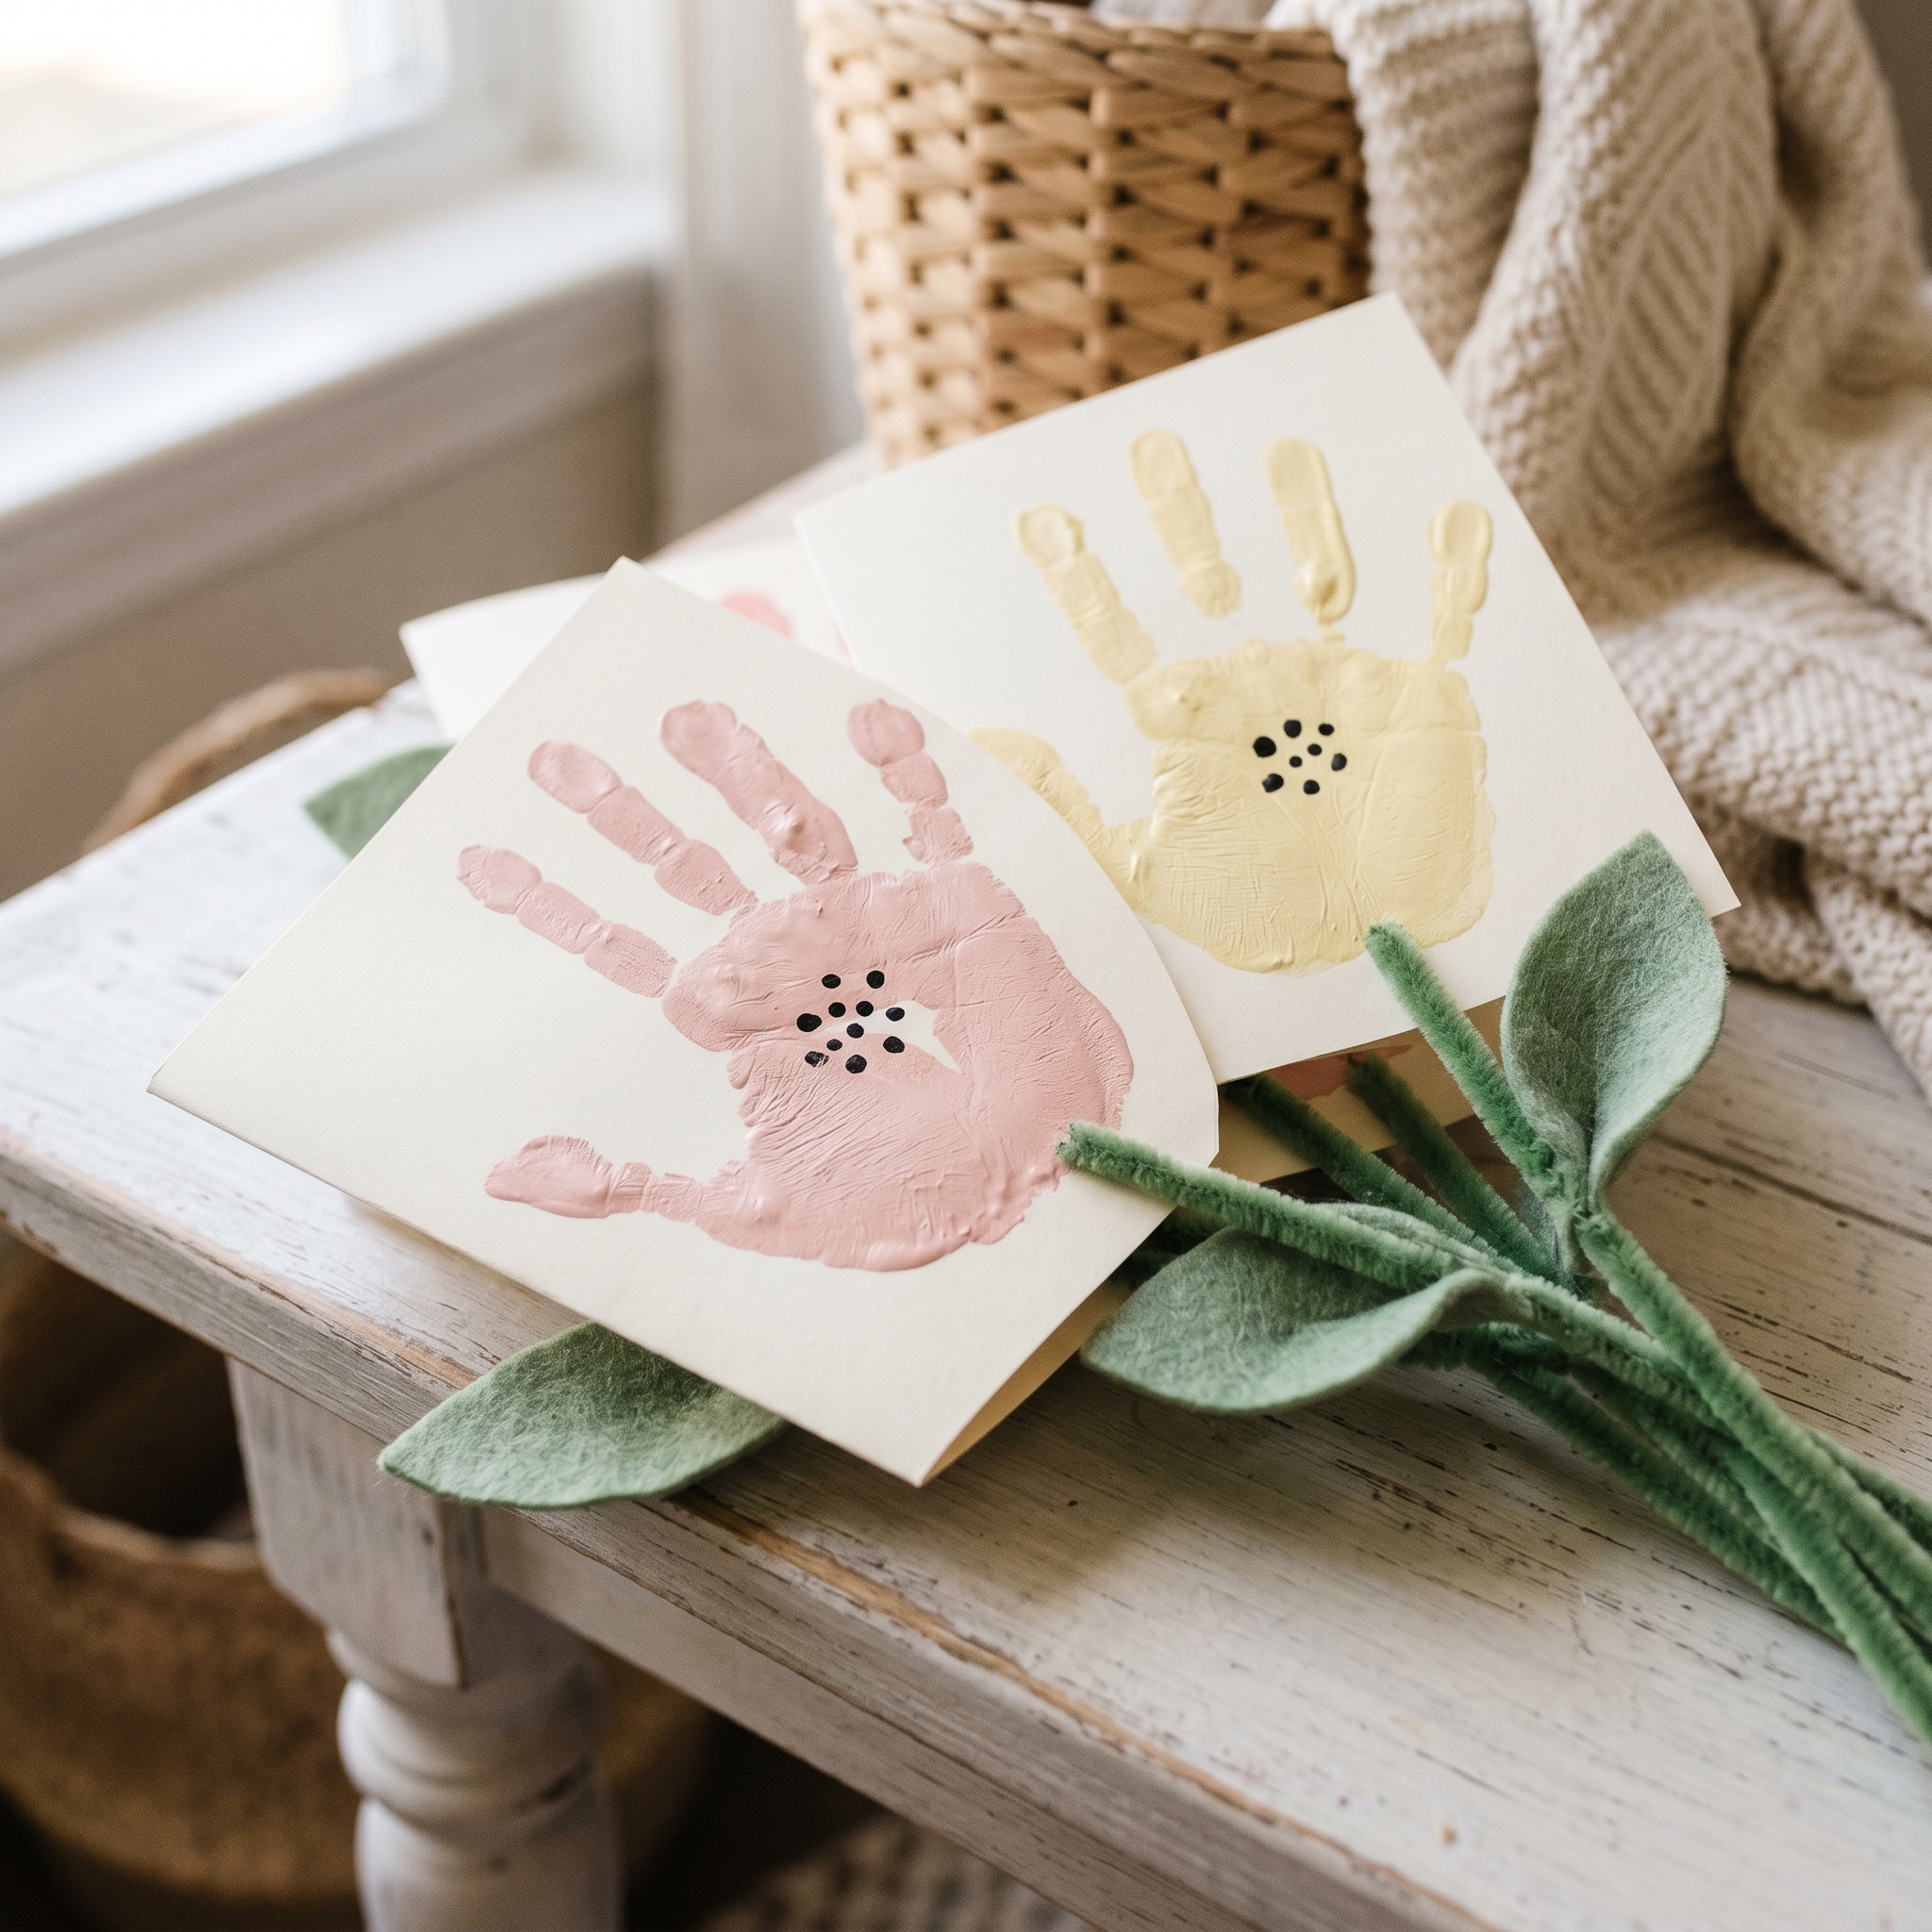
Handprint crafts are the ones you’ll pull out of a bin ten years from now and feel something. No special skill required, no expensive supplies, and it works for every age from wobbly toddler to confident second-grader. This one doubles as a keepsake and a piece of art you’d hang on the wall.
Age Range: 1–8 years (toddlers with a grown-up’s help; preschoolers and up can go mostly independent)
Time: 20–30 minutes of active crafting, plus 15–20 minutes of drying time
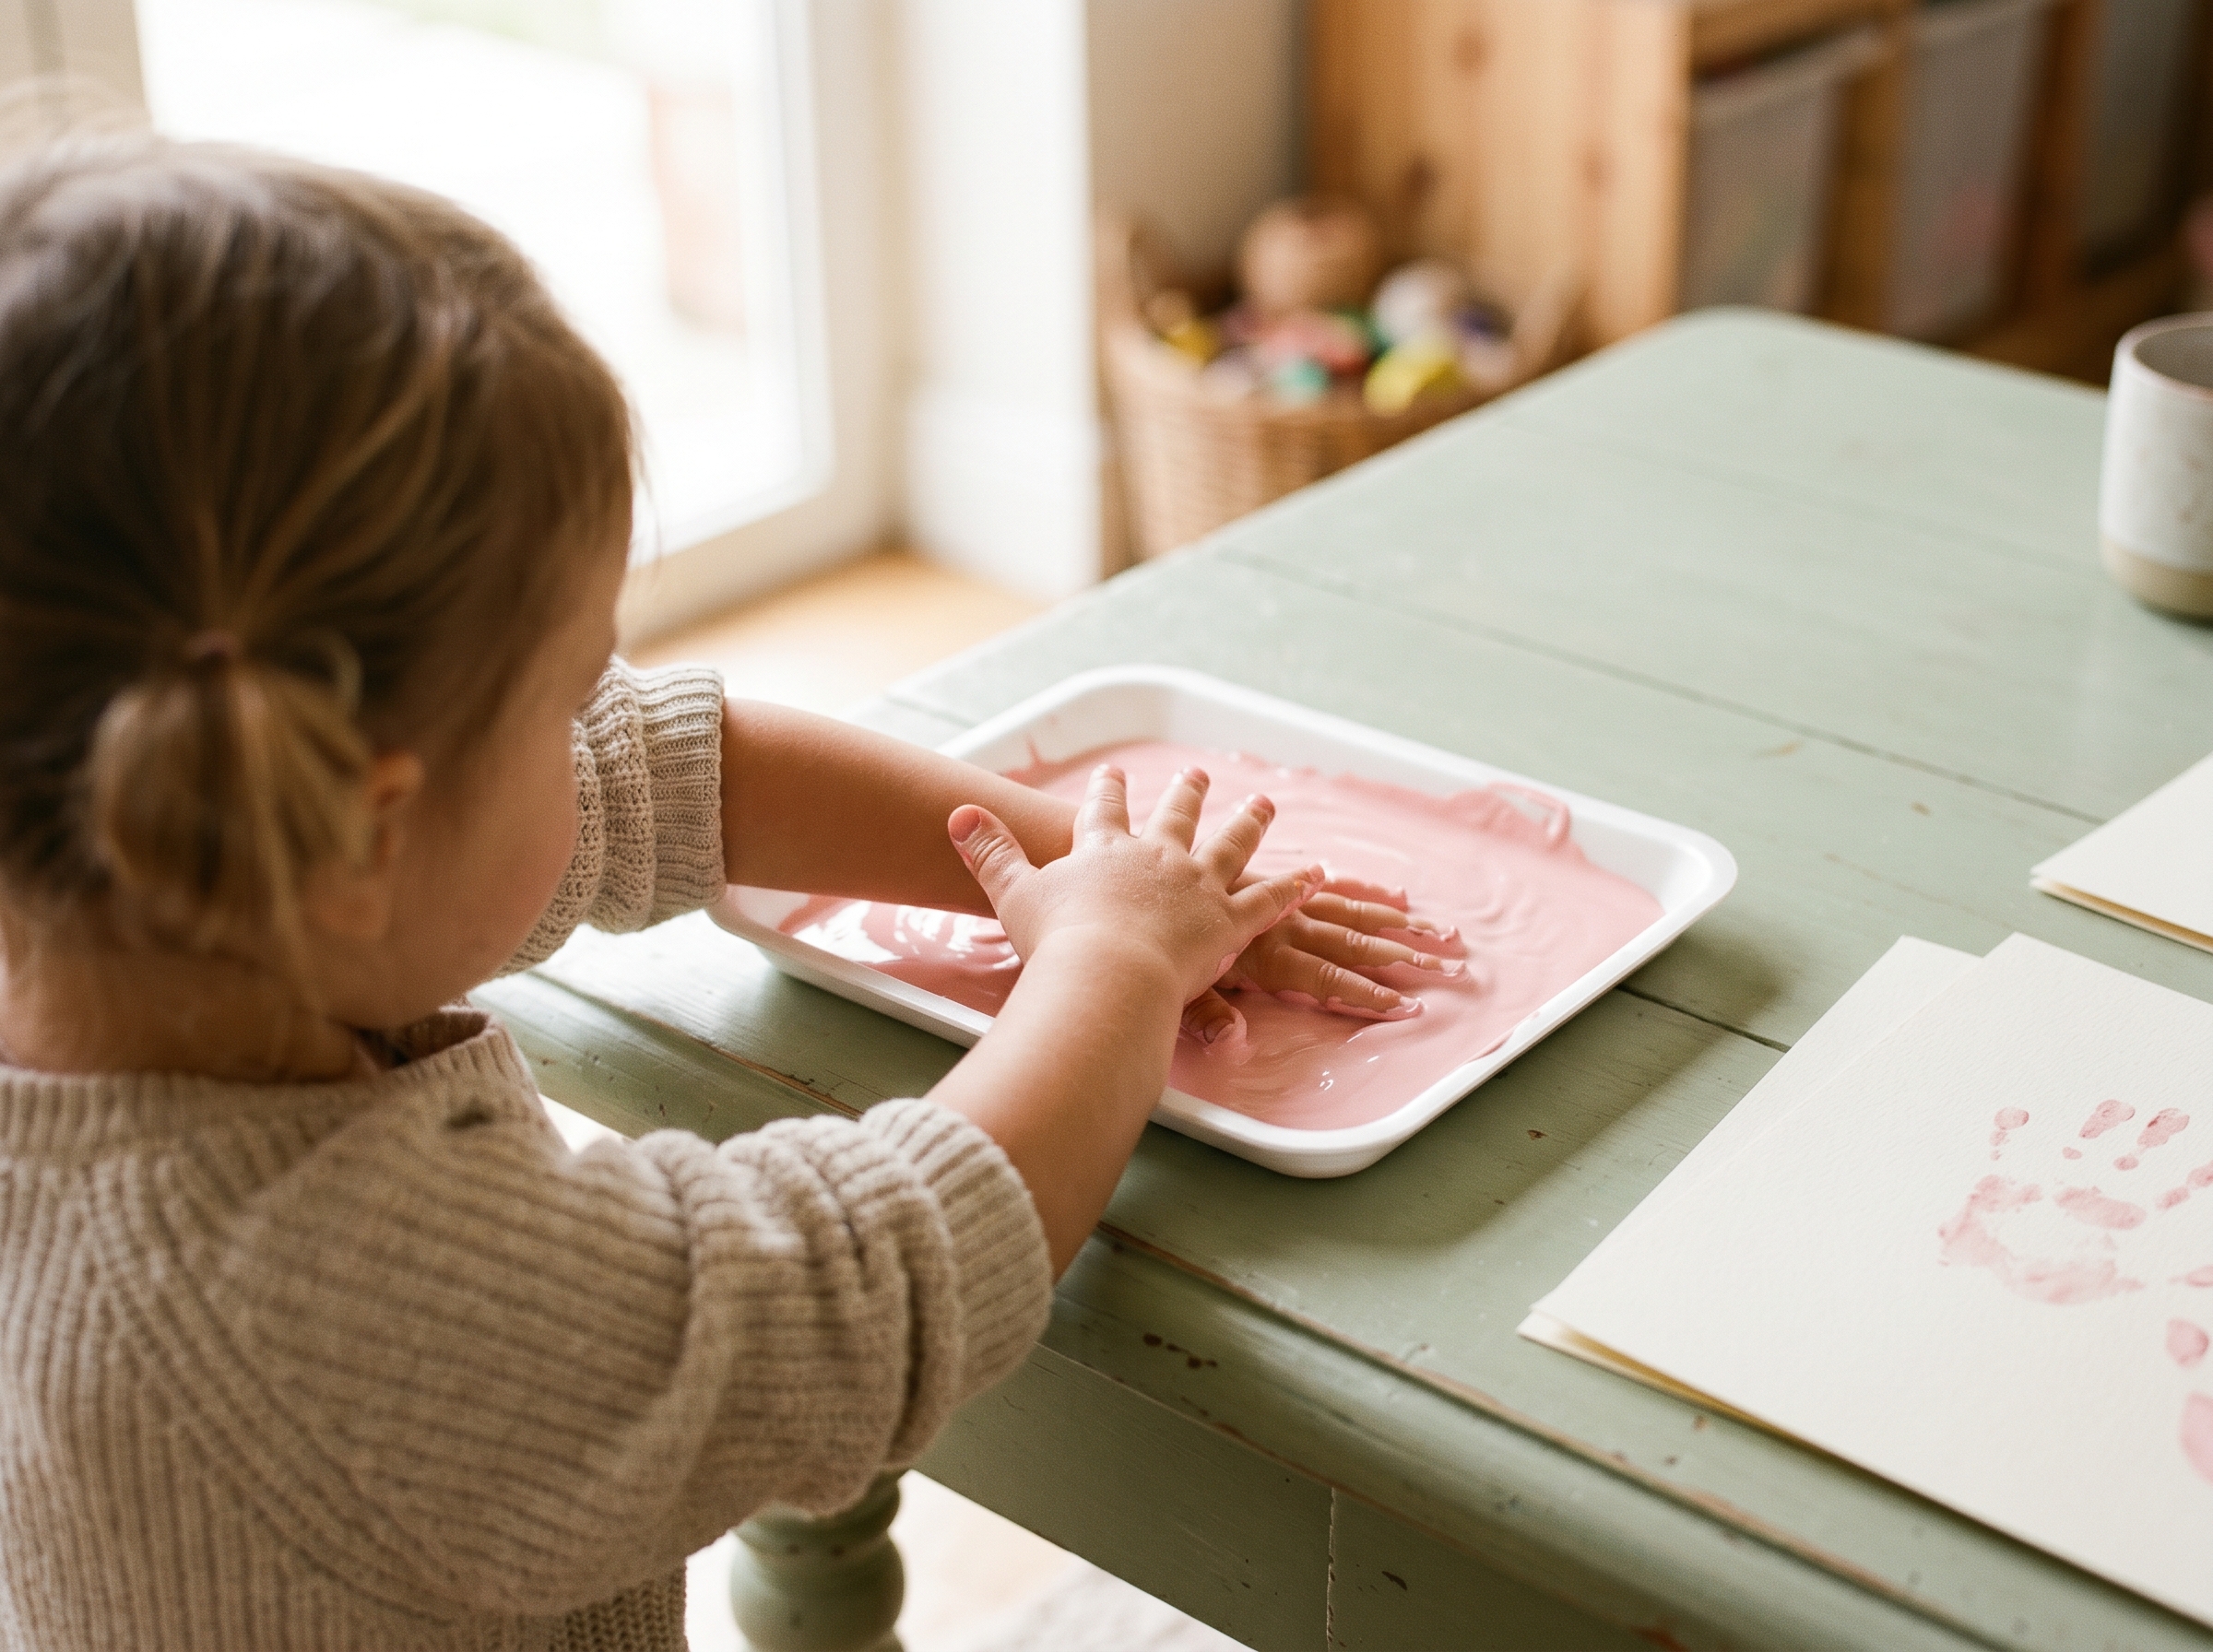
Materials
⚠️ Safety Notice: Several materials listed below, including pipe cleaners, pom poms, googly eyes, ribbon, and twine, are choking hazards for children under 3. Always supervise children ages 3 and under during any craft activity. Keep small parts away from babies and young toddlers, and substitute larger, age-appropriate alternatives where noted.
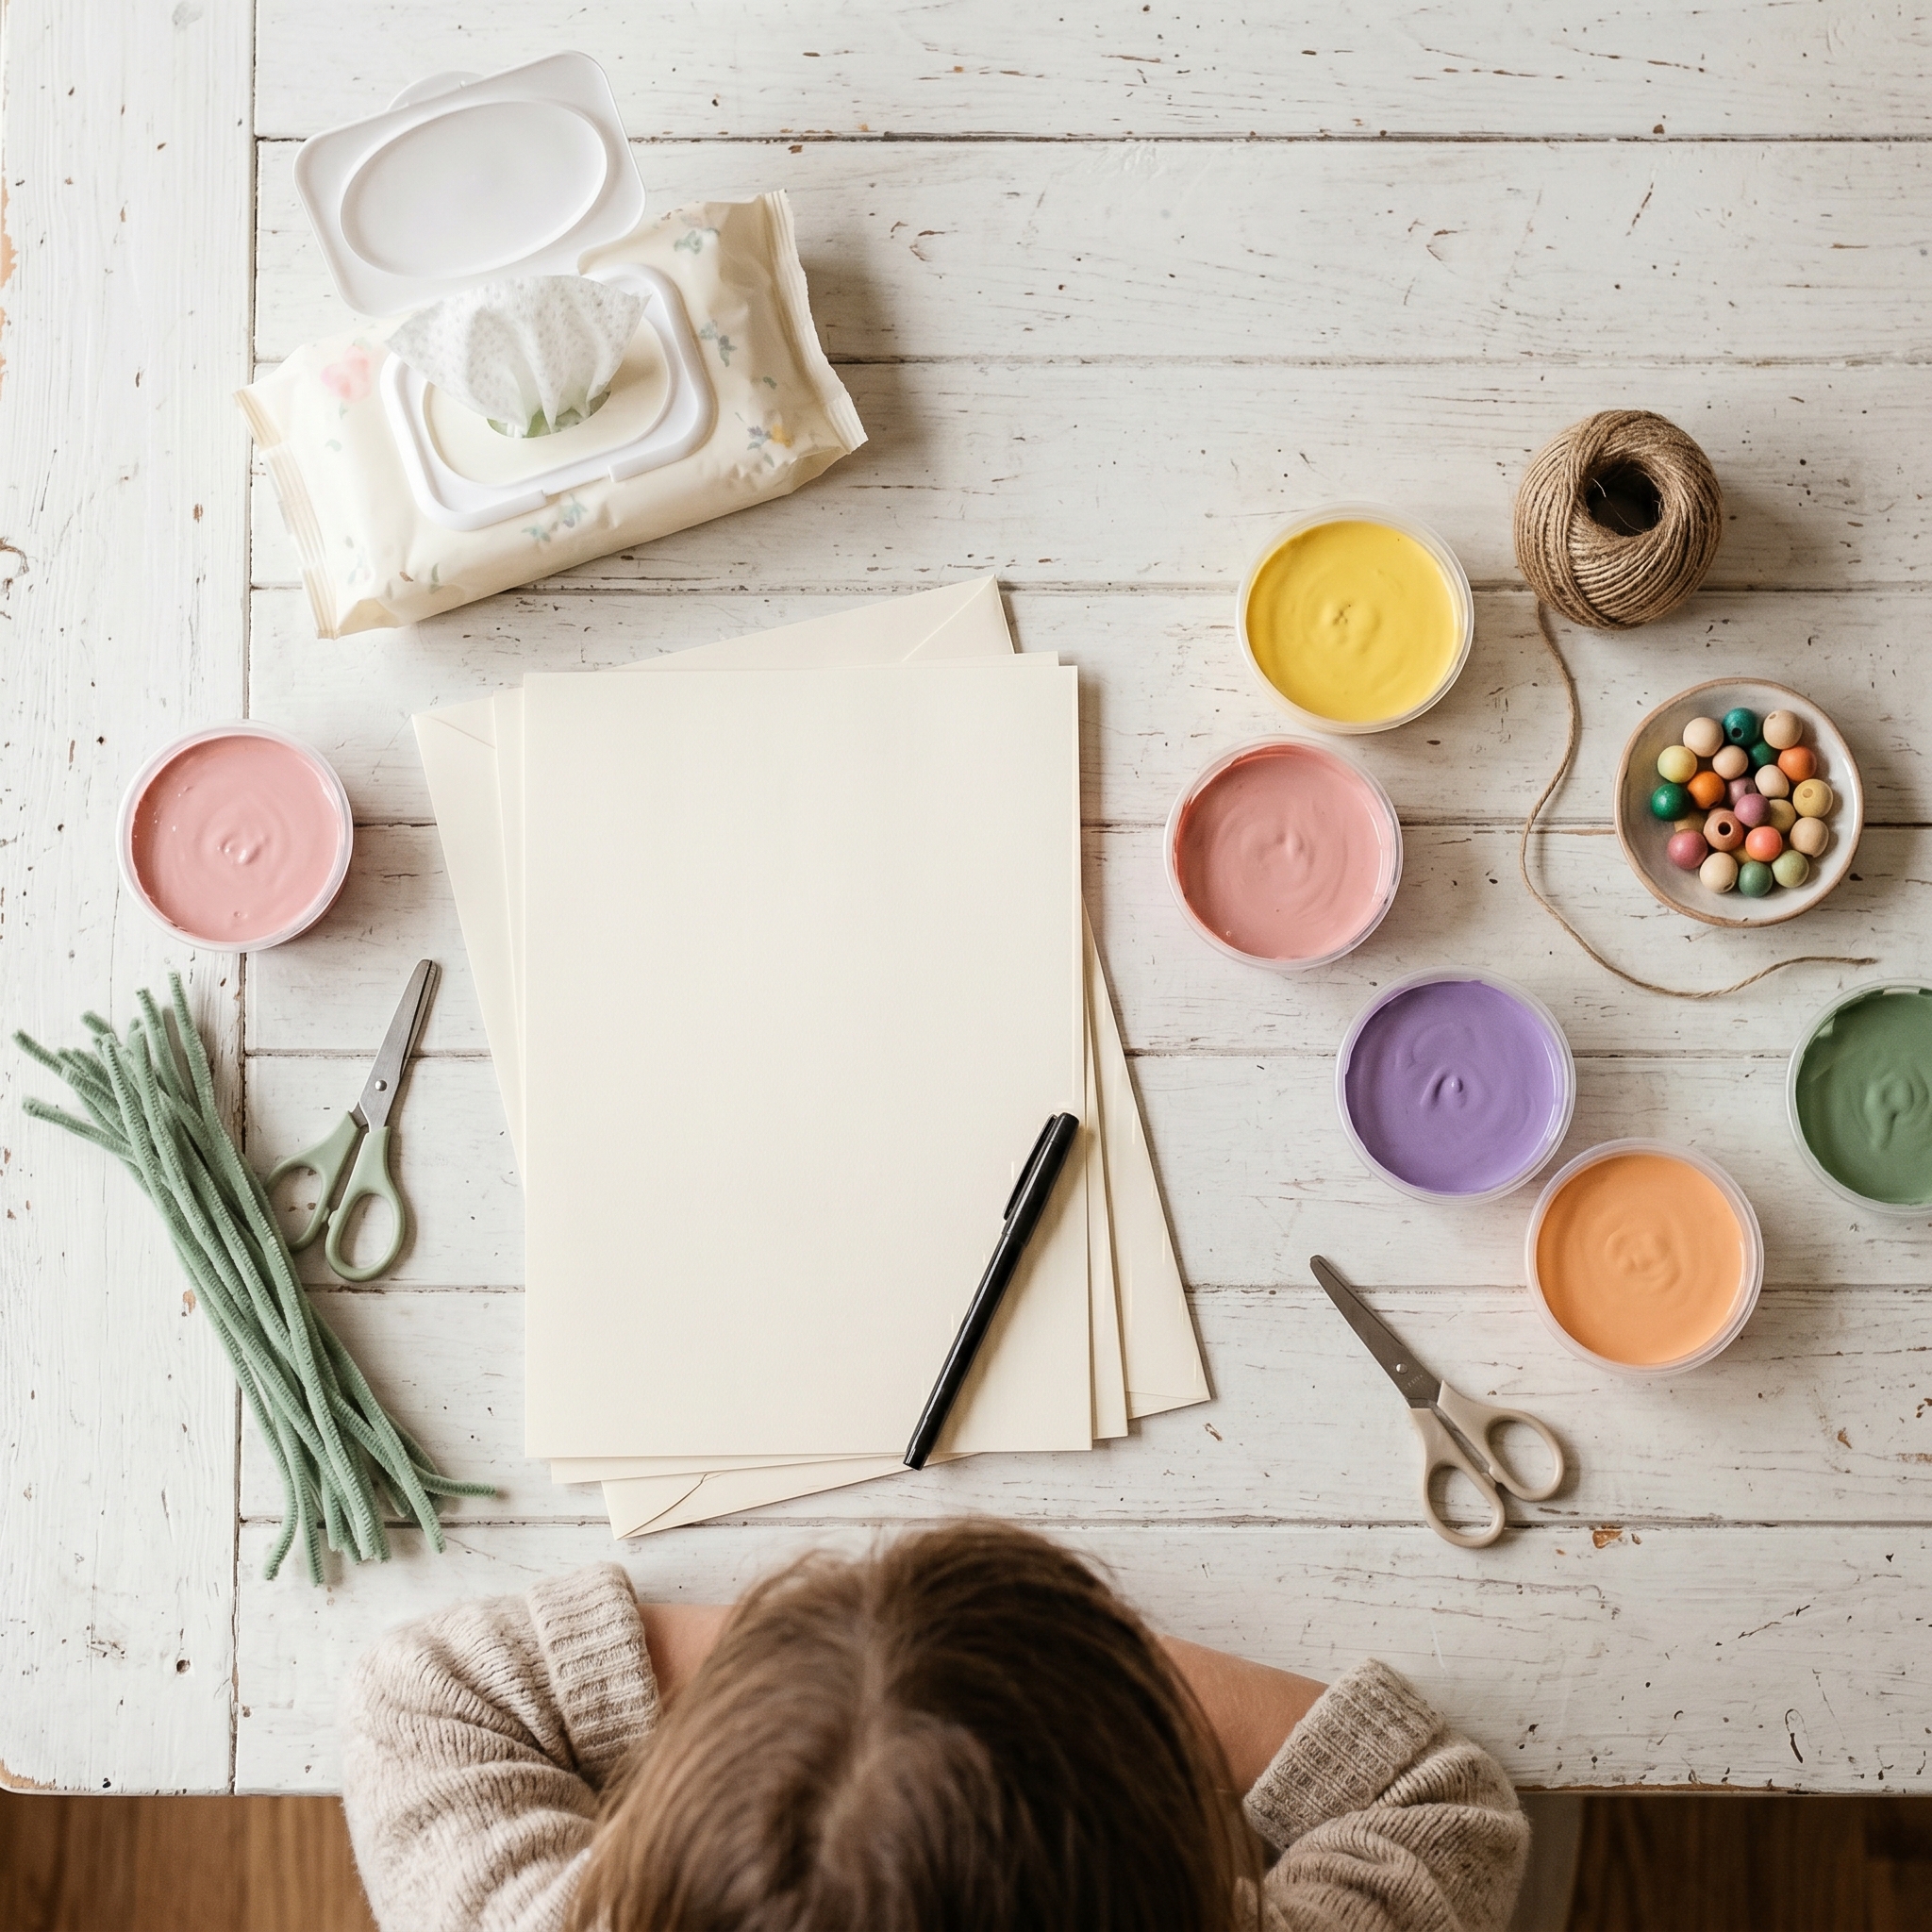
- Washable tempera paint in 3–5 spring colors (pink, yellow, purple, orange, white): 2 oz bottles work perfectly, one per color
- White cardstock or heavy construction paper (at least 65 lb weight): lighter paper warps when wet paint hits it
- Shallow plastic plates or foam trays: one per paint color so kids can press their whole palm in flat
- Green pipe cleaners or green marker: for stems and leaves (pipe cleaners are a choking hazard; use green marker only for children under 3)
- Wet wipes or a damp towel: open these before you start, not while your hands are covered in paint
- Thin black marker (optional, ages 4+): for adding petal details or a center dot
- Clear-drying craft glue (optional): helpful if you want to layer or overlap handprint petals
- Ribbon or twine (optional, ages 4+): tie around the base of the “stems” for a bouquet effect; not suitable for children under 3
Steps
- Cover your work surface with a vinyl tablecloth or butcher paper before anything else touches the table.
- Pour each paint color into its own shallow tray so little hands can press in without mixing colors.
- Help your child press their whole hand flat into one color, fingers together and palm down.
- Stamp the painted hand firmly onto the cardstock with fingers pointing upward, those fingers become the flower petals.
- Repeat with 4–5 more handprints in different colors, fanning them out slightly so they look like a loose bouquet.
- Rinse hands between colors to keep the hues clean and bright.
- Use a green marker or pipe cleaners to draw or attach a curved stem under each handprint flower.
- Add small leaf shapes along the stems using a green marker or cut construction paper.
- Let the whole piece dry flat for at least 15 minutes before anyone touches it.
- Write your child’s name and the date on the back. You will absolutely want it in five years.
Variations
Footprint Garden: For babies and young toddlers who can’t control a full handprint yet, use foot stamps instead. Foot shapes make adorable tulip heads planted in a row on green paper.
Fingerprint Bouquet: Older kids (ages 6–8) can use individual fingertips to build tiny flower clusters with much more precision and detail. It’s the same concept, scaled down and slowed down.
Coffee Filter Flowers: Swap cardstock for white coffee filters, color them with washable markers, then mist lightly with water so the colors bloom and bleed into each other. Attach to pipe cleaner stems once dry.
Window Cling Version: Paint directly onto clear contact paper instead of cardstock. Cut out each handprint flower and press it onto a window for a no-frame seasonal display that peels right off when you’re ready for the next season.
Collaborative Classroom Mural: Each child contributes one handprint flower to a shared sheet of butcher paper. Arrange them into a big spring meadow scene. This is a great option for preschool teachers looking for a low-prep group project.
More Easy Spring Crafts for Kids (By Age Group)
Not every craft works for every kid, and most roundup lists don’t acknowledge that. Here’s what actually fits where, organized by age band with a quick difficulty rating.
Spring Crafts for Toddlers (Ages 1–3), Difficulty: ★☆☆
For this age group, the goal is sensory fun with zero small parts and zero scissors. According to the American Academy of Pediatrics’ Healthy Children resource on nature art, nature-based creative activities support toddlers’ motor development and mental well-being at the same time, which makes simple crafts like these worth prioritizing.
⚠️ Adult supervision required for all toddler craft activities. Children ages 1–3 must be supervised at all times. Avoid any small pieces such as googly eyes, pom poms, buttons, or beads with this age group. All materials used with toddlers should pass the toilet paper tube test: if it fits inside a cardboard tube, it’s a choking hazard.
- Tissue paper flower collage: Tear pre-cut tissue paper squares and press them onto contact paper shaped like a flower, no glue needed, pure sensory satisfaction.
- Cotton ball cloud painting: Dip cotton balls into white or gray paint and dab them onto blue paper for a rain-cloud sky scene.
- Sponge-stamp rainbows: Cut kitchen sponges into arcs, dip into rainbow colors, and press onto paper in sequence for a full rainbow.
- Fingerprint caterpillar: Press a row of fingerprints in green paint, then add eyes and legs with a marker once dry.
- Handprint blossom tree: Paint the forearm brown for the trunk and branch, handprint the crown in pink or white for cherry blossoms.
If you’re looking for more low-mess ideas for this age, a full collection of indoor toddler activities for rainy days covers sensory bins, balloon games, and art projects that rotate well on those days when going outside isn’t happening.
Spring Crafts for Preschoolers (Ages 3–5), Difficulty: ★★☆
At this stage, kids can handle child-safe scissors, basic folding, and more intentional brushwork. By age 3–4, most kids can control a paintbrush well enough to stay roughly within a shape, which opens up a lot of options.
- Paper plate butterfly: Fold a paper plate in half, paint symmetrical wing patterns on each side, then unfold and add pipe cleaner antennae.
- Cupcake liner flowers: Flatten colorful cupcake liners as petals, layer them around a button center, and glue onto a green stem drawn on cardstock.
- Egg carton caterpillar: Cut an egg carton strip, paint each cup a different color, poke in pipe cleaner legs, and add googly eyes to the front.
- Fork-stamped chick: Dip a plastic fork in yellow paint and press it onto paper to create fluffy feather texture, then add an orange beak and eyes.
- Pom pom bee: Glue a yellow pom pom onto paper, add black stripes with a marker, then attach white tissue paper wings.
Spring Crafts for Kids Ages 6–10, Difficulty: ★★★
This age group wants a real challenge and a finished product they’re proud of. These projects take more time and produce something impressive.
- Pressed flower bookmarks: Press real flowers and leaves between heavy books for a week, then arrange them on cardstock strips sealed with clear contact paper.
- Watercolor resist butterflies: Draw butterfly wings in white crayon, then paint over with watercolor washes. The wax resists the paint and the hidden design appears.
- Nature weaving: Tie yarn between two sticks collected from the yard in a simple loom structure, then weave in leaves, grass, and flower stems.
- DIY seed paper: Blend scrap paper with water into a pulp, mix in flower seeds, press flat into shapes, and let dry. The finished “paper” cards can be planted directly in soil.
- Blow painting cherry blossoms: Drop pink paint onto paper and blow through a straw to spread it into branching blossom shapes.
The seed paper project pulls in a real science angle: kids see plant biology and paper recycling working together in one afternoon project. That’s worth pointing out to the parent who’s quietly wondering if crafts are “educational enough.”
How to Set Up a Spring Craft Station (So You’re Not Scrambling Mid-Project)
No competitor seems to cover this part, and it’s the thing that makes or breaks the whole experience. A little prep before the paint comes out changes everything.
Surface protection: A vinyl tablecloth beats butcher paper every time. Paper tears when wet, slides around, and doesn’t wipe clean. A dollar store vinyl cloth costs under $2 and survives an entire season of projects.
Paint tray hack: An ice cube tray is a free built-in palette with dividers. Fill each well with a different color, and kids can dip without mixing. Cleanup is a rinse under the tap.
Drying setup: A basic baking cooling rack keeps finished prints lifted so air circulates underneath. Paper towels let prints sit in any wet edges and smear. A $4 rack from the dollar store is worth it.
The wet wipe rule: Open the pack before paint touches anyone’s hands. Not after. Before.
Keep a dedicated spring craft box stocked and ready so you’re never hunting for supplies mid-session. Here’s a starter list that runs well under $25 total:
- Washable tempera paint set (spring colors)
- White cardstock pack
- Construction paper assortment
- Pipe cleaners (multi-color, ages 4+ only)
- Washable markers
- Craft glue or glue sticks
- Child-safe scissors
- Pom poms assortment (ages 4+ only; choking hazard for younger children)
- Googly eyes (ages 4+ only; choking hazard for younger children)
- Wet wipes (two packs)
For those days when your toddler is done with paint in 10 minutes flat, having a no-mess painting setup ready as a backup keeps the creative momentum going without the laundry aftermath.
What Skills Do Spring Crafts Actually Build?
If you’ve ever had to justify craft time to a skeptical co-parent, here’s your ammunition.
Fine motor development: Pinching tissue paper, tearing strips, pressing a paintbrush, threading yarn through a loom, all of these build grip strength and hand control that directly support pencil use later. Kids need hundreds of small-muscle repetitions each day, and a single craft session stacks up fast.
Early STEM thinking: Mixing yellow and blue paint to discover green isn’t just art. That’s color theory, cause and effect, and scientific observation happening in real time at your kitchen table. Our easy science experiments for kids roundup takes that same curiosity into more hands-on discovery.
Focus and persistence: A 20-minute craft session asks more sustained attention from a toddler than most other activities in a typical day. Finishing something, even a lopsided tissue paper flower, builds a real sense of accomplishment. You’re not just making a cute butterfly. You’re basically running an occupational therapy session with glitter.
That’s a lot of return for a $3 pack of tempera paint.
The toddler learning activities guide covers more on how everyday play builds early cognitive and language skills if you want to go deeper on the developmental side.
Frequently Asked Questions About Spring Crafts for Kids
What are good spring activities for kids beyond crafts?
Beyond art projects, spring is a great time for sensory bins filled with dried beans and plastic bugs, simple garden projects like planting seeds in paper cups, nature scavenger hunts in the backyard, and puddle-jumping after rain. Outdoor time supports the same developmental benefits as hands-on crafts, especially when it involves collecting natural materials that you can actually bring back inside and use in a project later.
What are the easiest spring crafts for 3-year-olds?
For a 3-year-old, stick to zero-scissors options with big, forgiving results. Tissue paper collages on contact paper require nothing but tearing and pressing. Fingerprint caterpillars need only a stamp pad or a plate of paint and a marker for the finishing details. Sponge-stamp rainbows are another winner since the sponge does most of the work and the color payoff is huge. All three hit the sweet spot for spring crafts for toddlers: low frustration, big visual reward, easy cleanup.
What spring crafts can kids make with just paper?
Quite a few. Paper plate butterflies, paper bag puppets shaped like chicks or bunnies, torn-paper flower mosaics, and simple origami tulips all work with nothing but paper and basic craft supplies. If you search for free printable templates, many sites offer spring coloring and cutting pages that give kids a guided structure without needing any additional materials. It’s an easy route when you’re low on supplies and short on time.
How do I keep spring crafts from becoming a huge mess?
Three moves that actually work: lay down a vinyl tablecloth (not paper, not newspaper), pour paint into an ice cube tray instead of directly on paper plates so kids can’t accidentally tip the whole color, and set up a drying rack before you open a single bottle of paint. The wet wipe rule also stands firm: open them before you start, not when one child has purple hands and another is heading for the couch.
What spring crafts work for a 10-year-old who thinks they’re “too old” for crafts?
Reframe the project and they’ll come around. Pressed flower bookmarks feel grown-up because the finished product is something they’ll actually use. Nature weaving with sticks and yarn looks more like textile art than a kindergarten project. Seed paper is a two-step science experiment that ends with a plantable card they can give someone. Watercolor resist art with hidden designs feels more like a trick than a craft. Lead with the result, not the process, and most 10-year-olds are in.


