
Shaving Cream Art for Kids
Shaving cream art is a printmaking technique where kids press paper onto a shallow tray of foamy shaving cream swirled with liquid watercolors or food coloring, then scrape away the cream to reveal a vibrant marbled pattern underneath.
Last updated: June 2026
Quick Answer: What Is Shaving Cream Art?
Shaving cream art uses inexpensive foamy shaving cream as a pigment carrier. You drop color onto the surface, swirl it gently, press paper down for a few seconds, then scrape the cream off to reveal a gorgeous marbled print. The paint transfers to the paper fibers during that press, so the finished piece is dry to the touch the second the cream is gone. Setup takes five minutes, the activity itself runs about ten, and cleanup wipes away in under five more.
It’s 3:30 on a rainy Tuesday and the kids are bouncing off the walls. You want to do something creative, but you’ve been burned before by “easy” art projects that turned into a full kitchen scrub-down. This one is different. Shaving cream art delivers stunning results with almost no mess, costs next to nothing, and works for ages 2 through 10. No special skills required, for you or for them.
At a Glance:
- Age range: 2–10 years
- Time: 15–20 minutes (5 min setup, ~10 min activity, under 5 min cleanup)
- Mess level: Low (the cream scrapes clean; surfaces wipe in seconds)
- Cost: Under $5 if you already have food coloring on hand
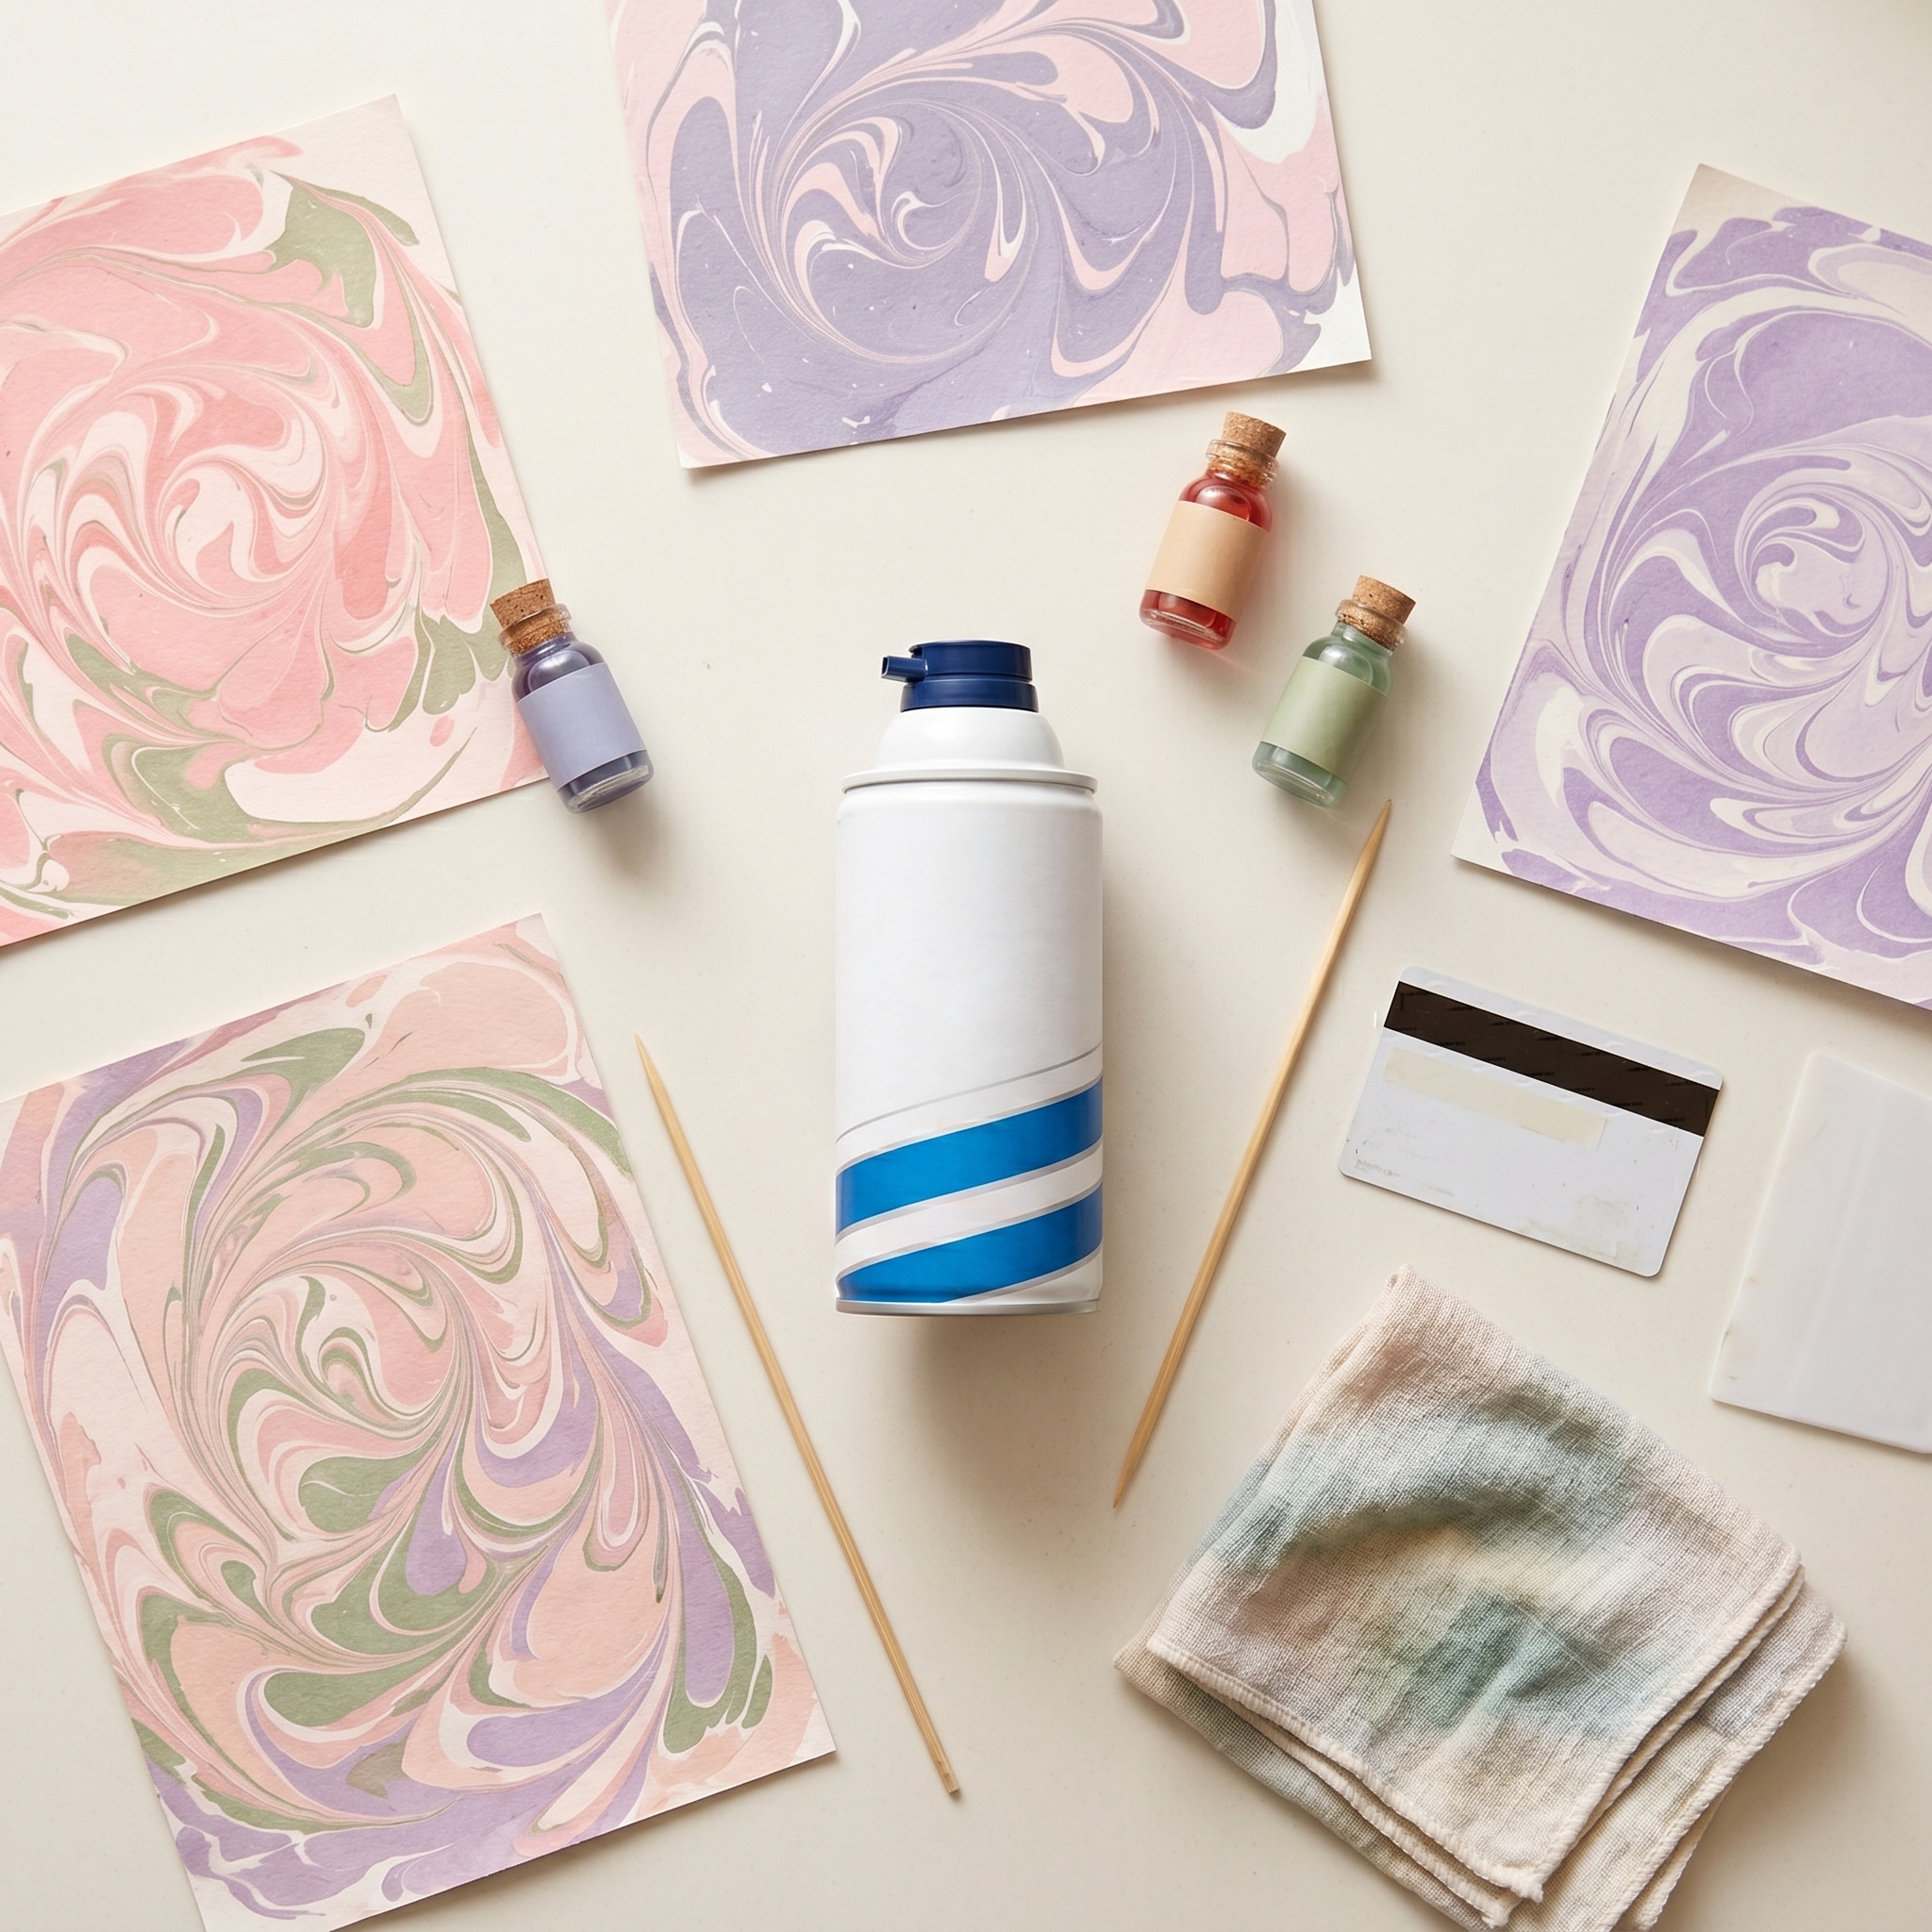
What You Need for Shaving Cream Art
Gather these before you sit down. The whole thing moves fast once you start, and you don’t want to be hunting for a scraper mid-swirl.
One non-negotiable supply note: foaming shaving cream only. Gel won’t work. It doesn’t form the fluffy base that suspends the pigment, so your colors will just sink and blur. A budget-brand foam can (think classic Barbasol-style) works identically to any premium option. Save your money.
- 1 can foamy shaving cream: NOT gel, foam only
- Shallow baking pan, pie plate, or plastic storage tray: a 9×13 pan works well for letter-size paper
- Liquid watercolors or food coloring: 3–5 drops per color
- Cardstock or heavy printer paper: 65 lb or higher recommended; thin paper tears when wet
- Skewer, chopstick, or the back of a paintbrush: for swirling
- Squeegee, expired credit card, or flat cardboard strip: for scraping
- Paper towels or a damp cloth: for cleanup
- Optional droppers: great for toddlers who need more control over color placement
- Optional apron or smock: food coloring can stain skin and fabric for a wash or two
If your kids love low-prep creating, no-mess painting techniques follow the same philosophy: minimal setup, maximum creativity, no scrubbing afterward.
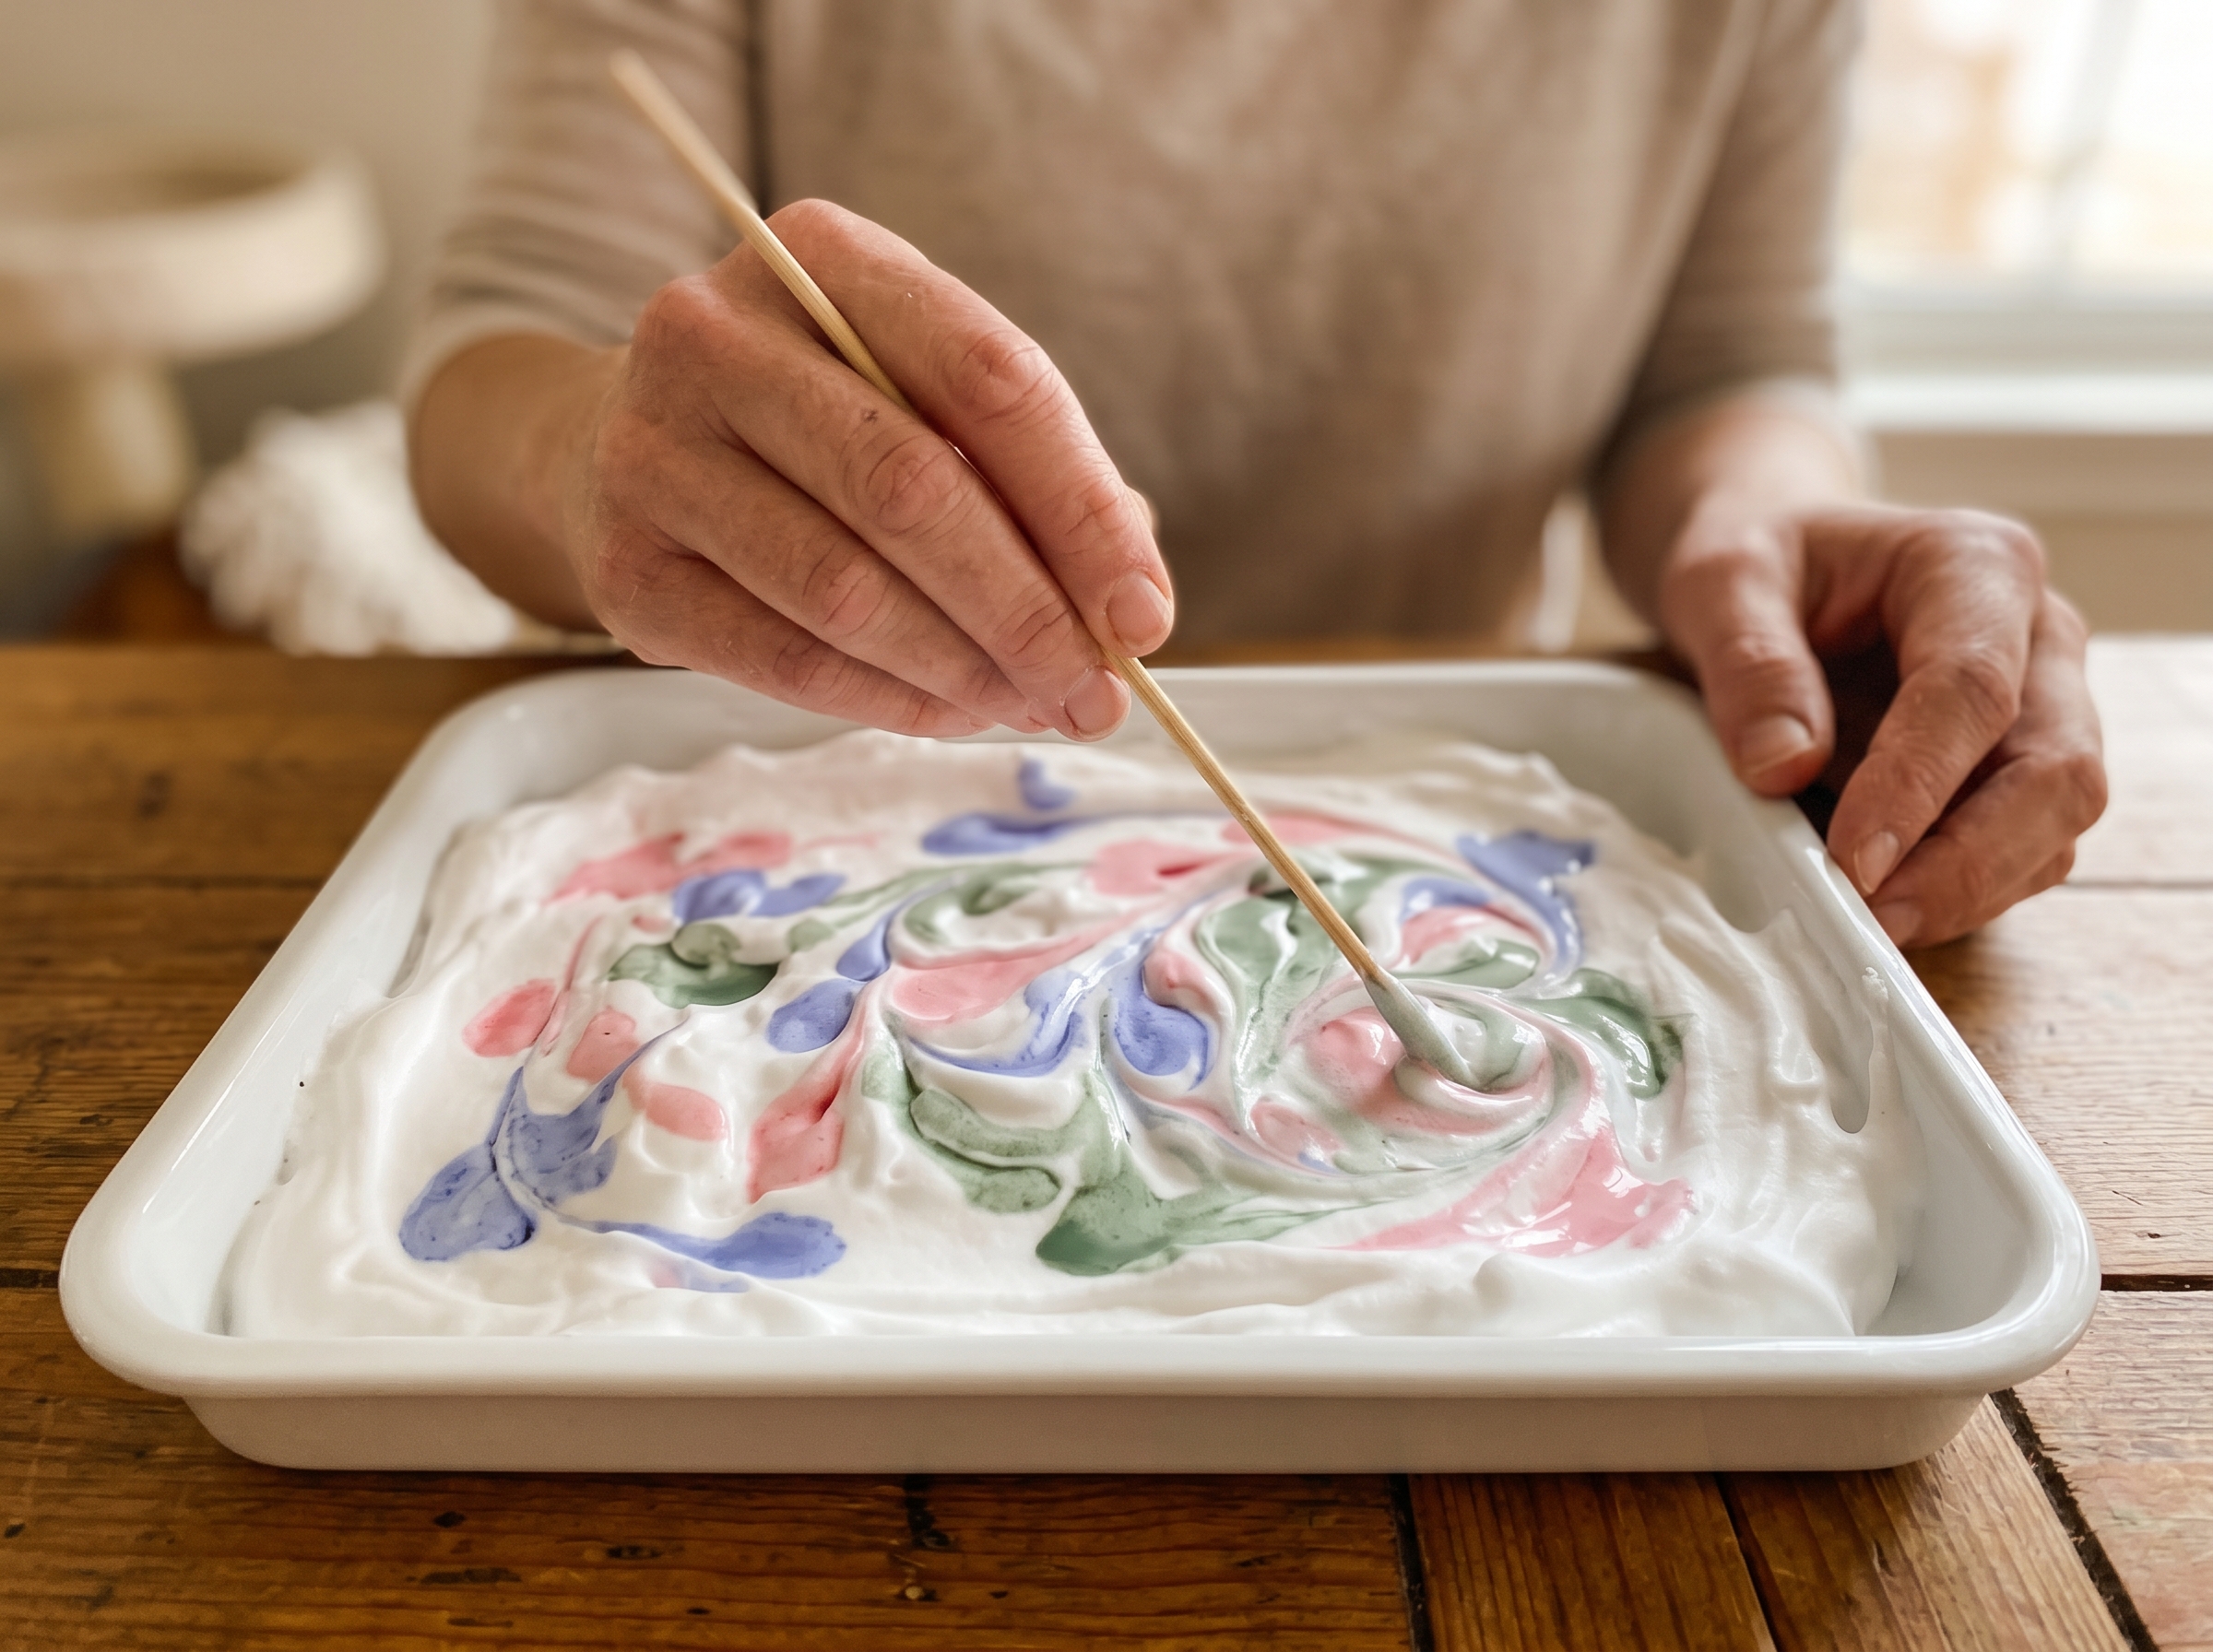
How to Make Shaving Cream Art: Step by Step
Follow these steps in order. Each one has a specific purpose, and the benchmarks below are what separate a crisp marbled print from a muddy blob.
- Fill the tray. Spray shaving cream to cover the bottom in a layer about ½ inch deep. Spread it roughly flat with your fingers or a spatula. It doesn’t need to be perfect.
- Drop in the color. Add 3–5 drops of each color across the surface. Use at least 2–3 colors for the best effect; high-contrast combinations like navy, coral, and cream photograph especially well.
- Swirl, but don’t overmix. Drag your skewer through the cream in loose S-curves, about 4–6 passes. Stopping while you can still see distinct streaks is the key. Over-swirling muddles everything into gray-brown.
- Press the paper face-down. Lay your cardstock onto the cream and press gently with flat palms for about 3 seconds. You want even contact, not downward pressure.
- Peel and set flat. Lift the paper straight up and lay it color-side-up on a clean surface.
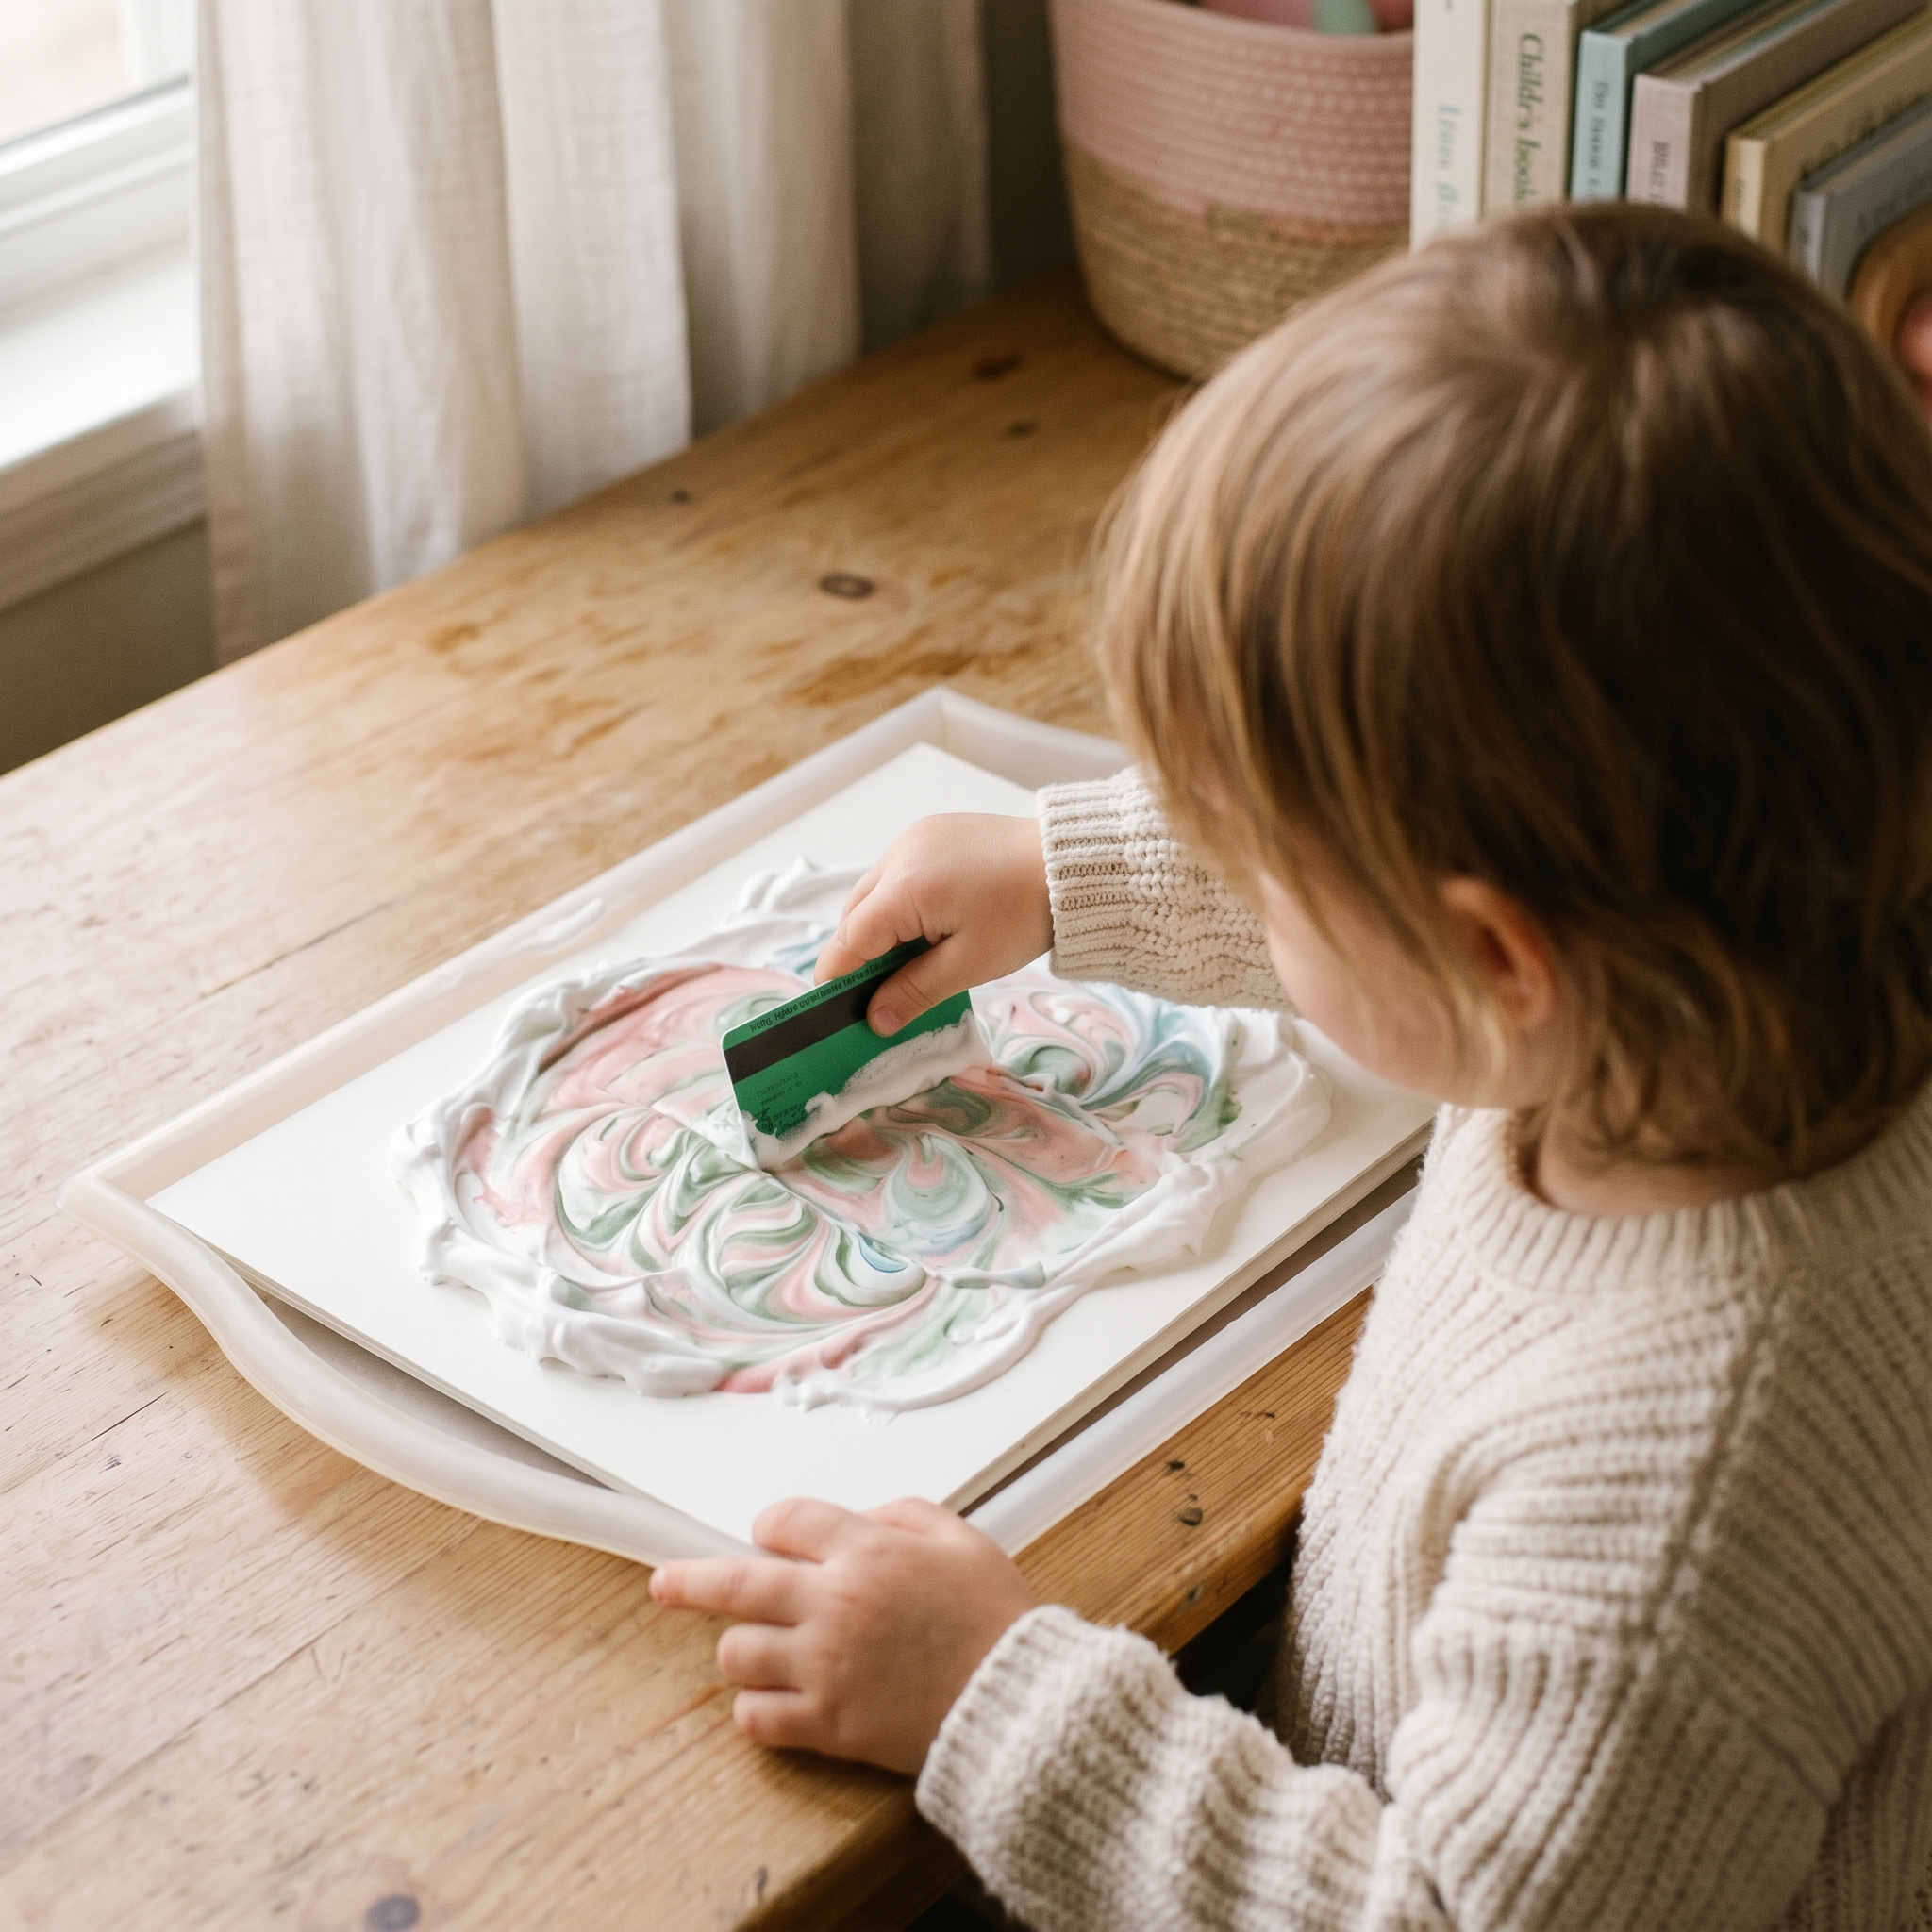
- Scrape off the cream. Use your cardboard strip or credit card to scrape the shaving cream off in one smooth stroke. The marbled pattern is already there underneath, dry to the touch.
- Repeat. You can usually get 3–4 prints from one tray before the color gets too muddy. Just add fresh drops of color between rounds.
Shaving Cream Art Variations
Once your kids nail the basic technique, there’s a lot of room to branch out. These variations cover different ages, materials, and finished uses.
Shaving Cream Art with Acrylic Paint
Acrylic paint works beautifully here, but it dries faster on the cream surface than food coloring does. Press and scrape within 60–90 seconds of laying the paper down or the transfer gets patchy. Acrylics work especially well on small canvas panels (6×6 or 8×10) because the finished piece looks frame-ready. Just clean your tools before the acrylic sets or you’ll be chipping paint off a chopstick.
Shaving Cream Painting Directly on the Tray (Toddler-Friendly)
Skip the paper transfer entirely for the under-3 crowd. Spray foam onto a tray, add a little color, and let them finger-paint right in it. There’s no finished product to hang up, but that’s fine. For toddlers, squishing cold foam between their fingers is the whole point. Just keep an eye on them and redirect if they try to taste it. Shaving cream isn’t meant to be eaten. According to ZERO TO THREE at the Building Problem Solving Skills resource, shaving cream as an art medium gives young children a chance to experiment, draw, and practice early mark-making skills in a low-stakes, sensory-rich way.
Shaving Cream Art on Canvas
Press a pre-gessoed canvas (unframed) the same way you’d press paper. The texture of the canvas grabs the color well. Use acrylic craft paint for this version since it adheres better to canvas than watercolors do. Let it dry for a full 24 hours before handling or framing.
Holiday and Seasonal Color Palettes
The marbled pattern changes completely depending on the colors you choose. Red, green, and gold make beautiful Christmas wrapping paper. Orange, black, and purple work for Halloween gift bags. Pastel pink, yellow, and mint are perfect for Easter. Swapping the palette is the easiest way to keep this activity fresh across the whole year.
Shaving Cream Marbled Gift Wrap
Grab a larger baking sheet and a roll of white butcher paper or kraft paper. The process is identical. Trim your finished sheets to wrap small gifts like books, candles, or jars. Kids love knowing their wrapping paper is one-of-a-kind. It also makes holiday prep feel like an activity rather than a chore.
Pro Tips and Troubleshooting
Most tutorials just show you the successful version. Here’s what to do when things go sideways.
| Problem | Fix |
|---|---|
| Colors look muddy or brown | You over-swirled. Limit to 4–6 strokes and use contrasting hues, not analogous colors that blend into each other |
| Pattern didn’t transfer to the paper | Paper was probably too thin (under 60 lb). Try cardstock next time and press more evenly with flat palms |
| Cream slides off the paper when scraping | The tray was overfilled. Aim for ½ inch of cream depth, not more |
| Colors bleed and spread too fast | Your food coloring is too diluted. Switch to undiluted liquid watercolors for sharper, cleaner lines |
| Dried paper feels stiff or slightly waxy | Totally normal. A small amount of shaving cream residue creates a slight sheen. It actually looks intentional once it’s dry |
The one rule worth repeating: always use foaming shaving cream, never gel. Gel can’t form the fluffy, pigment-suspending base that makes this technique work.
Age-Specific Setup Tips
Most guides say this is “great for ages 3 and up” and leave it there. Here’s what that actually looks like across different ages and what small adjustments make a big difference.
For Toddlers (Ages 2–3)
Skip the swirling step. Let them drop color onto the foam and press the paper without any swirling at all. The act of peeling the paper up and finding the print underneath is its own magical moment at this age. Use droppers instead of pouring food coloring directly, and do the whole activity on a high-chair tray to contain the spray. Expect the sensory experience of squishing foam to be more interesting than the finished art, and that’s perfectly fine.
For more low-prep, stay-home activity ideas at this age, indoor toddler activities for rainy days has a solid rotation worth bookmarking.
For Preschoolers (Ages 4–5)
Let them do the swirling with a chopstick. It’s great fine motor practice and they feel like they’re in charge of the whole process, which they basically are. Have them predict what the pattern will look like before they peel the paper. Do four or five prints in a session and let them pick their favorite to hang up as “real” art. Seeing it on the wall does something for a preschooler’s confidence.
For Big Kids (Ages 6–10)
Give them a creative constraint. Challenge them to use only warm tones or only cool tones in a single print. Introduce acrylic paint on canvas for a more permanent result. Let them upcycle their finished prints into handmade greeting cards or book covers. Kids this age also love the chemistry-style question of why the color sticks to paper and not to the foam, which is a good conversation starter if you want to extend the activity.
What to Do With Your Shaving Cream Art
Finished prints are more versatile than they look. Here are specific ways to use them instead of letting them pile up on the counter.
- Handmade greeting cards: fold a 5×7 print in half and write inside with a Sharpie
- Custom gift wrap: use a larger pan with butcher paper and wrap small books, candles, or jars
- Book covers: the classic school-book-cover technique, but actually beautiful
- Framed wall art: even a simple black frame from a dollar store makes a 5×7 print look polished
- Journaling and scrapbook borders: tear strips from finished sheets for decorative edges
- Homemade stationery set: make six to eight prints on cardstock and mail them as notes; kids feel proud of sending “real mail”
Frequently Asked Questions About Shaving Cream Art
How do you use shaving cream for art?
Spray foamy shaving cream (not gel) into a shallow tray to form a layer about ½ inch deep. Drop liquid watercolors or food coloring onto the surface and swirl gently with a skewer, about 4–6 passes. Press a piece of cardstock face-down for roughly 3 seconds, then lift it off and scrape away the cream with a flat edge. The marbled pattern transfers to the paper and is dry to the touch almost immediately.
Does shaving cream art dry?
Yes, almost immediately. The paint binds to the paper fibers during the press-and-scrape step, so the finished print is essentially dry the moment the cream is removed. You won’t need to wait for a drying period the way you would with watercolor or tempera painting. This is part of what makes it such a practical activity for younger kids with short attention spans.
Can you do shaving cream art with acrylic paint?
Yes, but you’ll need to work a little faster. Acrylics dry faster on the cream surface than food coloring or liquid watercolors, so press and scrape within 60–90 seconds of laying the paper down. Acrylic paint is especially good for canvas panels and produces a bolder, slightly more opaque pattern than watercolor-based options.
What kind of paper works best for shaving cream marbling?
Cardstock at 65 lb or heavier gives the crispest results because it’s stiff enough to peel off the cream in one clean piece without tearing or warping. Watercolor paper also works well. Standard 20 lb copy paper can work in a pinch, but it tends to tear at the edges and may wrinkle slightly once the cream is scraped off.
Will food coloring stain my kid’s hands?
Temporarily, yes. Food coloring typically stains skin for one to two washes but comes off fully with soap and water. Liquid watercolors wash off more easily and are worth the small upgrade if staining is a concern. Thin latex or nitrile gloves are another easy fix, especially for kids who are sensitive about messy hands.


