
Candy Cane Sensory Paint (Toddler Christmas Craft)
Candy cane sensory paint is a toddler-friendly Christmas craft where crushed candy cane pieces are mixed into white finger paint, creating a peppermint-scented, textured paint kids use to decorate cardstock candy cane shapes.
Last updated: June 2026
Quick Answer: What Is a Candy Cane Craft for Toddlers?
This particular candy cane craft goes beyond a standard holiday stamp activity. You’re mixing a sensory experience into the painting itself: crushed peppermint pieces add grit and scent to washable finger paint, so your toddler is engaging smell, touch, and sight all at once. No artistic skill required from you or your child. The messier it gets, the more they’re learning.
Everyone says holiday crafts with toddlers need to be quick, clean, and Pinterest-perfect. And sure, that sounds lovely. In practice? Toddlers will find the mess whether you plan for it or not. So you might as well make it intentional, peppermint-scented, and something you’d actually want to hang on the wall.
This craft is best for ages 18 months through 4 years. Prep takes about 10 minutes, the activity runs 15 to 25 minutes depending on how committed your toddler is to the process, and pieces dry in 30 to 45 minutes. That’s one full episode of a cartoon from start to finish.
Safety note: Adult supervision is required at all times during this activity. Crushed candy cane pieces are a choking hazard for young children. Keep the sensory paint mixture out of reach when not in active use, and never leave toddlers unattended with the materials. If a child attempts to eat the paint mixture, redirect immediately with an actual candy cane and supervise closely. The pipe cleaner variation also requires adult oversight, as pipe cleaner ends can be sharp.
What Is Candy Cane Sensory Paint?
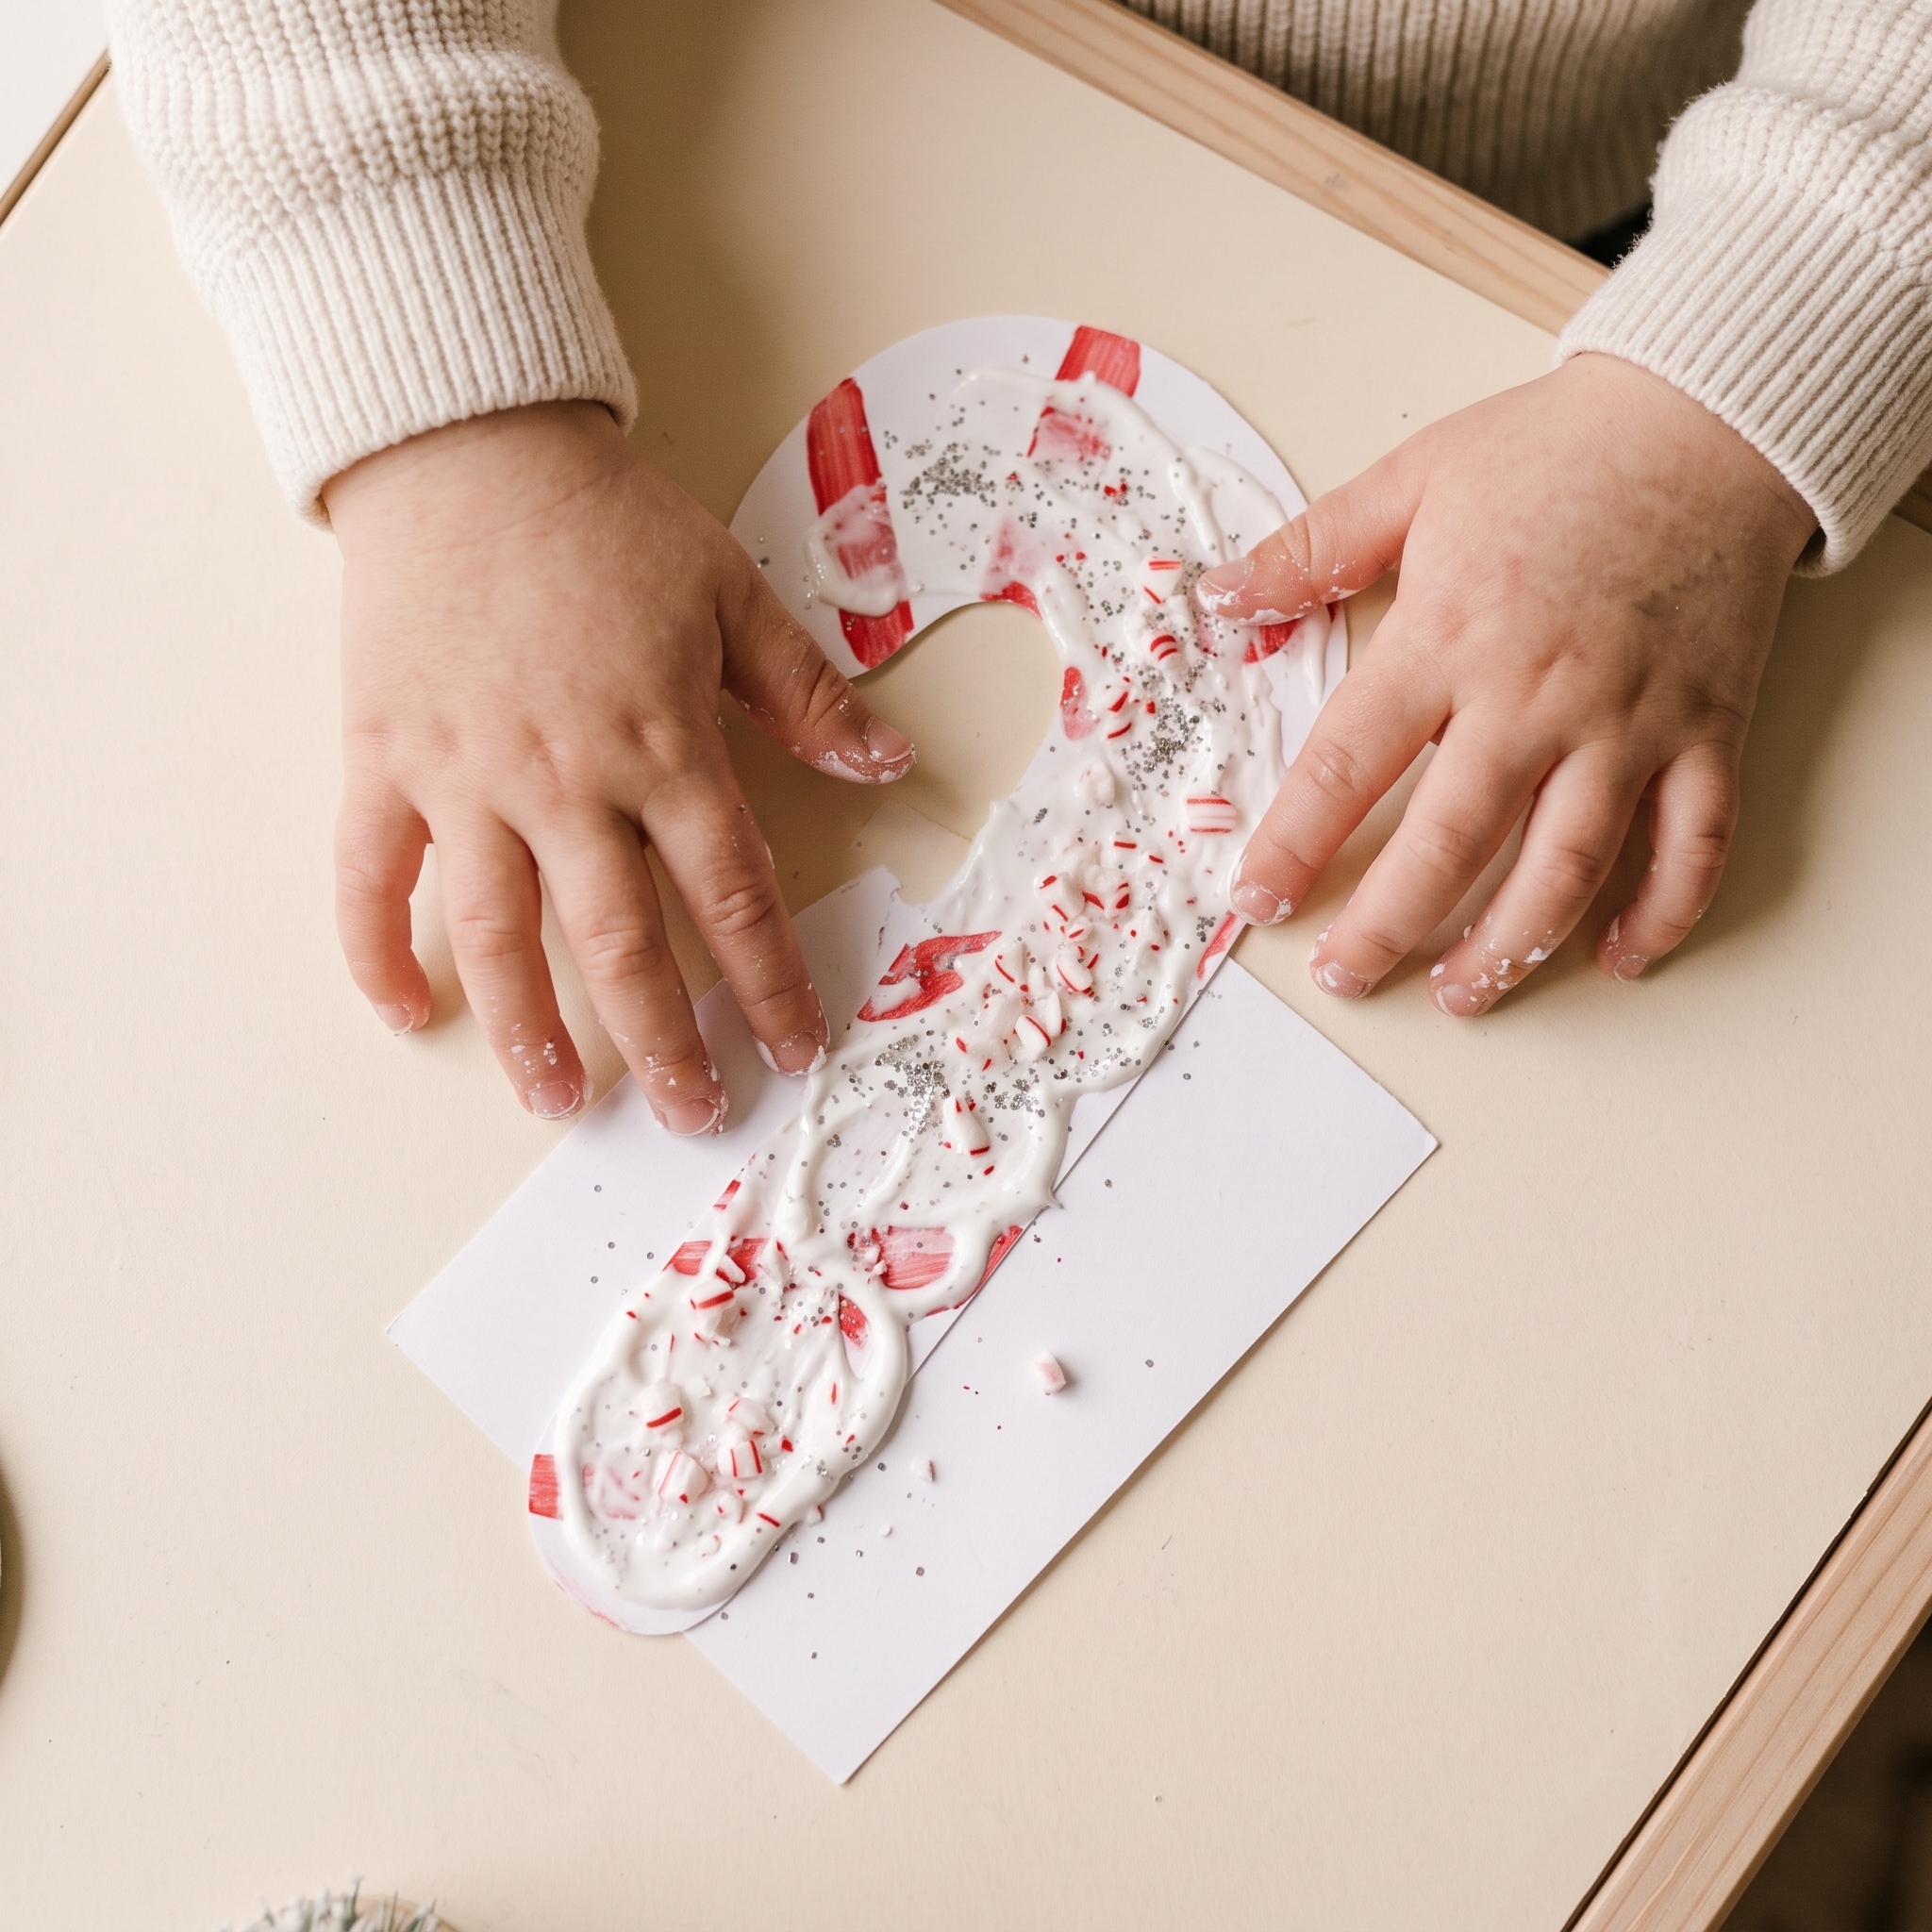
Standard toddler painting is just pigment on paper. Sensory paint adds a second (and third) layer of input. In this case, that means crushed candy cane pieces stirred into white finger paint, which gives the paint a sparkly, gritty texture and a distinct peppermint smell. When your toddler presses their fingers into it, they’re not just seeing color transfer: they’re feeling the crunch of sugar crystals and catching a whiff of mint.
That trifecta of texture, scent, and visual contrast is meaningful for developing brains. According to the American Academy of Pediatrics, play supports brain structure and function by facilitating synapse connections and improving brain plasticity, and sensory-rich play gives that development extra channels to work through. This is also what separates this activity from a basic stamp craft: your toddler is processing information through multiple channels at the same time, not just pressing a shape onto paper.
What You’ll Need
Ingredients and Supplies
- 3 to 4 mini candy canes (or 1 full-size): crushed into approximately 2 tablespoons of a mix of fine dust and small chunks (texture variety is the point)
- ½ cup white washable finger paint: Crayola Washable Finger Paint or Colorations both work well and are non-toxic
- 2 to 3 tablespoons red washable paint: a squeeze bottle gives slightly more stripe control, but a shallow tray works fine
- Pre-cut candy cane shapes from cardstock: use 65 lb. cardstock minimum so the paint doesn’t warp the shape; an 8.5″ x 11″ sheet fits two shapes per page
- A zip-lock bag: for crushing candy canes without sending shards across your kitchen
- A rolling pin or the back of a heavy spoon: for crushing
- A shallow tray or paper plate: for holding each color of paint
- A smock or designated “paint shirt”: non-negotiable unless you enjoy scrubbing red dye off a white onesie at 8 p.m.
- Optional, for the 3D version: red and white pipe cleaners for a candy cane pipe cleaner craft variation (details below)
How to Set It Up
Here’s exactly how to get this ready in under 10 minutes while your toddler is distracted by the morning cartoon lineup.
- Print or hand-cut your candy cane cardstock shapes. Cut 2 to 3 per child so you have backups when the first one becomes an abstract expressionist piece.
- Place unwrapped candy canes in a sealed zip-lock bag and crush with a rolling pin until you have a mix of fine sugar dust and small chunks. Stop before it becomes a full powder: the texture variety is what makes this sensory. Keep the sealed bag and crushed pieces out of children’s reach until you’re ready to mix.
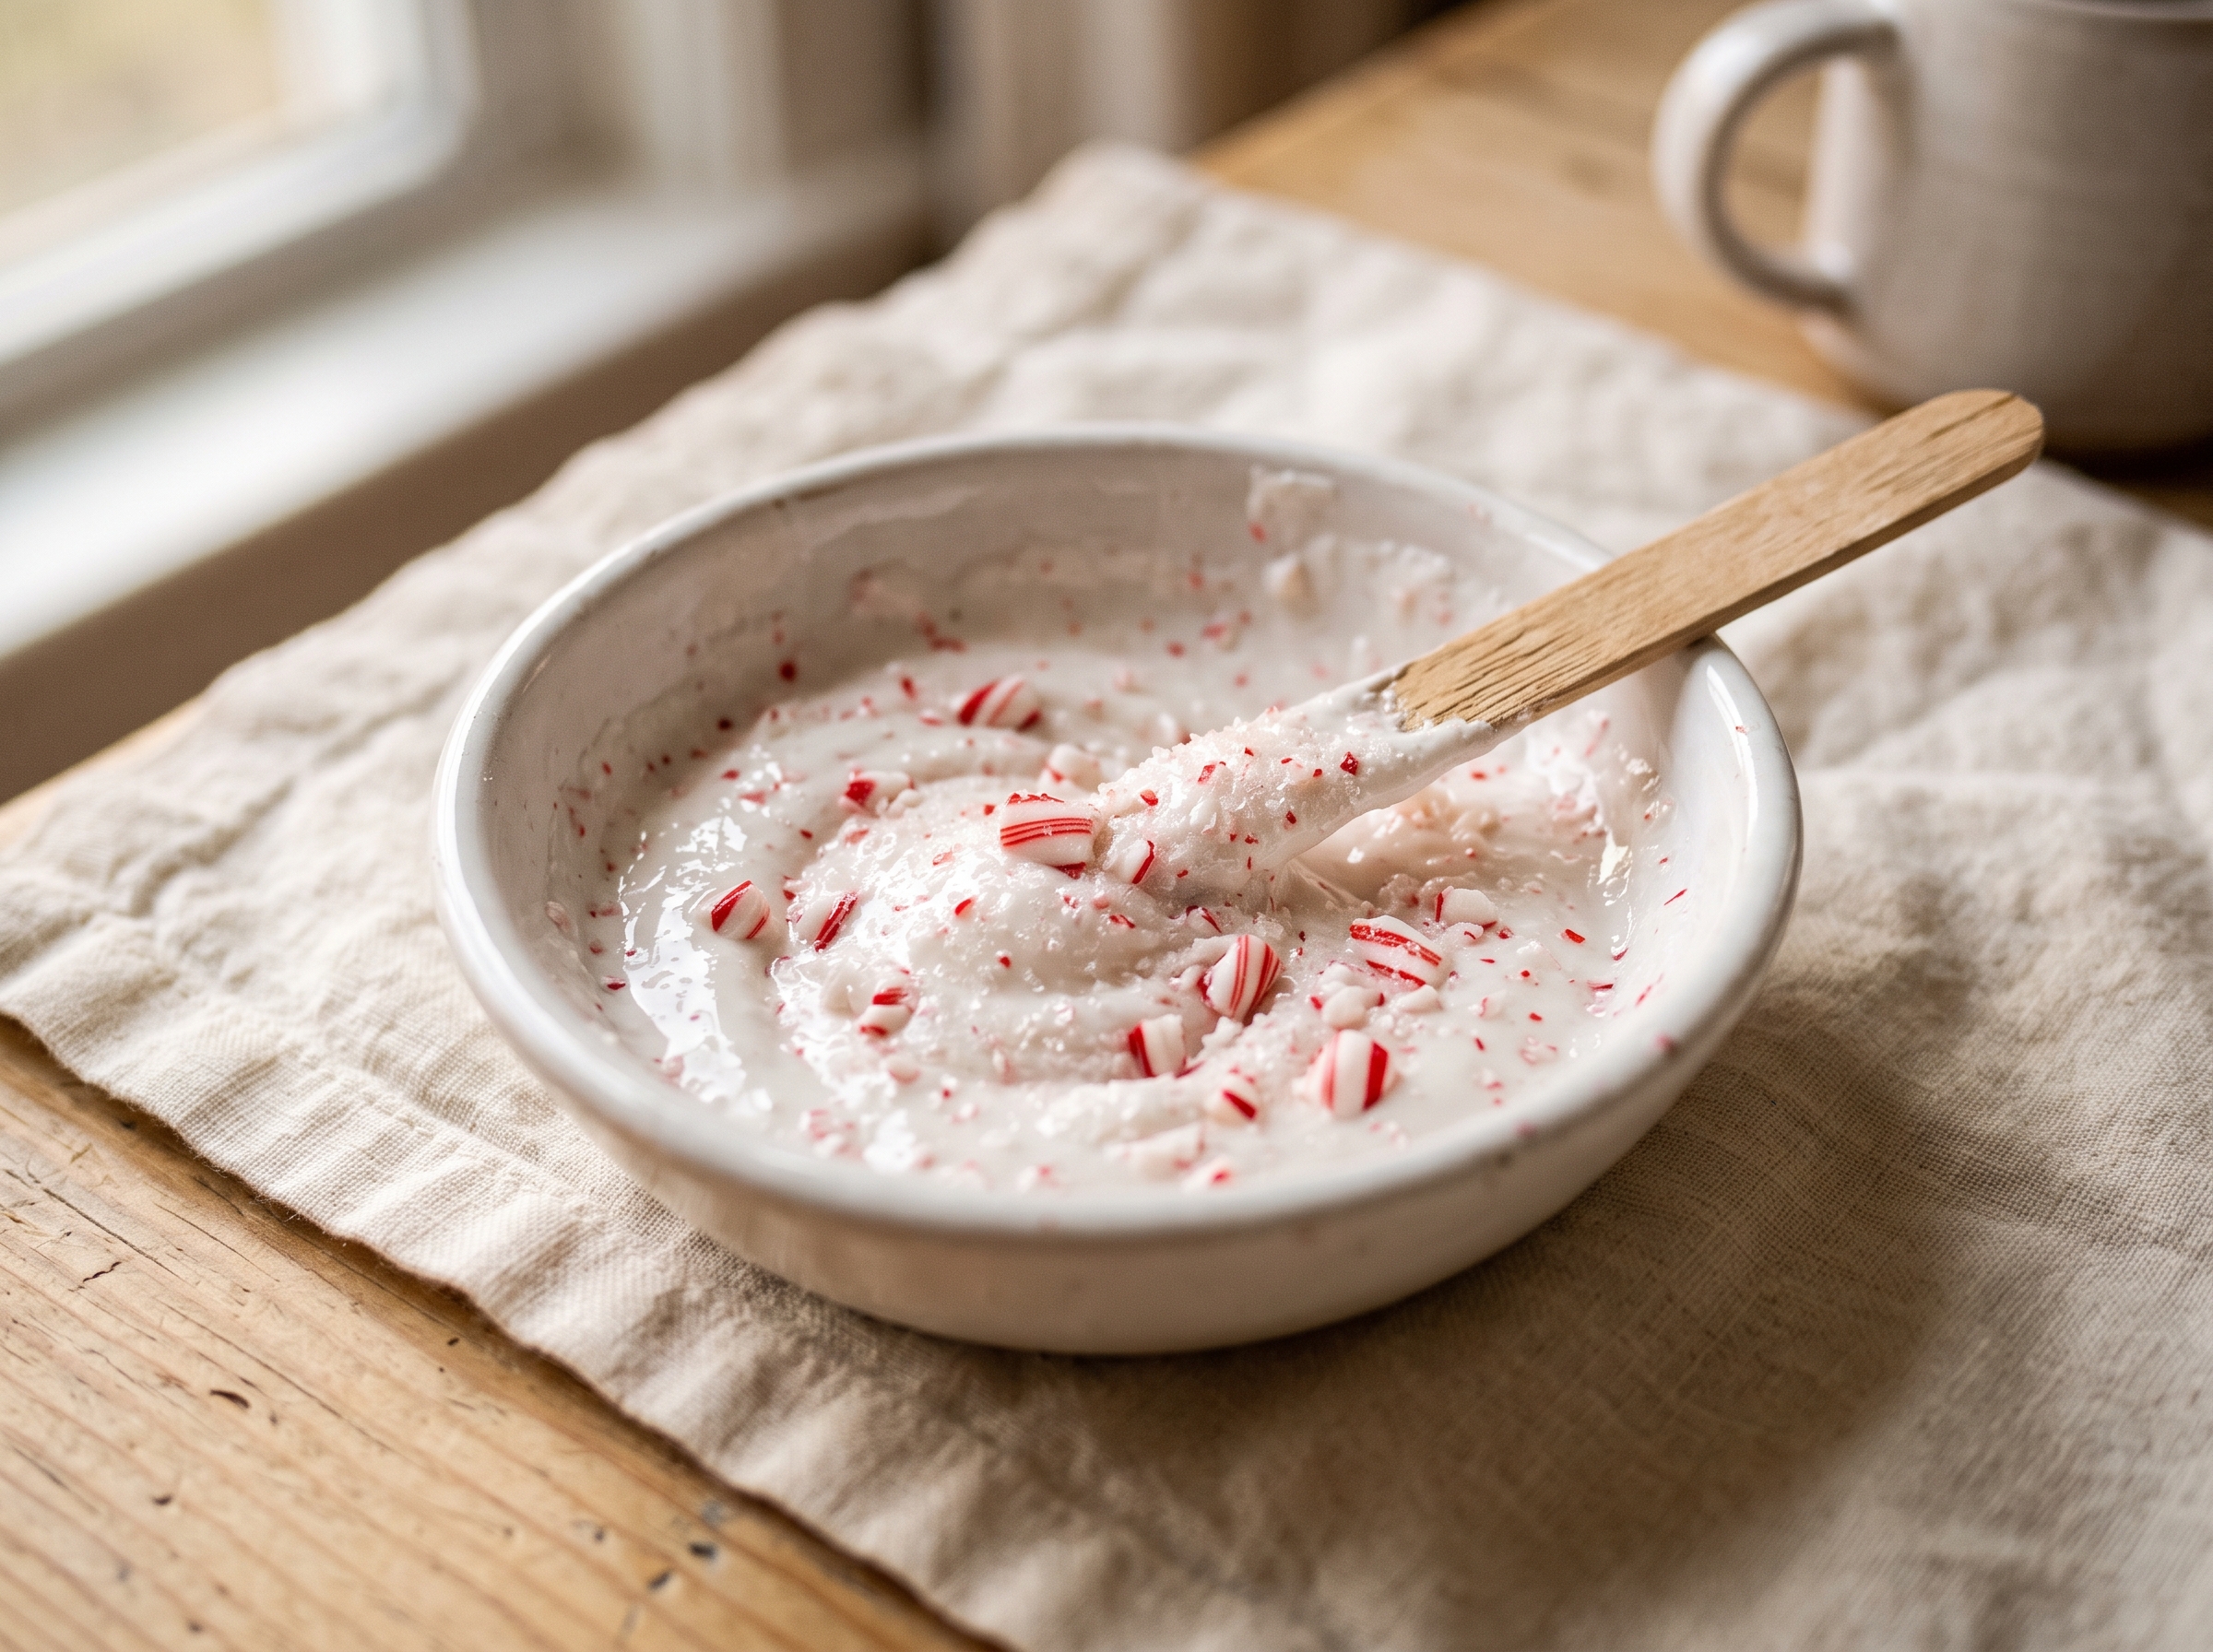
- Pour white finger paint into a shallow tray and stir in the crushed candy cane pieces. The mixture should look speckled and smell like a candy dish at grandma’s house.
- Set red paint in a separate tray or squeeze bottle. Keeping the colors separate at the start gives toddlers the option to make stripes before things inevitably blend.
- Lay a sheet of parchment paper under each cardstock shape. This makes it easy to lift the finished piece without tearing once the paint is wet.
- Let your toddler go. You can guide them toward alternating red and white for a striped look, or let it be completely freeform. Both outcomes are adorable. Stay within arm’s reach throughout the activity.
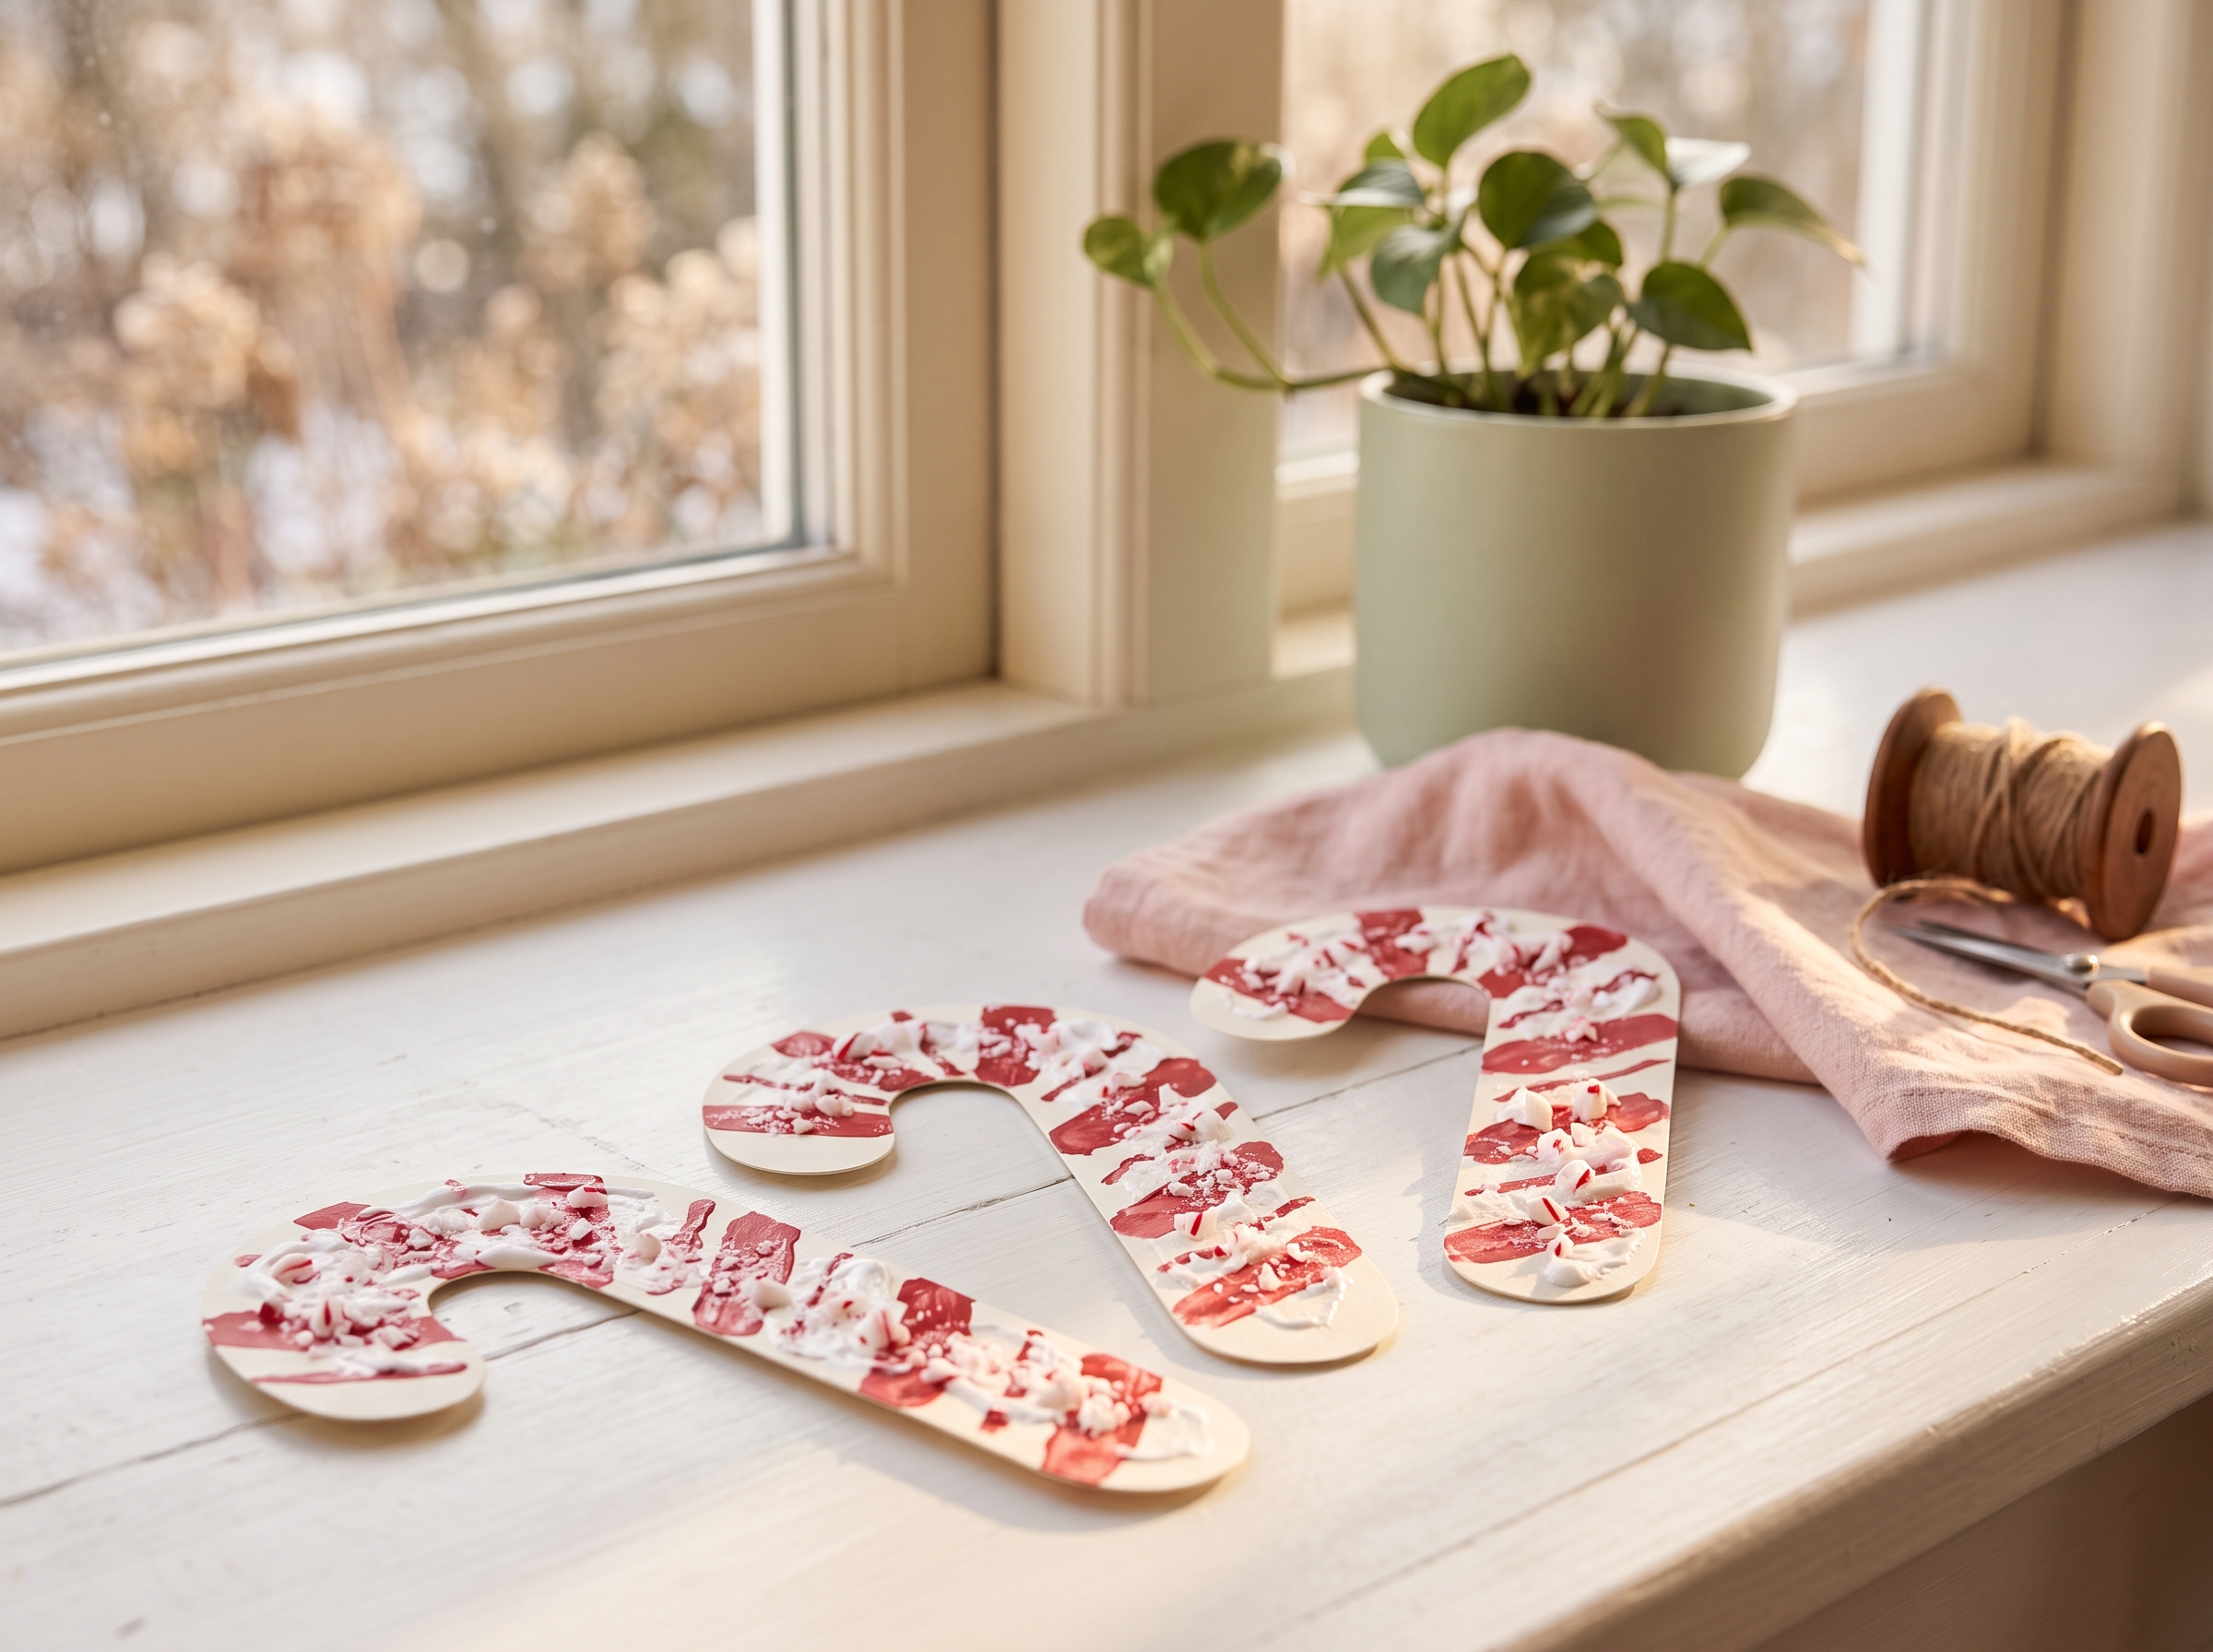
- Set finished pieces flat to dry for 30 to 45 minutes before hanging or displaying. Remove paint trays and any remaining crushed candy cane pieces from the child’s reach once the painting portion is done.
If you’re doing this with a 3- or 4-year-old, try handing them a fork to drag through wet paint for a built-in stripe effect. It’s a small technique upgrade that keeps older toddlers engaged longer and creates a surprisingly polished result.
What Kids Learn (Why This Craft Works Beyond the Cuteness)
This candy cane craft for kids earns its place in the rotation because of what’s happening developmentally, not just aesthetically. If your toddler is anything like most, they won’t sit still for a structured lesson, but they’ll press, smear, and squeeze paint for 20 minutes without blinking.
- Fine motor skills: Pressing, spreading, and pinching paint builds hand and finger strength, which is foundational prep for writing.
- Sensory processing: Engaging peppermint smell, grainy texture, and color contrast simultaneously supports sensory integration in young children.
- Color mixing: When red and white overlap, toddlers see pink appear. It’s an organic, zero-explanation-needed first color mixing lesson.
- Cause and effect: “I press harder, more paint transfers.” Basic physics, toddler edition, no vocabulary required.
- Holiday language building: Stripe, sticky, smooth, red, white, peppermint. Natural opportunities to expand vocabulary without it feeling like school.
If you’re looking for more ways to build these same skills at home, toddler learning activities that use everyday items are a great companion resource for rainy-day routines, and our toddler sensory activities guide has more easy setups if this one’s a hit.
3 Fun Variations to Try
Candy Cane Reindeer Craft (Turn the Candy Cane Upside Down)
Once the painted candy cane shape is dry, flip it upside down. The hook at the top becomes a set of antlers. Add two googly eyes with a glue dot and a small red pom-pom for the nose, and you have a candy cane reindeer craft your toddler can finish in one sitting. Googly eyes and pom-poms are small enough to be a choking risk if they work loose, so I stay hands-on for this step and check that the glue dots have fully set before a younger toddler gets to hold the finished piece.
This version doubles as an ornament: punch a small hole at the base of the hook before painting, thread through a piece of twine, and it’s ready to hang. It’s one of those candy cane craft ideas that looks like it took way more effort than it did, which is exactly the kind of holiday craft win every parent deserves.
Candy Cane Pipe Cleaner Craft (3D Version for Older Kids)
For a no-paint alternative, a candy cane pipe cleaner craft skips the mess entirely. Start with one red and one white pipe cleaner. Line them up side by side and spiral-twist them together, alternating color sections as you go in approximately one-inch segments. Bend the top 1.5 inches into the classic hook shape. Adult supervision is needed throughout, as pipe cleaner ends can be sharp.
The result is a tactile, 3D ornament that holds its shape well. Older kids (ages 4 and up) can manage the twisting mostly independently. Pair it with a painted version as a set, and you’ve got a toddler-made gift that grandparents will keep.
Stamped Wrapping Paper Version
Cut a candy cane shape from a thick sponge or dense foam sheet and use it as a stamp on plain kraft paper. Kids dip the stamp into red and white paint and repeat across the paper for DIY gift wrap. This works well for ages 3 to 5 who want a bigger-kid version of the same activity. It uses up leftover paint, stretches the craft into two sessions, and means at least some of your holiday wrapping looks intentionally handmade.
Tips for Making This Easier (Mom Shortcuts That Actually Help)
In my experience, the more setup you can do ahead of time, the longer the activity lasts before someone has a meltdown (you or them).
- Pre-crush the night before: Seal crushed candy cane pieces in a small jar the evening before. It saves five minutes of setup and removes one chaotic step from the morning. Store the jar out of children’s reach.
- Use a shower curtain liner as a drop cloth: It wipes clean, doesn’t absorb paint, and you can shake it outside and reuse it. Far better than paper towels layered three deep.
- Have a treat on standby: If your toddler tries to eat the paint (and they will try), a real candy cane works as a snack redirect once a child is old enough for hard candy. Crayola Washable Finger Paint is non-toxic, but the sensory mix isn’t intended as food either way. One important caveat: hard candy, including candy canes, is a choking hazard for kids under about 4, so for my youngest painters I skip the real candy cane and redirect with something soft instead, like a peppermint-flavored yogurt pouch, and I keep any candy canes (whole or broken) well out of reach during the craft.
- Make 4 to 6 shapes at once: Extras dry into sweet gift tags or card inserts for grandparents, teachers, or neighbors. One setup, multiple uses.
- Embrace the chaos strategically: If you’re already in paint mode, this is a natural session to try no-mess painting techniques alongside for toddlers who want sensory input without the full cleanup commitment.
Frequently Asked Questions About Candy Cane Crafts for Kids
What is the easiest candy cane craft for toddlers?
The sensory paint version in this guide is one of the simplest: you need crushed candy canes, washable finger paint, and a cardstock shape. Total time from setup to finished piece is under 35 minutes. Always supervise toddlers closely during this activity, as the crushed candy cane pieces are a choking hazard. For a completely no-mess alternative, the pipe cleaner twist version requires zero paint and works well for toddlers who prefer to keep their hands clean (they exist, rarely, but they exist).
Can I use a template to cut the candy cane shapes?
Yes, and it’s worth doing. You can find free printable candy cane templates with a quick search, or simply trace the outline of an actual candy cane onto cardstock freehand. Use 65 lb. cardstock at minimum: anything lighter tends to warp and curl as the wet paint dries, and the shape won’t lie flat for display.
How do I make a candy cane reindeer craft with toddlers?
Start with a finished painted candy cane shape and let it dry fully. Flip it upside down so the hook becomes antlers. Attach two googly eyes using a glue dot, then press a small red pom-pom below the eyes for the nose. That’s the whole thing. It works well for ages 2 and up, and the assembly takes about three minutes once the base is dry.
What can I make with candy cane pipe cleaners?
The twisted ornament version covered above is the classic. You can also twist a single pipe cleaner into a candy cane shape and use several linked together as a garland chain. For older kids (5 and up), pipe cleaner candy canes can be shaped into a headband accent by securing the twisted cane to a plain headband with a few extra wraps of the pipe cleaner around the band. It’s a surprisingly sturdy little accessory that holds up through a full school holiday party.
Are there candy cane craft ideas that work for older kids too?
The stamped wrapping paper version scales well for kids ages 4 and up, and the pipe cleaner craft keeps older kids engaged without talking down to them. For kids 5 and up, look for candy cane starburst mirror tutorials (where individual candy cane shapes radiate out from a central mirror) or candy cane wreath projects using foam or cardboard as a base. Both are solid next-level options once the toddler version has been thoroughly mastered.


