
Button Pumpkin Craft for Kids
A button pumpkin craft is a kid-friendly art project where colorful buttons are glued onto a pumpkin-shaped cardstock cutout to create a textured, dimensional fall decoration ready in under 30 minutes.
Last updated: July 2026
Quick Answer: Button Pumpkin Craft
A button pumpkin craft starts with a simple pumpkin shape drawn on cardstock, colored orange so any gaps between buttons disappear, then layered with buttons of all sizes using tacky glue. Kids ages 3 and up can handle most of the steps themselves. The finished piece is dimensional, tactile, and wall-worthy. No paint, no glitter (unless you want it), and cleanup is basically just putting the lid back on the glue.
Everyone assumes fall crafts for kids have to involve messy paint or complicated cutting. Honestly? Not always. Some of the most striking seasonal projects come from the simplest ideas, and this one proves it. The button pumpkin craft shows up on mantles and classroom walls every October for a reason: it’s forgiving, flexible for a wide age range, and the result looks like you tried much harder than you did. If you’ve got a jar of old buttons and a sheet of cardstock, you’re already most of the way there.
Kids ages 3 through 10 all get something different out of this project. A three-year-old loves the sensory experience of picking up and pressing buttons. A nine-year-old wants to engineer the perfect layered arrangement. Both end up proud of what they made, which is the whole point.
Why Kids Love This Button Pumpkin Craft (And Why Moms Do Too)
Buttons are a surprisingly rich sensory material. They come in different sizes, weights, and finishes: matte, shiny, iridescent, faceted. For younger kids especially, just sorting through a bowl of them is half the fun before a single drop of glue hits the paper.
There’s also a developmental benefit worth knowing about. Picking up and placing buttons of varying sizes builds the pincer grasp, the fine motor skill that underlies writing, drawing, and scissor use. In my experience, crafts that sneak in skill-building without feeling like work are the ones kids actually want to do again. If your preschooler is working on pre-K readiness, this is a low-frustration way to practice.
For ages 3 to 4, there’s no wrong way to place a button. The open-ended nature of filling in the pumpkin shape keeps frustration low and creative confidence high. For a deeper look at sensory-based activities like this one, toddler sensory activities using everyday materials are a great companion read.
Mom win: this is a legitimate paper pumpkin craft with zero paint mess. The cleanup involves capping the glue and sweeping up any stray buttons. That’s it.
Materials
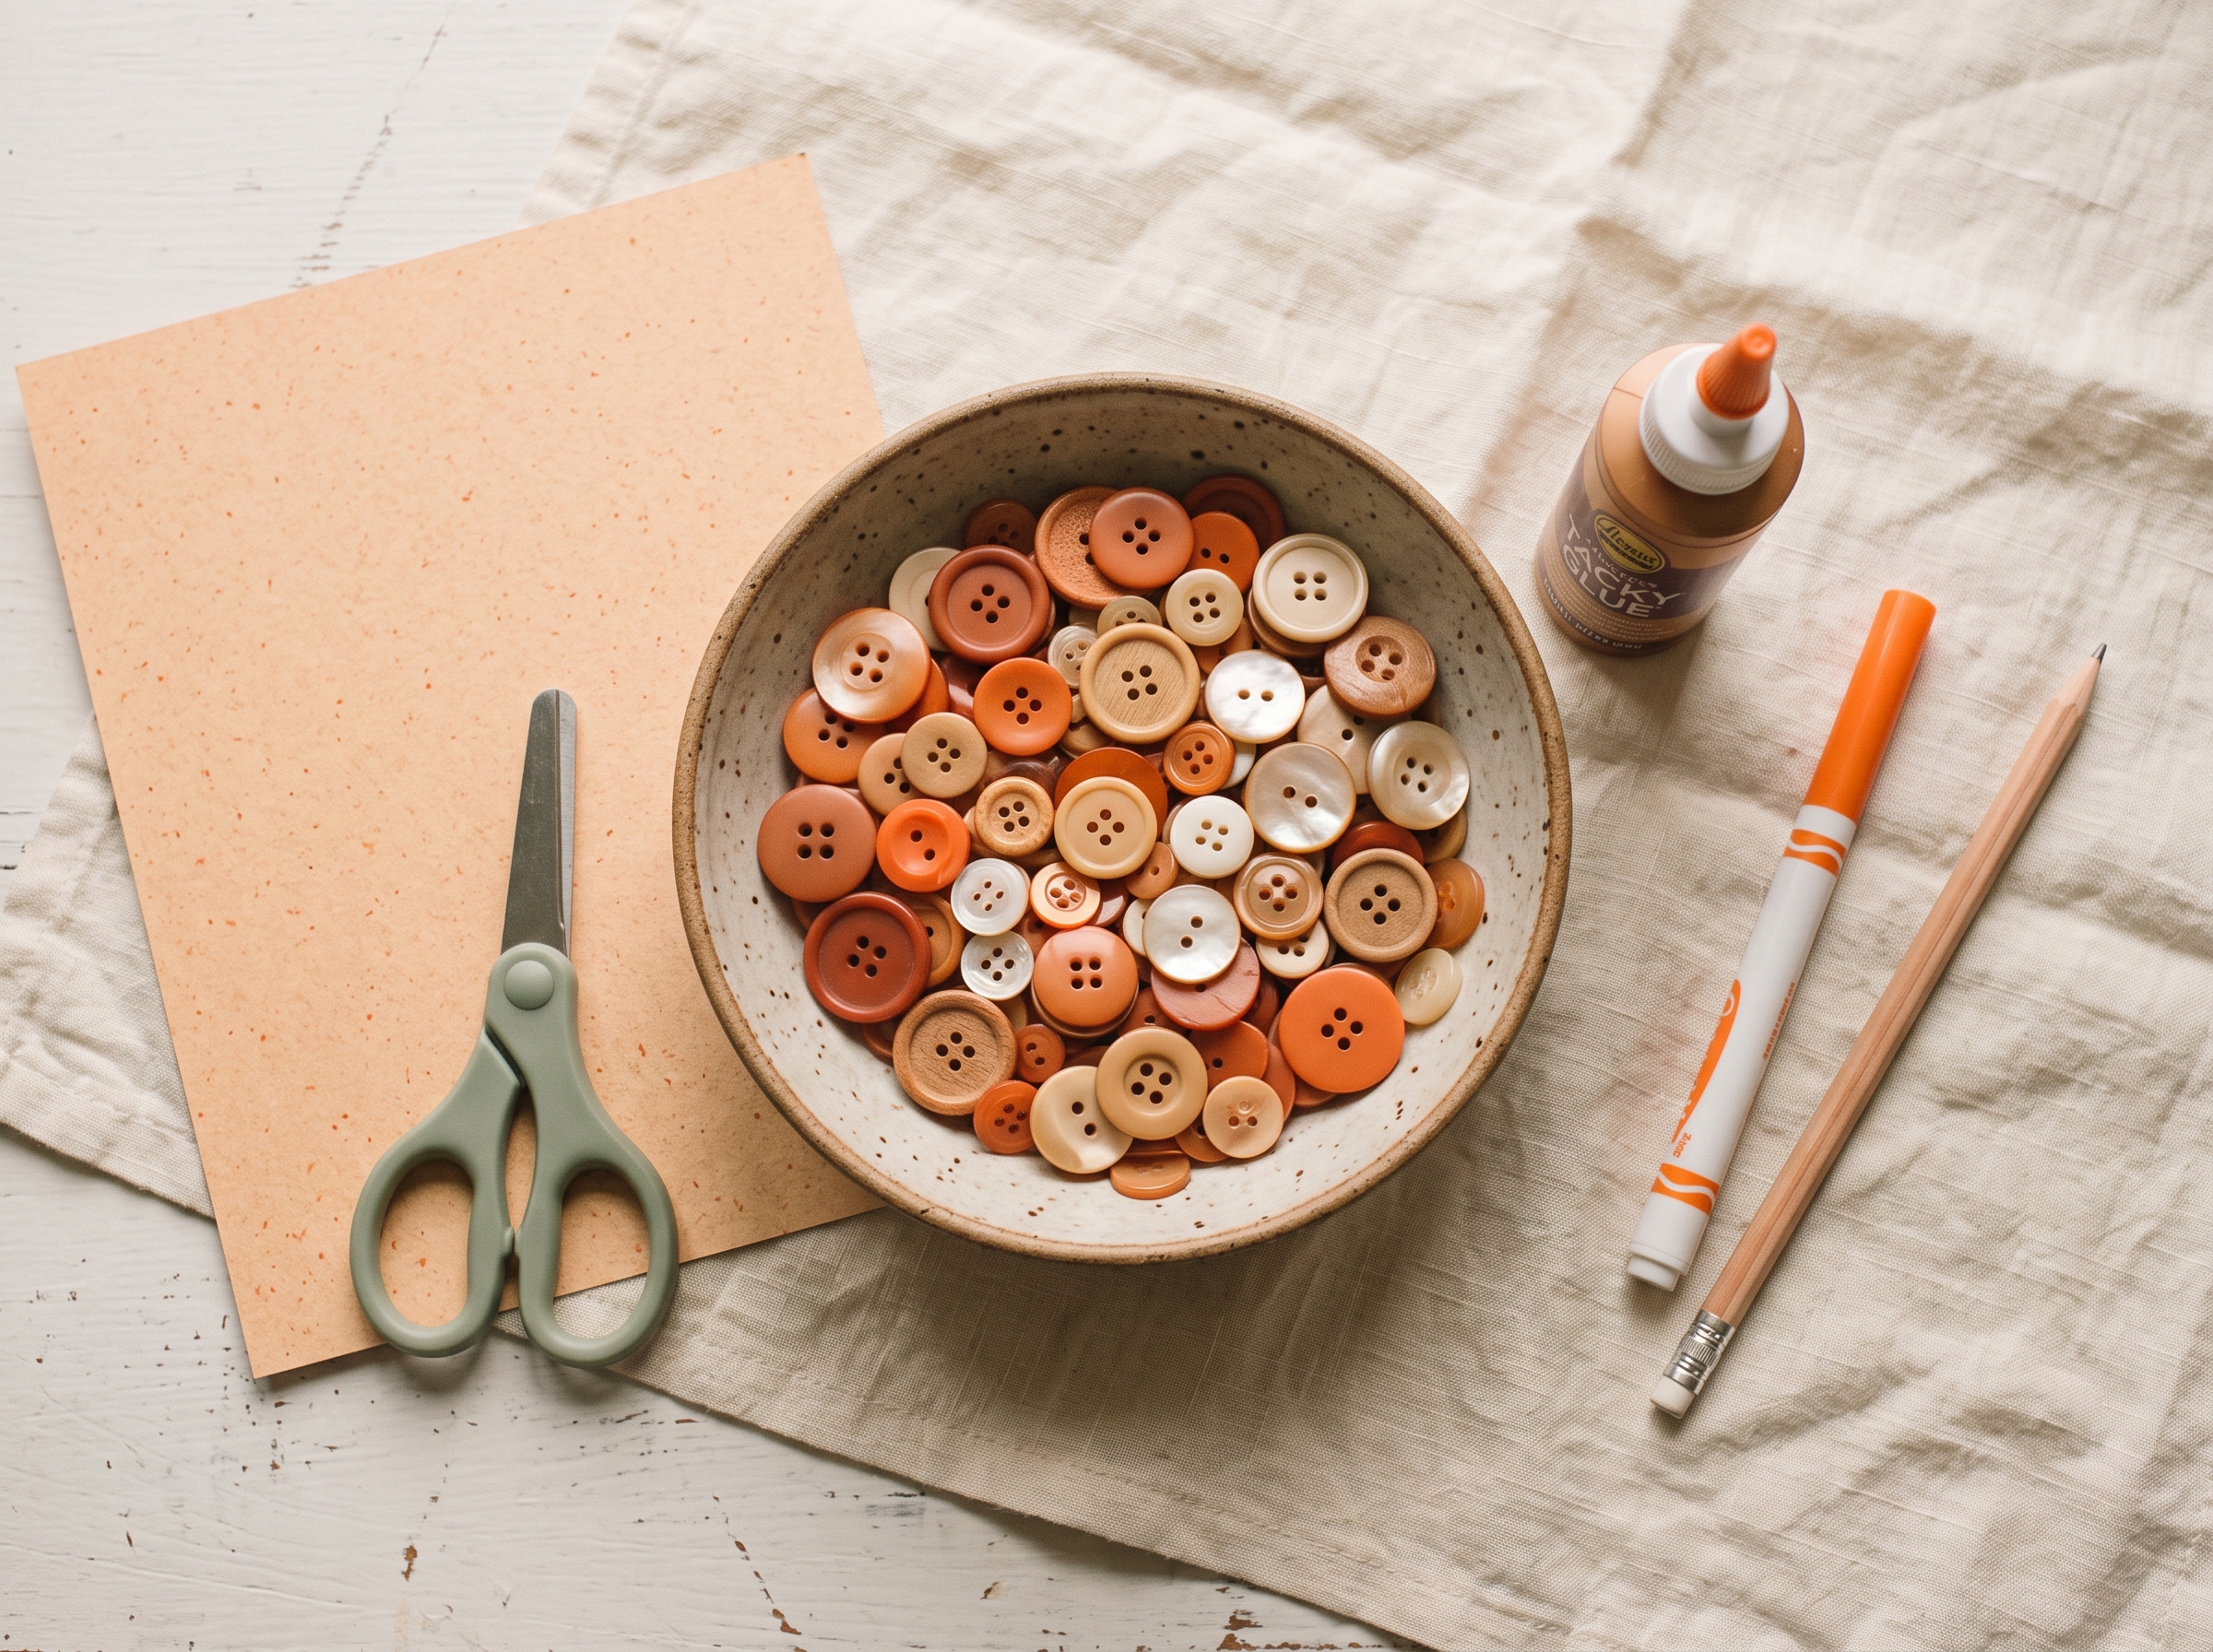
You don’t need much. Here’s what to pull together before you sit down with the kids:
- Orange cardstock (or heavy white cardstock): at least 65 lb. weight so it doesn’t buckle under button weight. If using white cardstock, you’ll color it in the next step.
- Pencil: for sketching your pumpkin outline
- Scissors: for cutting out the shape
- Orange marker or crayon: to color the cardstock inside the pumpkin before adding buttons
- Tacky glue or a low-temp glue gun: tacky glue (such as Aleene’s Tacky Glue) works best for ages 3 to 7; a low-temp glue gun is great for ages 8 and up with supervision
- Assorted orange buttons: aim for 30 to 60 buttons depending on pumpkin size; a mix of sizes from ½ inch to 1 inch works best for that layered, dimensional look
- A few green or brown buttons: 3 to 5 for the stem
- Optional: black cardstock background for display contrast
- Optional: a 4×6 or 5×7 picture frame to display the finished piece
- Optional: orange glitter for a shimmer effect (see Variations below)
The cardstock base is what makes this a proper paper pumpkin craft rather than just a button activity. Regular copy paper will warp under the weight and moisture of the glue, so the cardstock really does matter here.
How to Make a Button Pumpkin Craft (Step-by-Step)
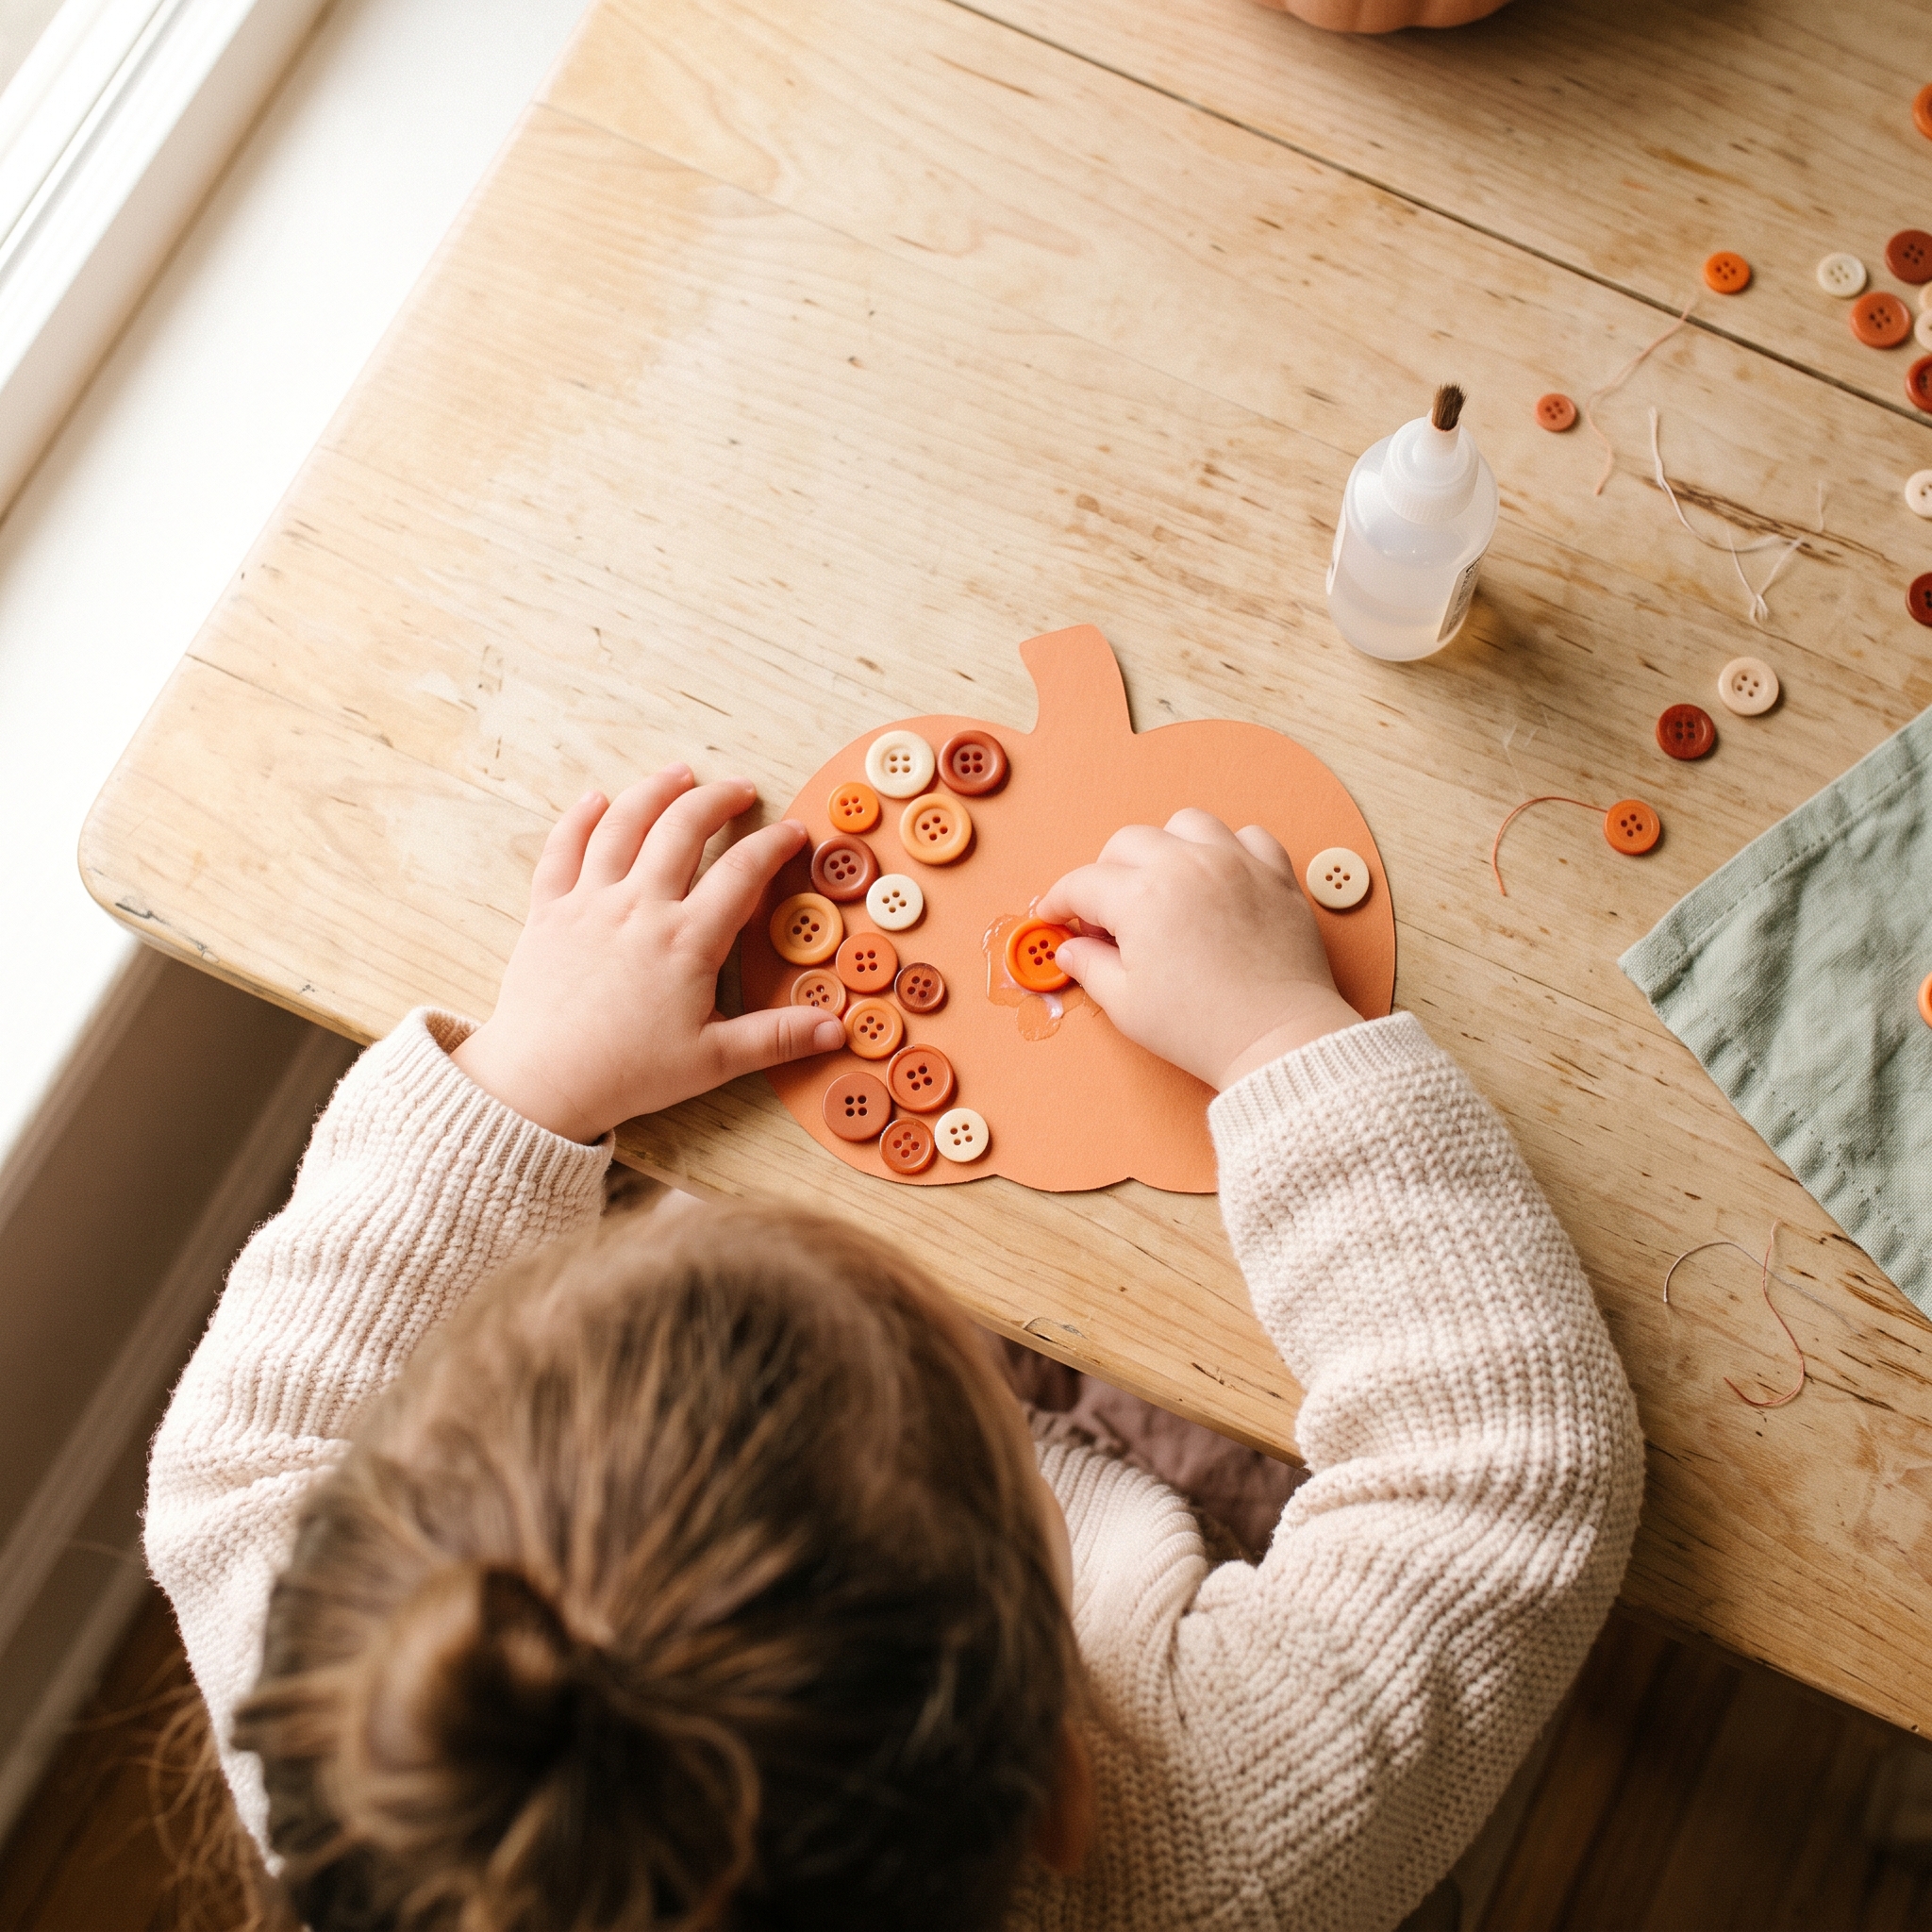
Set up a small bowl of buttons within reach before you start. Giving kids something to pick from keeps the process feel like an invitation rather than an assignment.
- Draw your pumpkin shape on the cardstock. Aim for a shape at least 4 inches wide. No artistic skill needed: three overlapping ovals create a perfectly convincing pumpkin outline. Sketch lightly in pencil.
- Color the inside of the pumpkin shape orange. Use a marker or crayon so any small gaps between buttons blend into the background instead of showing white paper. Skip this step if your cardstock is already orange.
- Cut out the pumpkin shape. Keep the edges as smooth as possible. Jagged edges will show around the button border on the finished piece.
- Squeeze a thin layer of tacky glue over one section of the pumpkin. Work in thirds rather than coating the whole shape at once. Glue dries faster than you think, especially on cardstock.
- Press your largest buttons in first, leaving small gaps between them. Buttons in the ¾ to 1 inch range anchor the layout. Place them with a little breathing room so the smaller ones have somewhere to go.
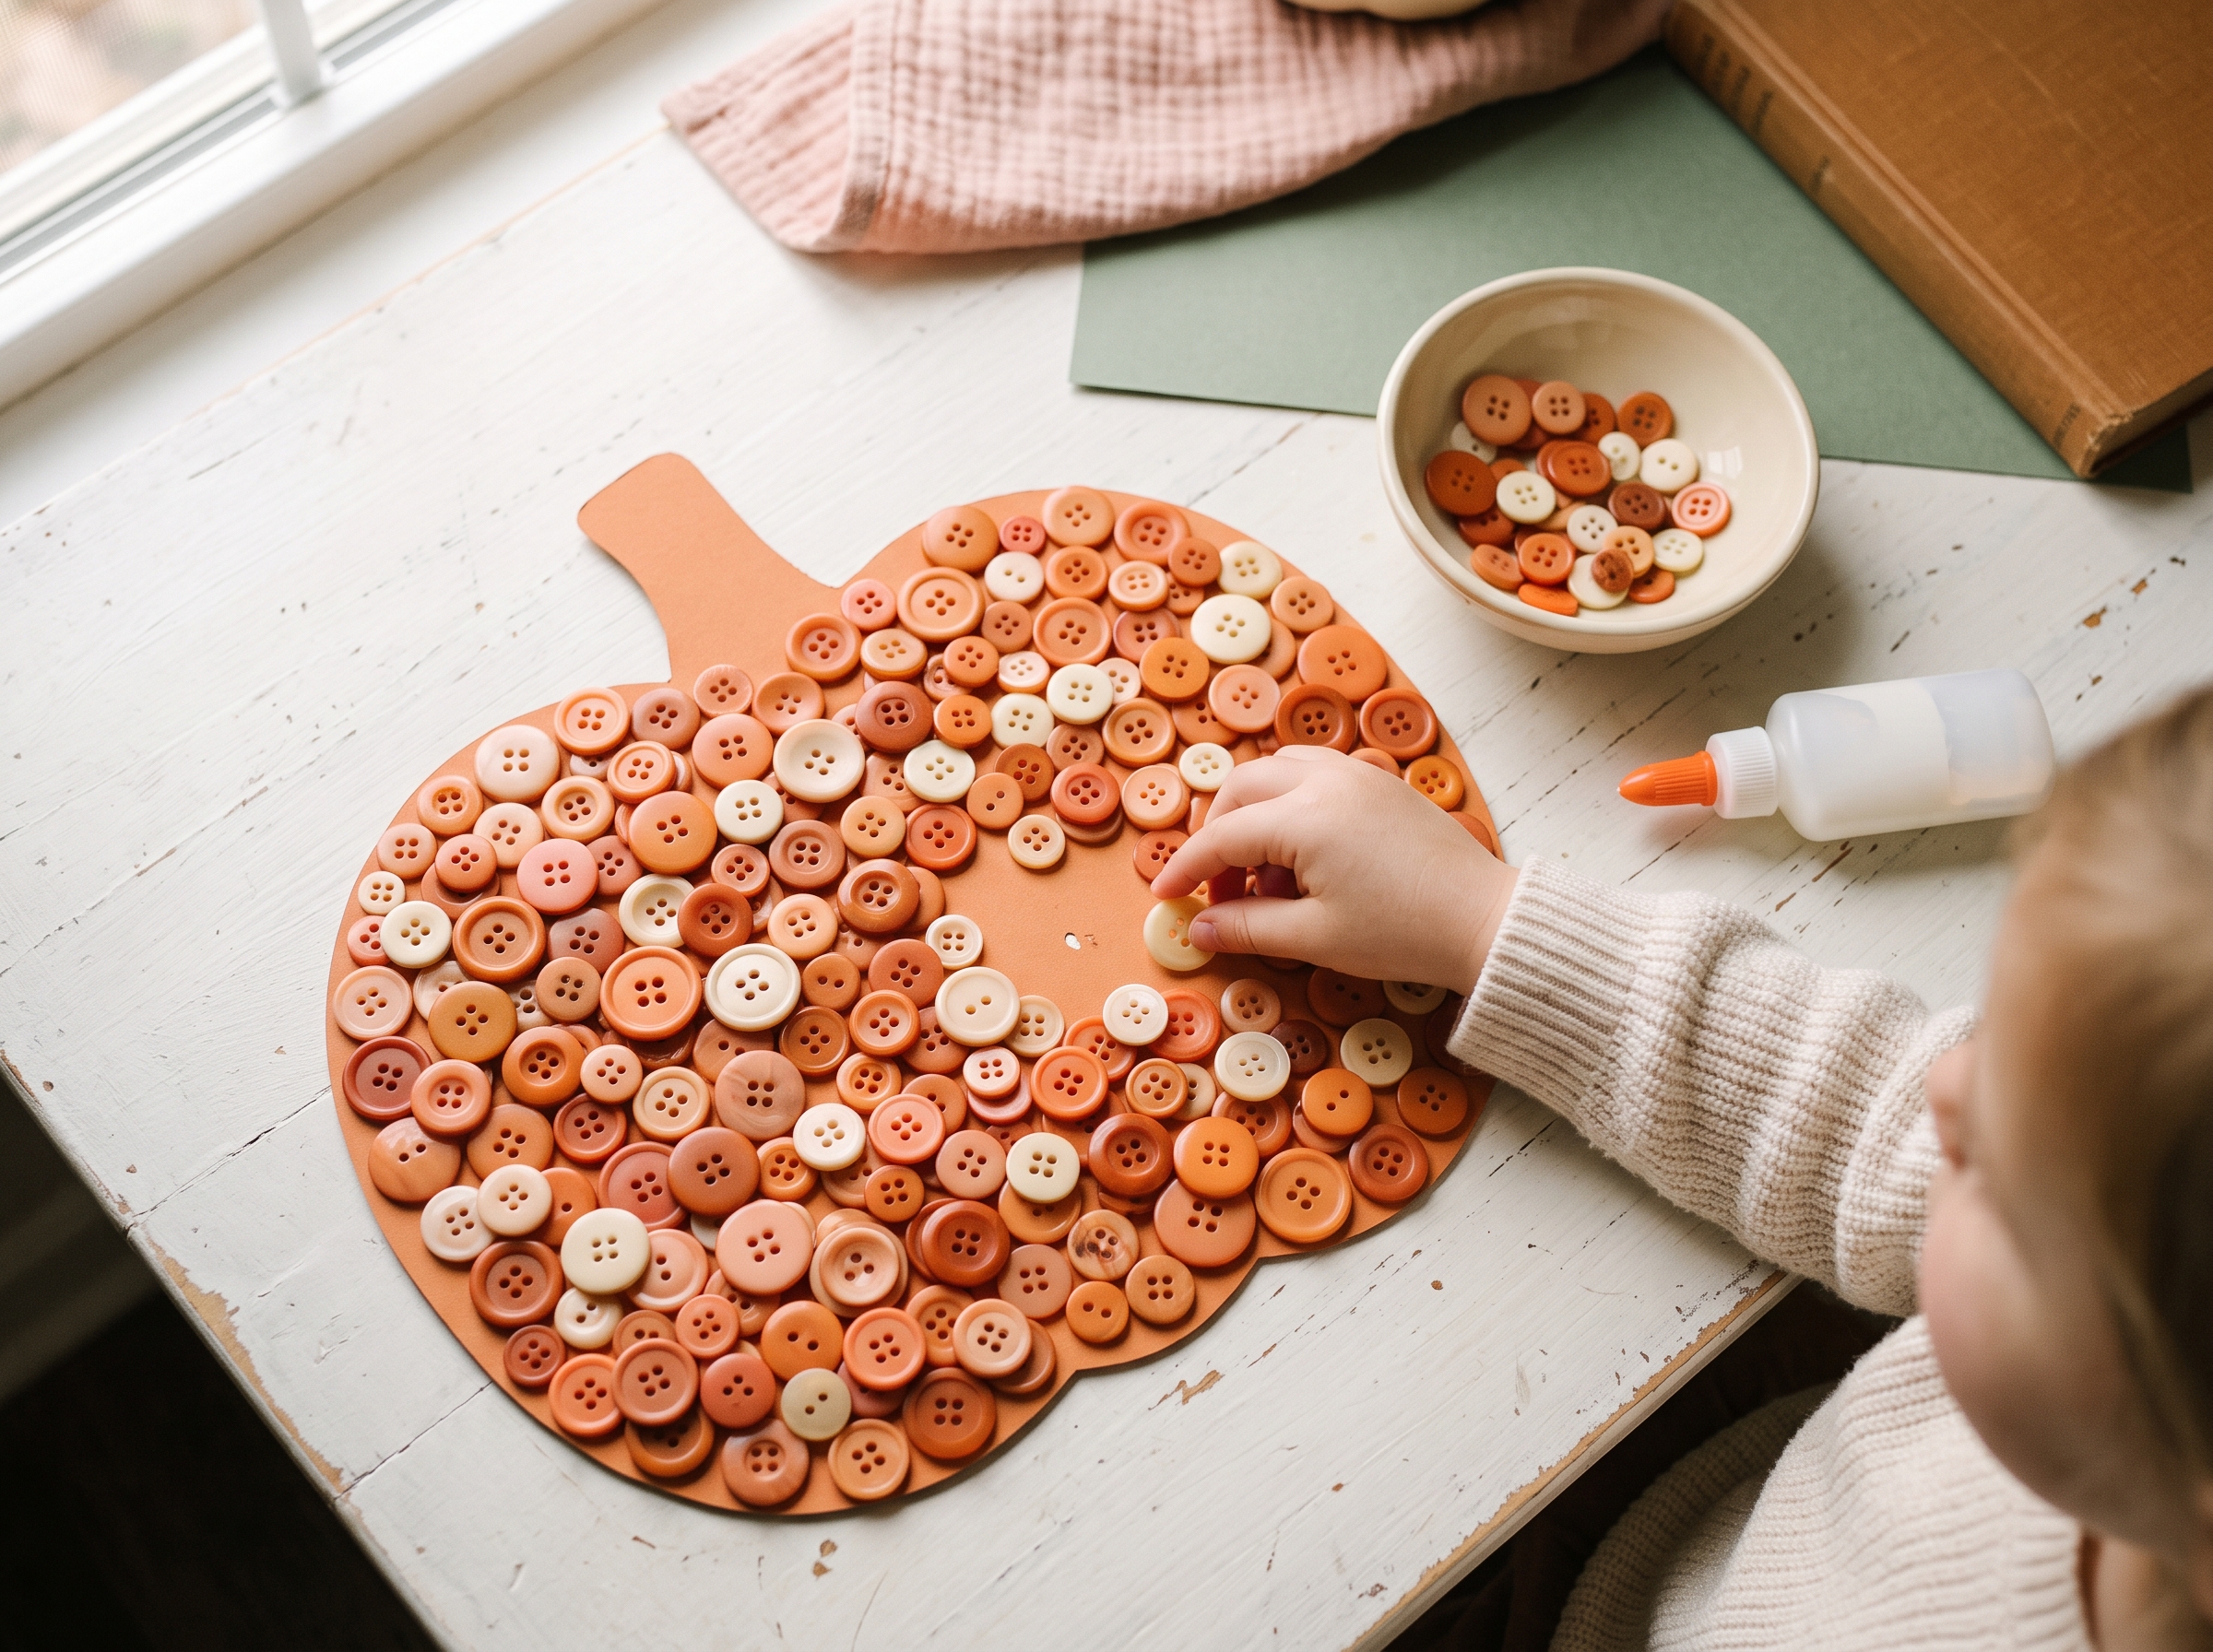
- Fill the gaps with smaller buttons. Aim for at least two layers of coverage in some areas. That extra depth is what gives the finished craft its satisfying, chunky look.
- Add 3 to 5 green or brown buttons at the top for the stem. Alternatively, tear a small stem shape from green construction paper and glue it on. Both work great.
- Let everything dry flat for 15 to 20 minutes before moving, framing, or hanging. Rushing this step is the one thing most likely to lead to a button avalanche.
One technique worth knowing from the packing-tape method: if you prefer a no-glue-gun approach for younger kids, apply overlapping strips of clear packing tape sticky-side-up to the back of a cardstock cutout, then press buttons directly onto the tape. It works well for supervised toddler play and skips the drying time entirely.
Tips for the Best Results
A few small moves make the difference between a craft that looks polished and one that falls apart on the way to the mantle.
- Sort buttons before you start: Two small piles, large and small, saves a lot of mid-project searching. Kids can do the sorting while you prep the glue.
- Use at least 65 lb. cardstock: Regular printer paper cannot handle the weight. If you’re working with a canvas board (an 8×10 is a popular size for this project), you can skip the cutting step entirely and trace the pumpkin directly onto the canvas.
- Tacky glue vs. low-temp hot glue: Tacky glue is non-toxic, slower to dry, and safer for younger kids. A low-temp glue gun bonds faster and holds the second layer of buttons more securely. For kids under 8, stick with tacky glue.
- Apply glue to the button back for the second layer: This is the key to getting that dimensional, sculptural look. Dot glue directly onto the button back and press it onto the first layer. It grips much better than trying to glue into tiny gaps.
- Frame it while the glue is still slightly pliable: Sliding the piece into a frame before everything cures completely lets you adjust the position without damaging the buttons.
For more open-ended fall project ideas that work across different ages, fall activities for families has a solid mix of indoor and outdoor options worth bookmarking for the season.
Button Pumpkin Craft Variations
The basic version is great. These twists make it work for every age and occasion.
Toddler-Friendly Version (Ages 2 to 3)
Pre-draw and pre-cut the pumpkin shape. Use a foam pumpkin base from the Dollar Tree instead of paper. Toddlers can grip and press buttons directly into foam without needing glue. For fully supervised sensory play, a sheet of contact paper sticky-side-up makes a no-glue base that toddlers can manage completely independently. Use only buttons larger than 1.25 inches across, the U.S. Consumer Product Safety Commission’s small-parts choking-hazard threshold for kids under 3, to keep choking risk low (more on safety in the FAQ below).
Simple One-Layer Version (Under 15 Minutes)
A single flat layer of buttons with no overlapping is the fastest path to a finished project. This simple button pumpkin craft version works well for classroom settings, large groups, or days when patience is running low. It still looks polished, especially on a black cardstock background.
Glitter Pumpkin Upgrade
While the glue is still wet between buttons, sprinkle orange glitter over the whole surface. Shake off the excess over a sheet of paper after the glue dries. The shimmer peeks out between buttons for a festive Halloween look without going full-glitter-chaos.
Framed Keepsake Version
Mount the finished button pumpkin on black cardstock. Write your child’s name and the year in white gel pen along the bottom. Pop it into a 5×7 frame. This version makes a thoughtful grandparent gift, and it holds up year after year. If you love button crafts as keepsakes, an easy button heart craft follows the exact same technique and makes a sweet Valentine’s Day companion piece.
Dollar Tree 3D Pumpkin Version (Older Kids and Adults)
For a more involved project, paint a Dollar Tree foam pumpkin with chalk paint (two coats of white is popular for a farmhouse look), then use a regular-temp glue gun to cover the surface with buttons in circular rows from the top down. Leave the bottom flat so it sits upright. This one takes more time but the result is a 3D table display that lasts for years.
Where to Find Buttons for This Craft Without Spending Much
You don’t need a craft store haul to pull this off. Here’s where to look:
- Thrift stores and Goodwill: Check the sewing notions section. Bags of 50 to 100 assorted buttons often run $0.50 to $1.50, and you usually get a great size mix.
- Old clothing: Cut buttons off worn-out cardigans, shirts, or coats before donating. This is one of the best free sources for interesting, varied buttons.
- Dollar Tree: Button packs in the seasonal craft section, especially in September and October, typically include 40 to 60 buttons for around $1.25.
- Walmart or Amazon assortment packs: A 200-piece assorted button set usually runs $4 to $6, which is enough for 4 to 6 pumpkins.
- JoAnn and Michaels clearance bins: Button grab-bags show up in these bins regularly. Stack with a 40 to 50 percent off coupon and you’re paying almost nothing.
Orange buttons are easiest to find in fall. If you spot a good deal in October, grab extra and store them for next year. Buttons keep indefinitely.
Frequently Asked Questions About Button Pumpkin Crafts
What age is a button pumpkin craft good for?
Ages 3 and up can enjoy this craft with minimal adult help. Kids ages 3 to 4 do best with a pre-cut template and close supervision around smaller buttons. Ages 5 and up can usually trace and cut their own shape. For toddlers under 3, a foam pumpkin base and large buttons (bigger than 1.25 inches across, the standard choking-hazard threshold for that age) make the activity accessible while keeping small-part risks low.
Is there a button pumpkin craft template I can use?
You can download free pumpkin silhouette templates from many craft and education sites, or trace a round object like a bowl and add bumps for a quick freehand version. The printed template method gives cleaner edges, which matters most for the framed keepsake version. Either approach works for the basic craft.
Can toddlers do a button pumpkin craft safely?
With supervision, yes. The key safety consideration: any button that fits inside the U.S. Consumer Product Safety Commission’s small-parts test cylinder, about 1.25 inches across, counts as a choking hazard for children under 3, and pediatric safety guidance is to keep parts that size away from toddlers entirely. For toddlers, use oversized craft buttons well over 1.25 inches across, skip the glue gun entirely, and consider a contact paper sticky base so they can press buttons on independently. Always stay within arm’s reach during the project.
What’s the best glue for a button pumpkin craft?
For kids under 8, Aleene’s Tacky Glue is the standard go-to. It holds well, dries clear, and is non-toxic. For ages 8 and up with supervision, a low-temperature glue gun gives faster results and a stronger bond, especially useful for 3D foam pumpkin versions. Avoid standard-temperature glue guns for any child involvement.
How do I display a finished button pumpkin craft?
For the flat cardstock version, a 5×7 or 4×6 picture frame works perfectly and keeps the craft intact from year to year. You can also punch a small hole at the top and hang it with twine as part of a fall garland alongside other seasonal cutouts. The black-cardstock-backed version is especially striking in a simple frame and looks like intentional wall art rather than a kids’ project, which is a win for everyone.


