
Ghost Eraser Stamp Art (Easy Halloween Craft)
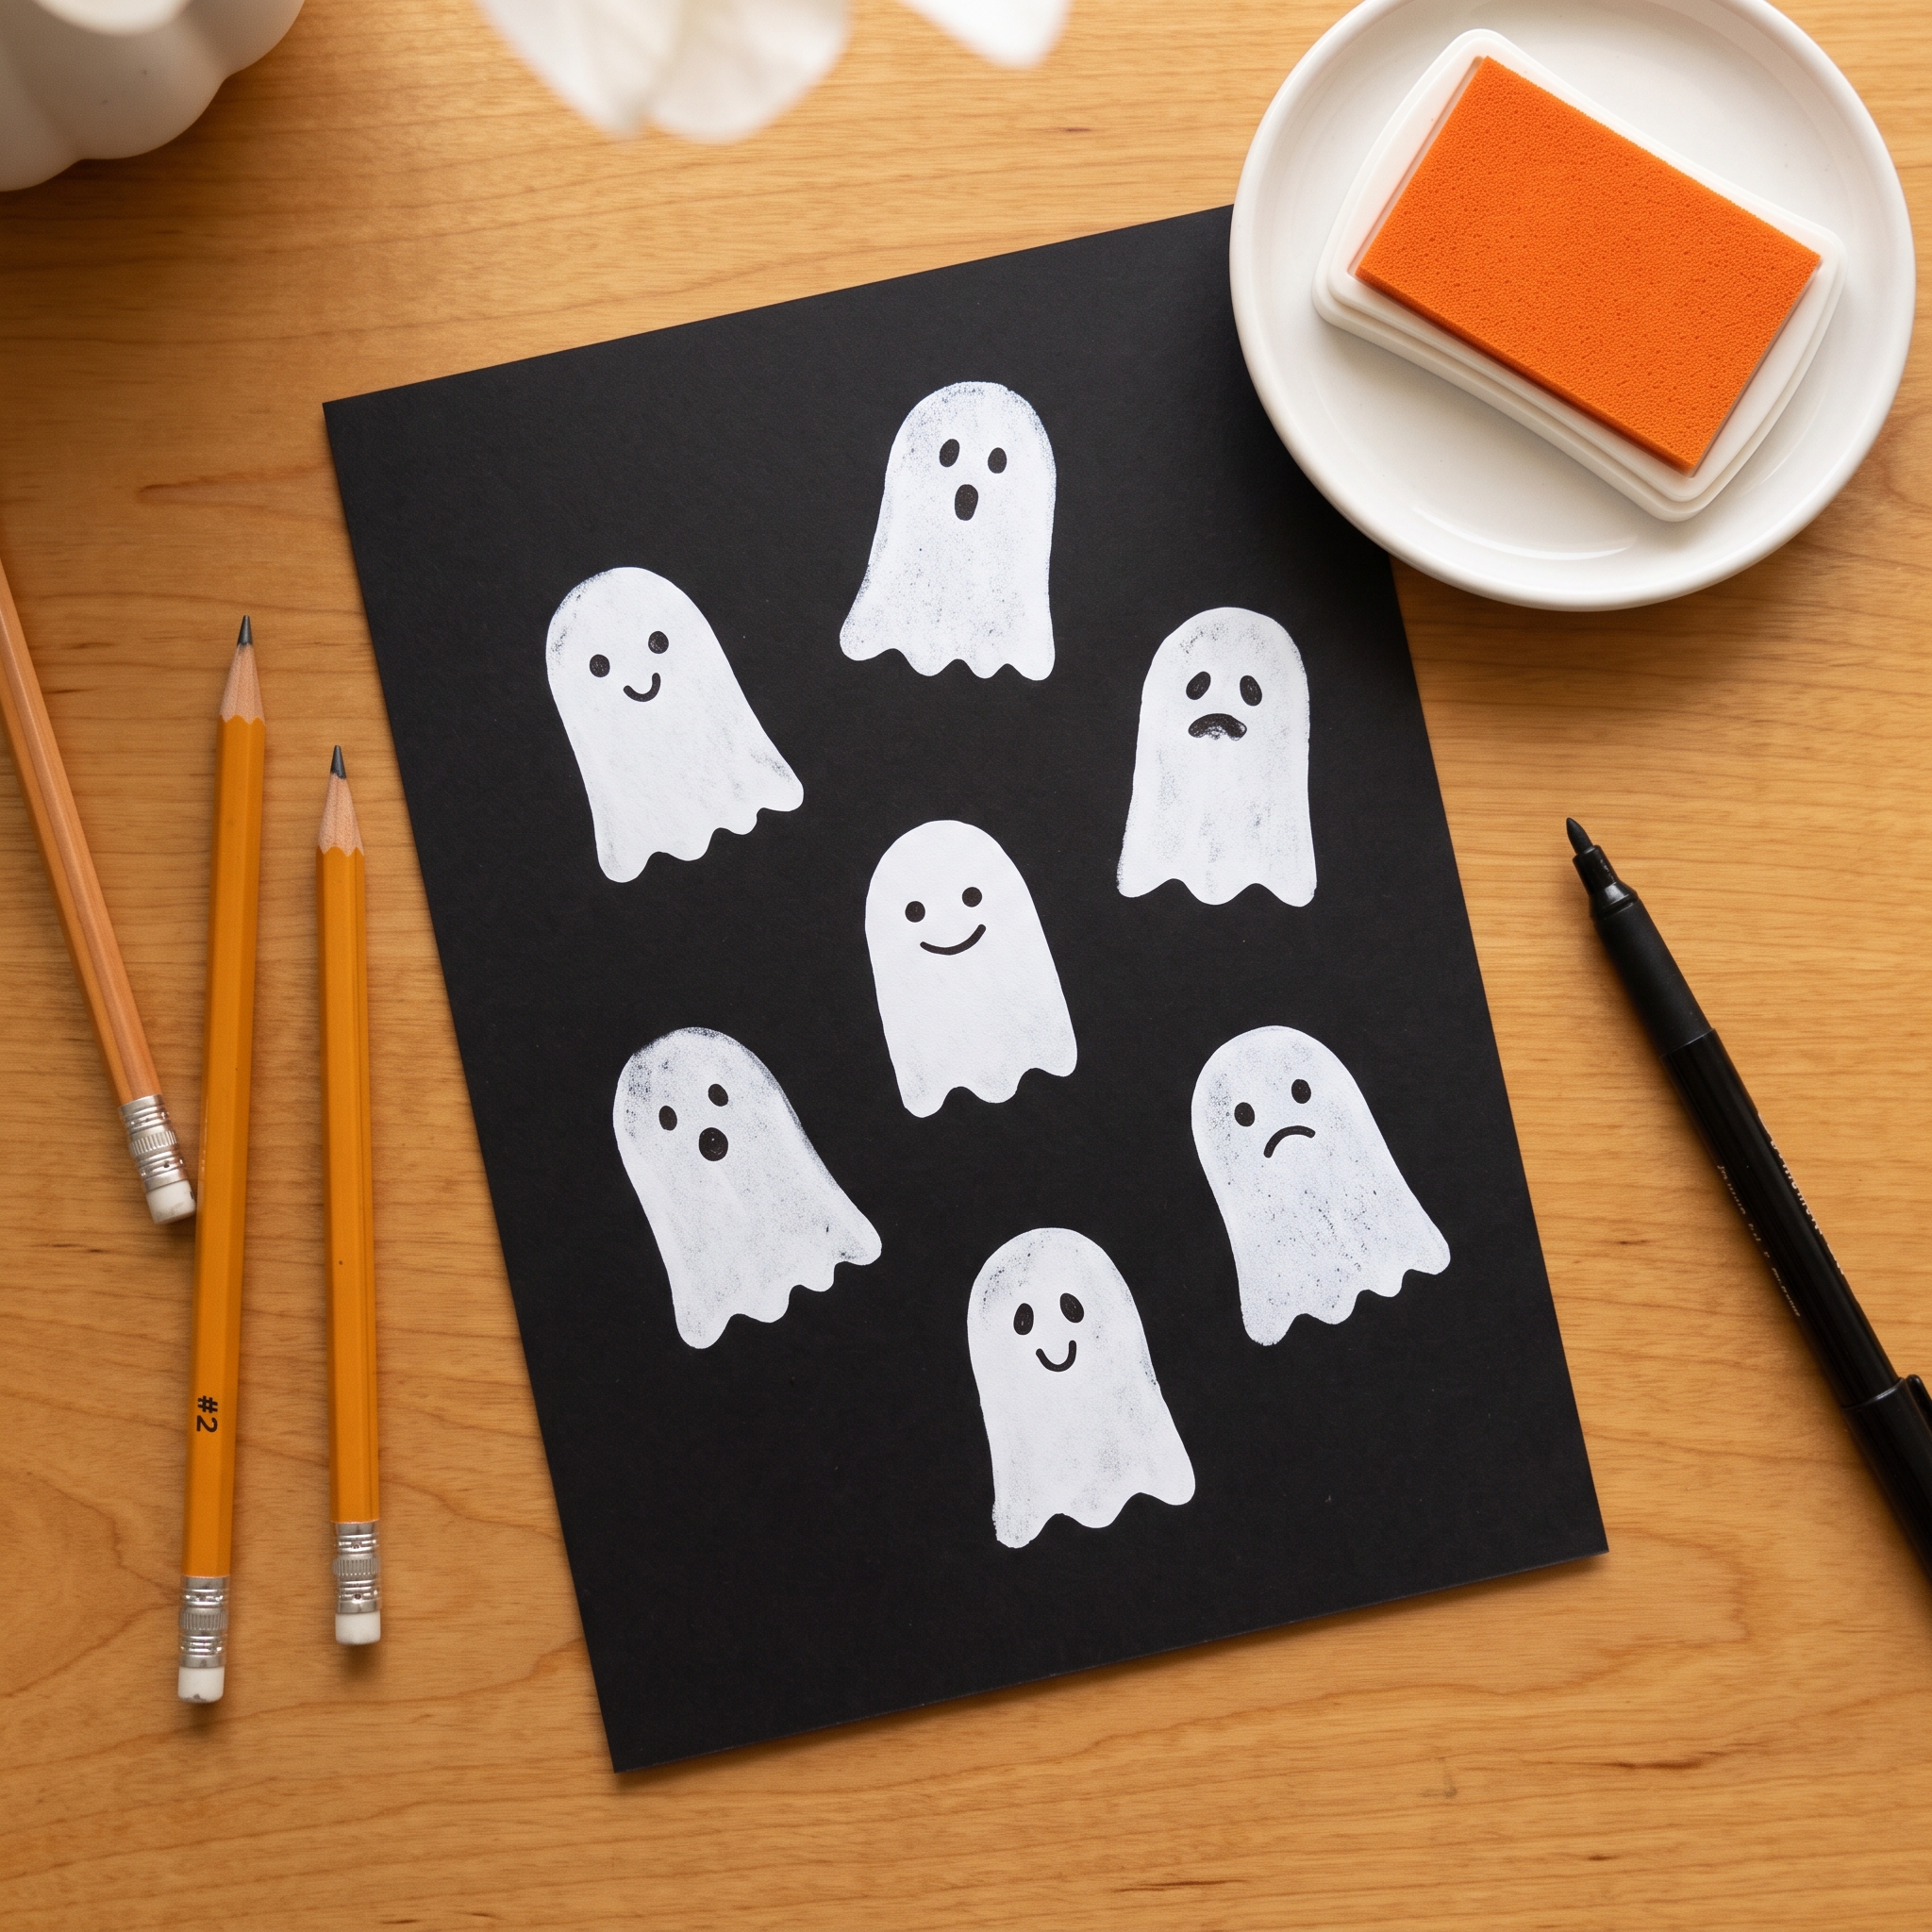
Ghost eraser stamp art is a Halloween craft for kids where the flat end of a pencil eraser or foam eraser is pressed onto an ink pad and stamped onto cardstock to create ghost shapes.
Last updated: July 2026
Quick Answer: Ghost Craft for Kids Using Eraser Stamps
This ghost craft for kids takes about 20 minutes, costs almost nothing, and uses supplies you probably already have. Kids press a pencil eraser (or a rectangular block eraser) onto a Halloween-colored ink pad, then stamp ghost shapes onto black or orange cardstock. Add faces with a marker and you’re done. No templates, no scissors, no glitter explosions.
If your Halloween craft pile looks anything like mine right now, you need something that actually works in the window between snack time and the next meltdown. This one does. It’s low-mess, open-ended enough that every kid’s sheet looks a little different, and the results are cute on a bulletin board or in a frame.
⏱ Time: About 20 minutes
👧 Ages: 3 and up (with adult prep for youngest)
🧹 Mess Level: Low
💰 Cost: Under $2, or free with supplies on hand
What Is Ghost Eraser Stamp Art?
Ghost eraser stamp art is a ghost craft where kids use the rounded oval end of a standard pencil eraser, or a rectangular pink block eraser, as a ready-made stamp for ghost bodies. No carving, no cutting, no templates required. A pencil eraser happens to be almost exactly the right shape for a classic cartoon ghost when pressed flat onto an ink pad and lifted cleanly off cardstock.
That’s what makes this different from tissue ghosts, fabric ghosts, or a cotton ball ghost craft. The stamp itself is already in your pencil cup. The creative work goes into the ghost faces, the colors, and how kids arrange their spooky little scenes on the page.
Materials
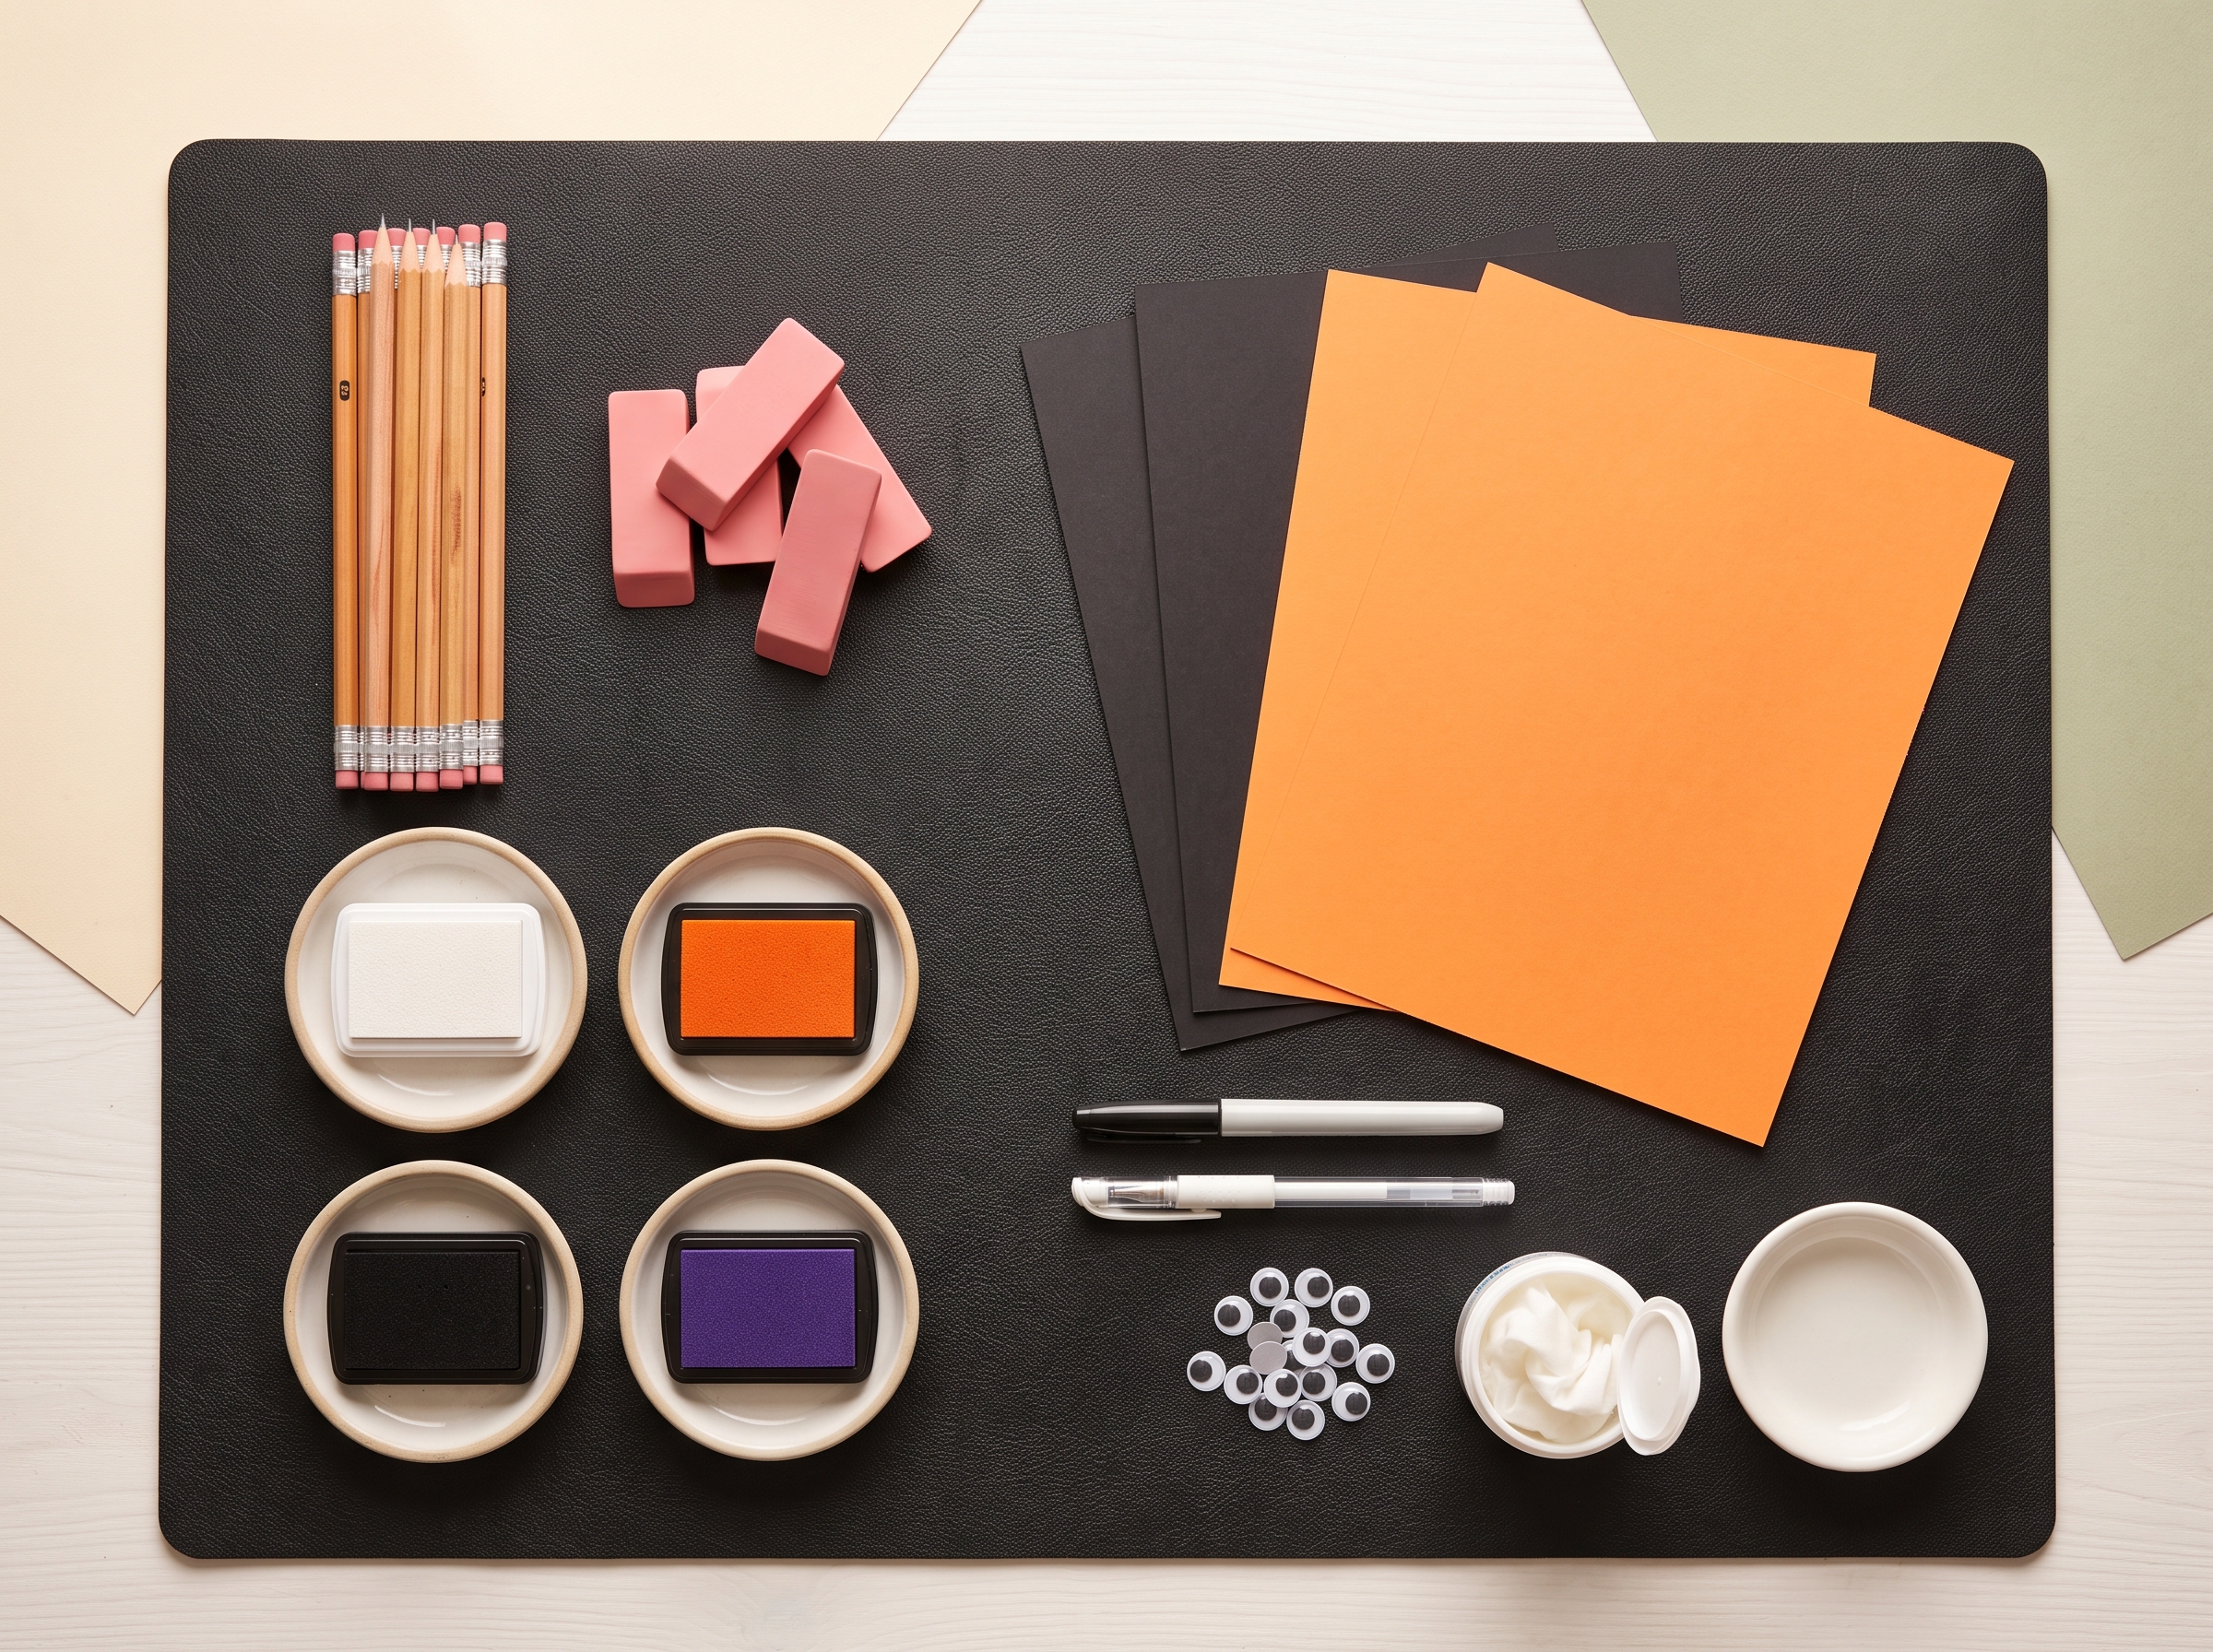
Here’s what you need to pull this together:
- Standard #2 pencils with unused erasers: 4 to 6 per child gives you varied stamp sizes
- Rectangular block erasers: Staedtler or similar pink/white blocks (approximately 1.5 x 2.5 inches) make bigger ghost bodies
- Halloween-colored ink pads: A white pigment ink pad paired with black cardstock, or black/orange/purple ink pads paired with white cardstock
- Cardstock (8.5 x 11): Black, orange, or deep purple for the most striking contrast
- Fine-tip black marker or white gel pen: For drawing ghost faces after stamping
- Paper plate or small craft tray: For staging the ink pad and keeping the table clean
- Baby wipes or damp paper towels: For fast color switches and cleanup
Optional extras that take it up a notch:
- Googly eyes (3mm or 5mm): Press on while ink is still slightly tacky. I skip these for kids under 3, since they’re small enough to be a choking hazard; marker or gel pen faces work just as well until your little one is past the put-things-in-their-mouth stage.
- White or silver glitter glue: For ghost trails or sparkly details
- Foam ghost-shaped erasers: Available at Target dollar bins and Dollar Tree, usually $1 to $2 for a pack of 6
Steps
- Set up your stamping station. Place the ink pad on a paper plate beside your sheet of cardstock. Having everything within arm’s reach prevents the grab-and-smear that happens when kids have to reach across a crowded table.
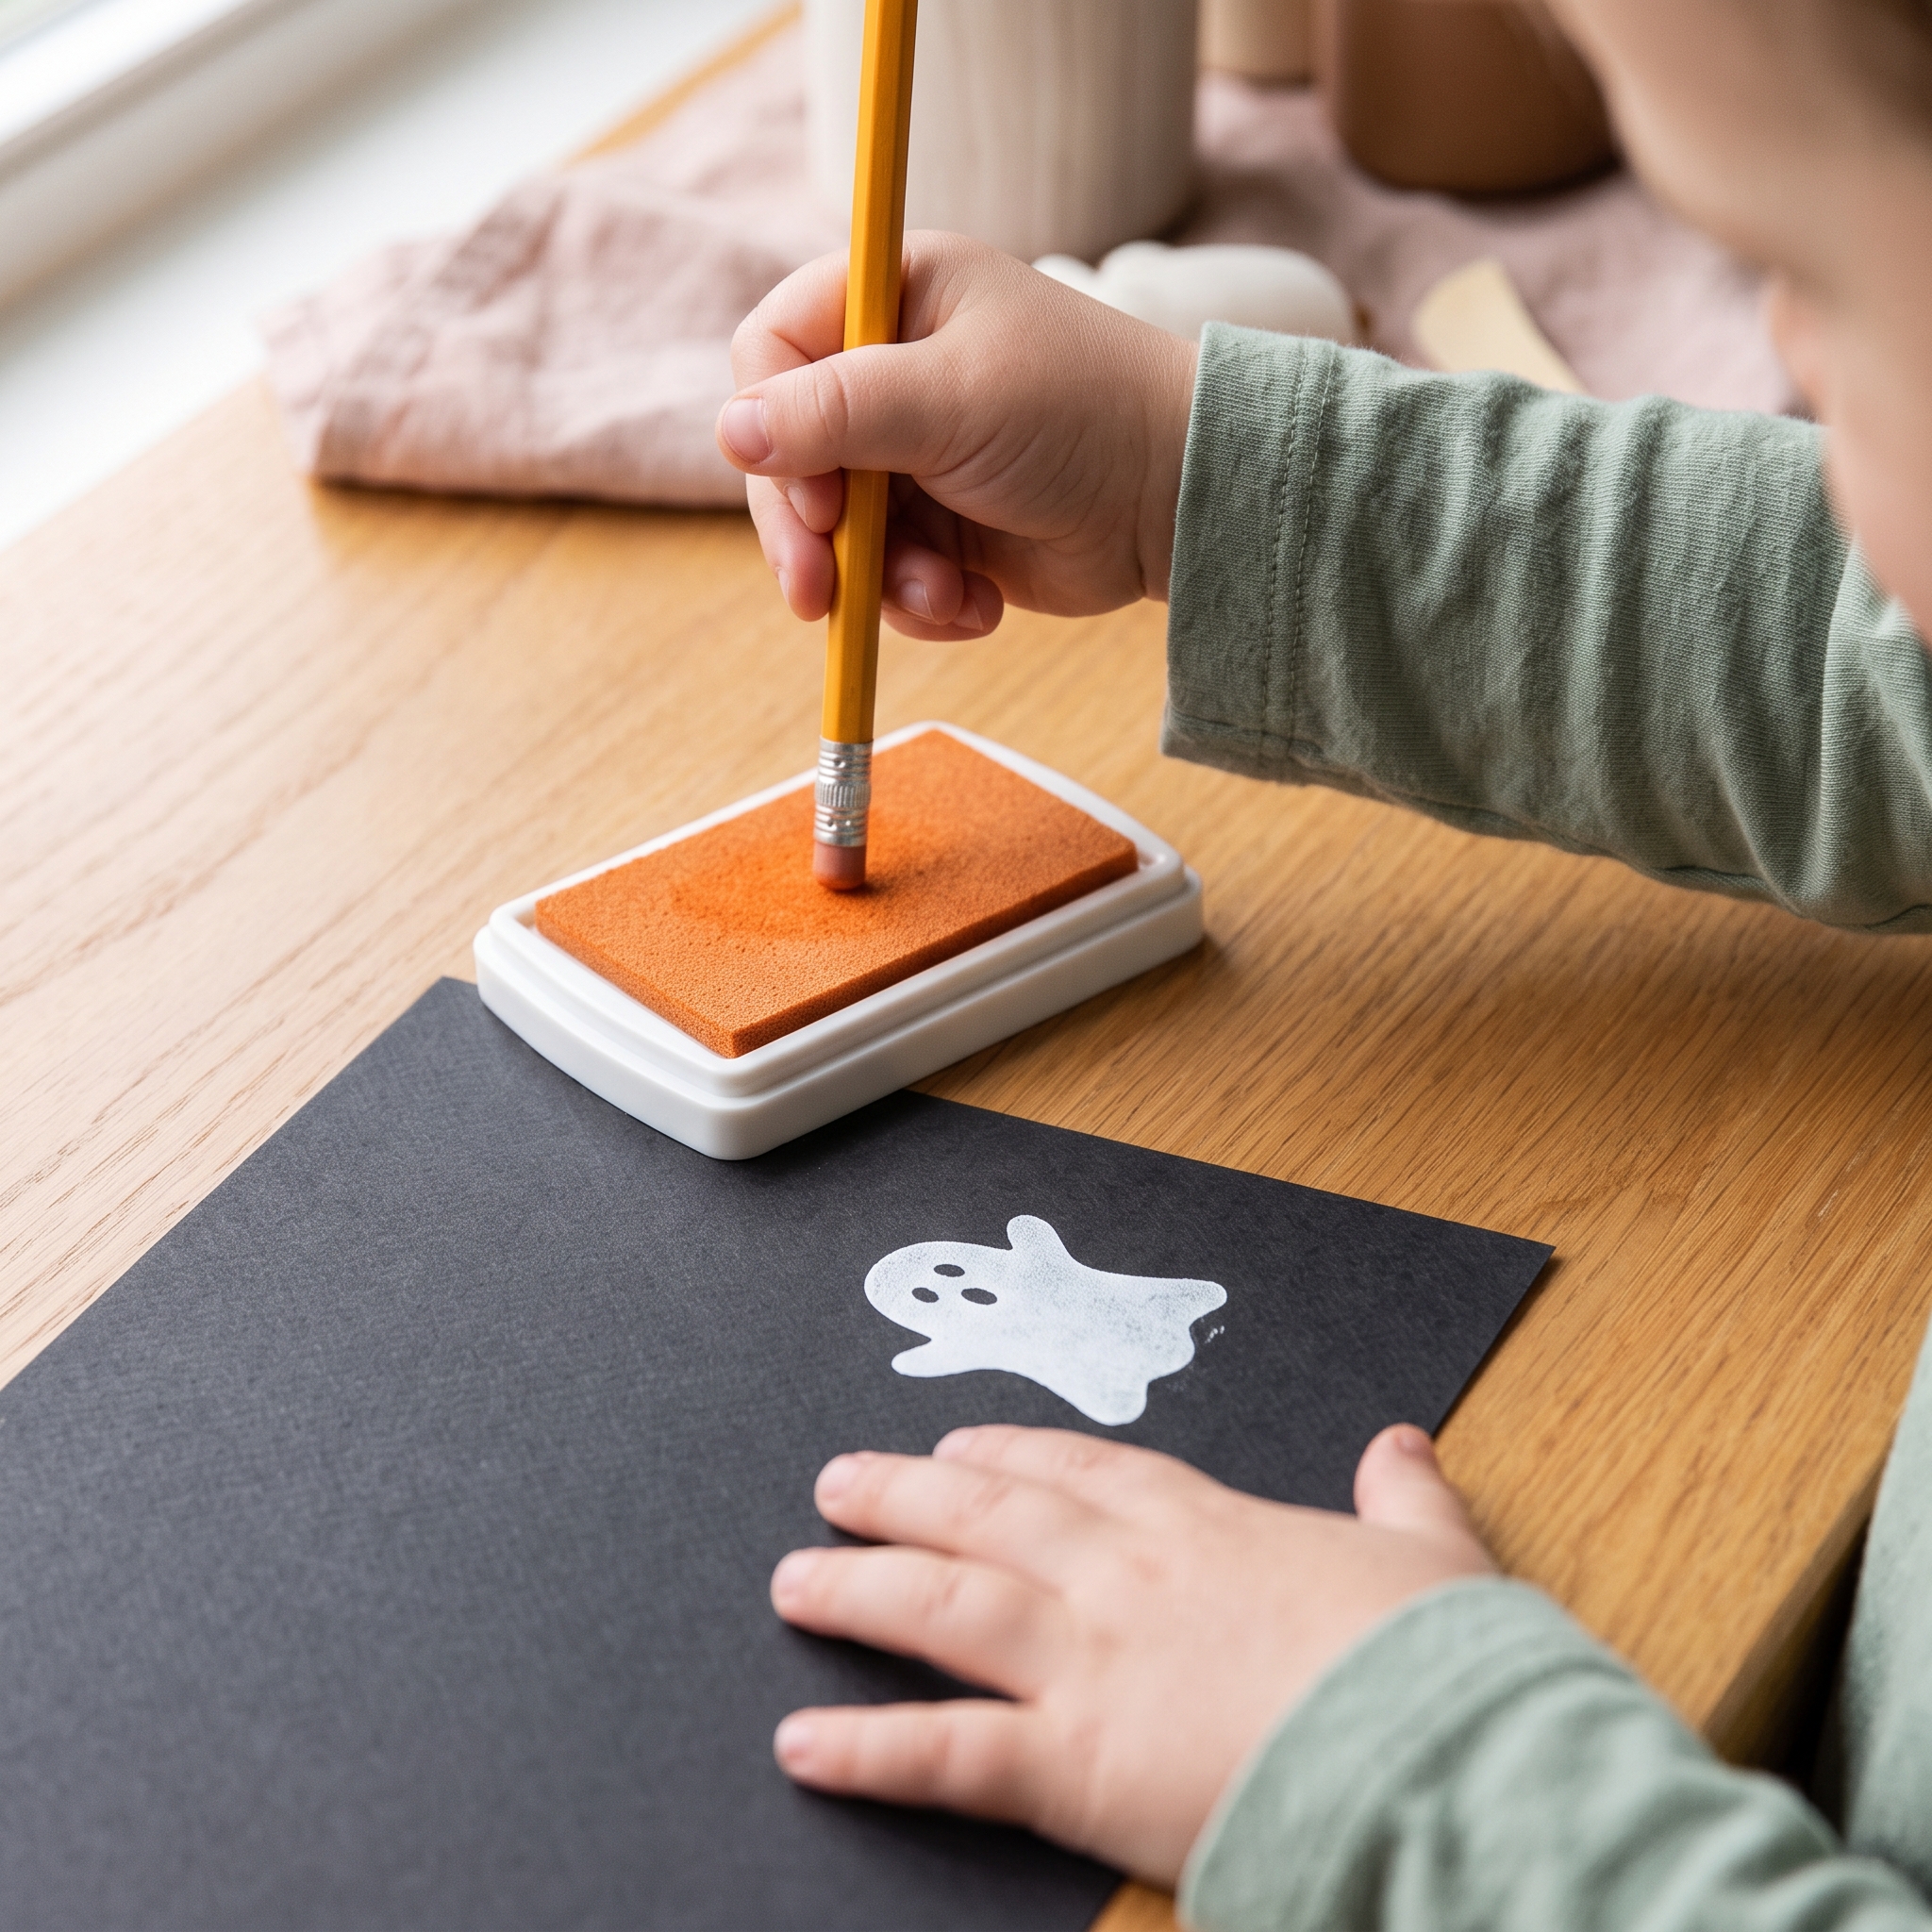
- Press the eraser end flat into the ink pad using 2 to 3 light taps. Tap, don’t drag. Dragging loads too much ink on one side and gives you a blurry ghost instead of a clean shape.
- Press straight down onto cardstock and lift cleanly. No rocking, no wiggling. The press-straight-down-and-lift motion is the key technique here, and it’s worth demonstrating once before kids start.
- Repeat to build your ghost scene. Kids can fit 10 to 15 ghost stamps per page. Overlapping slightly creates a floating-cluster effect that looks intentional and fun.
- Let ink dry for 3 to 5 minutes before touching. Skipping this step is the number one cause of smeared ghosts. Set a timer if you need to, because patience is hard when you’re six.
- Draw ghost faces with a fine-tip marker or white gel pen. Classic friendly ghost: two dot eyes and an open O mouth. Try a surprised face (wide O eyes, small oval mouth), a sleepy face (half-closed lines for eyes), or a silly face with a wavy grin for variety.
- Add optional extras: googly eyes, glitter glue trails, or a chalk-drawn moon in the background. This is where kids go rogue in the best way and the sheets start to look wildly different from each other.
- Sign and date the bottom of the sheet. These hold up beautifully framed, and you’ll thank yourself in five years.
Tips for the Best Ghost Prints
Re-ink often. One firm press into the pad makes one crisp ghost. After two or three stamps, the eraser starts to run dry and the prints get faint. Keep re-inking consistently and your ghost scene will look uniform instead of patchy.
Use cardstock, not printer paper. Standard 65 lb. cardstock holds ink without bleedthrough and gives you a sturdier finished piece worth keeping. Regular printer paper works in a pinch but tends to curl and absorb ink unevenly.
White on black is the showstopper combo. If you want prints that look striking, a pigment-based white ink pad (Versacolor White or Ranger Archival White both work well) on black cardstock produces dramatically better contrast than a dye-based ink pad. The difference is noticeable.
For toddlers under 3: Pre-ink the eraser yourself, then guide their hand through the press-and-lift motion. The lift is the hardest part for little hands that want to drag or twist. Hand-over-hand once or twice and they get it.
Switching ink colors: A baby wipe plus a 10-second air dry on a paper towel is all you need between colors. It keeps the colors clean and lets kids make multi-colored ghost scenes without muddying everything together.
If your kids love low-mess art projects in general, no-mess painting ideas are worth bookmarking alongside this one for rainy-day rotations.
Variations
Cotton Ball Ghost Craft Version
Use the eraser to stamp a ghost outline first, then squeeze white school glue inside the stamped shape and press cotton balls into it for a 3-D fluffy texture. This cotton ball ghost craft variation is especially good for ages 3 to 5 and adds a tactile pincer-grasp component that keeps little hands busy a little longer.
Ghost Gift Tags and Halloween Cards
Stamp ghosts onto kraft cardstock cut to 3 x 4 inches, punch a hole in the corner, and thread a piece of twine through. Instant Halloween gift tags for treat bags or school gifts that look handmade in the best way. A few stamps on a folded card blank also makes a sweet Halloween party invitation.
Ghost-Print Treat Bags
Grab plain white paper lunch bags and stamp them all over with orange or purple ink ghosts. Let them dry, fill with candy, and fold the top over. A class set of 25 bags runs under $3, and kids can stamp their own to take home.
Glow-in-the-Dark Ghost Stamps
Swap the ink pad for glow-in-the-dark fabric paint and stamp onto a dark t-shirt or canvas tote bag. Charge the design under a lamp for a minute, then turn off the lights. Best for ages 6 and up with adult supervision for the fabric paint step.
Foam Ghost Eraser Stamps
If you want even bigger, faster ghost shapes, foam ghost-shaped erasers from the Target dollar section or Dollar Tree (usually $1 to $2 for a pack of 6 to 10) make a great classroom Halloween station. They’re pre-shaped, the kids just ink and press, and the whole class can rotate through in minutes.
What Kids Are Really Learning (And Why That’s a Bonus)
I’ll be upfront: I don’t pitch this to my kids as a learning activity. But the fact that it quietly is one? That’s a mom win.
Fine motor development: The press-and-lift stamping motion builds hand strength and the kind of bilateral coordination that child development guidelines from the CDC identify as important in early childhood. Occupational therapists often recommend stamping activities for children ages 2 to 5 who are working on pre-writing grip control. If your toddler struggles with the lift motion, that’s useful information, not just a messy moment.
Color theory intro: Choosing whether to use white ink on black or orange ink on white is a low-stakes, natural intro to contrast. Kids start making deliberate choices about what looks better, and that’s early visual thinking.
Counting and pattern-making: Kids naturally count their ghost stamps as they go, and many start arranging them in rows or clusters without being asked. That’s early math thinking happening at the craft table.
According to Zero to Three’s child development guide, children between 25 and 36 months use everyday objects in imaginative play and storytelling. A page full of stamped ghosts becomes a whole ghost neighborhood story for a lot of kids. That imaginative layering is worth encouraging.
For more activities that build these same skills with everyday materials, toddler sensory activities are a great companion to keep in rotation, and our fine motor spider activity for preschoolers is another good one for the rotation.
Ways to Use Your Finished Ghost Art
The craft is fun. The finished sheet is also useful. Here’s what to do with it beyond setting it on the counter and forgetting:
- Frame it for Halloween wall art: Three black cardstock ghost prints in matching frames make a cohesive Halloween gallery wall that looks intentional, not cluttered.
- Use as Halloween wrapping paper: Stamp across a full sheet of white butcher paper for a personal, handmade wrap for Halloween birthday gifts.
- Lunchbox love note: Cut one small ghost from the sheet, draw a face, and tuck it into the lunch box with a little note on the back.
- Digital card for grandparents: Photograph the finished sheet and send it as a digital Halloween card. Grandparents love it more than any store-bought card.
- Halloween party invitation: Stamp onto a folded card blank, write the party details inside, and mail them. Handmade invitations are a detail people remember.
Frequently Asked Questions
How do you make a Halloween ghost craft with eraser stamps?
Press the flat end of a pencil eraser or a rectangular block eraser onto a Halloween-colored ink pad, then press it straight down onto black or orange cardstock and lift cleanly. Repeat to build a ghost scene, let the ink dry for 3 to 5 minutes, then draw simple ghost faces with a fine-tip marker or white gel pen. No templates or cutting required.
What age is ghost eraser stamp art good for?
Kids ages 3 and up can do this mostly independently. Ages 2 to 3 do well with adult hand-over-hand help on the press-and-lift motion, which requires more controlled coordination than the stamping itself. The bigger the eraser (a block eraser rather than a pencil tip), the easier it is for younger children to grip and control.
Can you make a ghost craft without a printable template?
Yes, and this eraser stamp method is specifically designed to skip templates entirely. The eraser is already shaped like a ghost body, so there’s nothing to print, cut, or trace. If you prefer a guided shape for a cotton ball ghost craft variation with younger toddlers, a simple ghost silhouette printed on cardstock gives little hands a clear area to fill with cotton balls.
What’s an easy ghost craft for toddlers specifically?
The two most toddler-accessible approaches from this article are the eraser stamp method with a large foam or block eraser (easier to grip than a pencil tip) and the cotton ball ghost craft variation where kids press cotton balls onto a glue-covered ghost shape. For children under 3, pre-inking the eraser and guiding the press motion with hand-over-hand support makes both approaches manageable and fun.
How do you make a ghost with a styrofoam ball?
This method is different from eraser stamp art but worth a quick answer since it comes up often. Drape a 9-inch square of white muslin or inexpensive white fabric over a 1.5-inch styrofoam ball, tie it off below the ball with ribbon, add drawn-on eyes with a fabric marker, and hang with clear string. According to craft guides from Buggy and Buddy, this fabric ghost method works for a range of ages: you can hold the ball steady while your child ties the ribbon, or let them hold it for you, so it’s easy to adapt for younger kids too. It’s a lovely decoration to reuse year after year, but it does require fabric, scissors, and a bit more adult involvement than the stamp method here.


